



 +31 20 820 3777
 Compliance
  Support
  Documentation
 Login
Login 




Introduction
Anyone who has ever had to work with SPSS (unfortunately, I have) knows the sense of dread that sets in during the initial launch. Since the software takes forever to start, that feeling tends to linger. The interface is another matter entirely — it is notoriously unintuitive. I was finally rescued from this software prison by the discovery of pandas; with it, I could perform similar analyses much faster, with convenient script saving, and with the ability to reproduce results instantly.
A single researcher can get by with a standard PC for statistical analysis. However, when conducting large-scale research or organizing collaborative efforts within a group, you need more powerful hardware and software — such as JupyterLab running on a GPU server. That is what we will cover today.
Data science is built on experimentation, not just writing code in the traditional sense. It requires looking at an intermediate result, changing a single line, and running it again. A standard program that runs from start to finish is poorly suited for this; every time you run it, you start with empty memory, and loading datasets or model weights can take anywhere from minutes to tens of minutes. The JupyterLab kernel keeps data loaded between cell executions, reducing the iteration cycle to seconds. This is a major reason why notebooks have displaced other solutions during the research phase.
Why JupyterLab on a GPU Server?
Beyond the reasons mentioned above, a dedicated server is essential when data cannot leave the corporate perimeter for security reasons. It is also indispensable for research environments where all participants require an identical setup. A GPU server is the ideal choice for projects involving long-running, continuous data processing, as a server provides much higher stability and uptime compared to a standard PC. In short, this setup is optimized for teams and provides a unified research environment.
The GPU is not there for aesthetics. The core operation within a neural network is matrix multiplication — thousands of identical, independent multiply-accumulate operations. A CPU is designed differently; it features a dozen or so complex cores optimized for branching, sequential logic. In contrast, a GPU consists of thousands of simple processors performing the same operation on different data points. The performance difference for these tasks is measured in orders of magnitude. Add to that memory bandwidth: a GPU offers hundreds of gigabytes per second, compared to the roughly 100 GB/s of server RAM. In deep learning, data throughput often becomes a bigger bottleneck than the actual computation.
There are downsides, the most significant being cost. A server with a high-end GPU is an investment that should be made intentionally based on your workload. If your needs are intermittent, hourly rental is a viable option. In this article, we will walk through the process of building a fully functional multi-user environment from a bare-metal system.
Server Requirements
The key metrics for choosing a JupyterLab server are the number of concurrent users, model size, and dataset volume. We will use our own pricing as an example, though other providers will be similar.
GPU and VRAM Capacity
When choosing a card, prioritize Video RAM (VRAM) over raw compute performance. A model and its training data must either fit entirely within the VRAM or they won't. While there are many ways to compress a model (quantization, LoRA, etc.), we won't cover those here as they are beyond the scope of this guide. Simply put: VRAM capacity determines how complex your techniques must be and how long training will take.
- 24 GB: Sufficient for fine-tuning small models, computer vision tasks, and standard data analysis. Prices vary significantly: an RTX 3090 might cost ~$350/month, while an RTX 4090 with similar VRAM starts at ~$370/month.
- 32 GB - 48 GB: An RTX 5090 (32 GB) is roughly $650/month, while an A6000 (48 GB) is about $800/month.
Professional cards are notably more expensive than consumer cards. They offer similar VRAM capacities at the entry-level (e.g., A5000 vs. RTX 3090), but the choice often comes down to Error Correction Code (ECC) memory, which consumer cards lack. For higher capacities, the gap widens: an A6000 (48 GB) is ~$800/month, an RTX PRO 5000 (72 GB) is ~$1,400/month, and an RTX PRO 6000 (96 GB) is ~$2,600/month. Data center cards like the A100 or H100 command a premium not just for capacity, but for HBM (High Bandwidth Memory), which reaches terabytes per second. Keep in mind that professional cards support Multi-Instance GPU (MIG) technology, allowing you to partition one card into several isolated instances — a feature consumer cards do not support.
Our testbed uses a consumer GPU, so we won't be using driver-level partitioning. All commands, package versions, and benchmarks in this guide are based on the following configuration:
|
Hardware Type |
Model |
Rationale |
|---|---|---|
|
GPU |
1x RTX 3090 (24 GB) |
Most affordable option with 24GB VRAM; Ampere architecture is compatible with current CUDA. |
|
CPU |
Ryzen 5900X (12C/24T) |
4–8 cores per GPU; fewer cores would bottleneck data feeding. |
|
RAM |
64 GB |
Double the VRAM plus overhead for 2–3 concurrent JupyterLab kernels. |
|
Storage |
1 TB NVMe |
Datasets, model caches, user environments, and intermediate results. |
|
OS |
Ubuntu 26.04 LTS (Kernel 7.0.0-29) |
Latest Long Term Support version. |
|
Billing |
Hourly |
Our testbed was set up for one-off configuration; long-term rental is better for production. |
Server Preparation
Once the server is provisioned, the first priority is security before exposing any web interfaces. We will update the system, set the timezone, create user accounts, and configure the firewall:
apt update && apt full-upgrade -y # Update packages to latest versionstimedatectl set-timezone Europe/Moscow # Set system timezoneapt install -y git curl htop tmux rsync ufw bc # Install basic utilitiesServer images often arrive "minimized," meaning some tools like rsync or ufw might not be pre-installed. Also, ensure the timezone is set correctly; otherwise, the JupyterLab file browser will display incorrect timestamps.
Next, we add standard system users. Since the web interface uses the same authentication mechanism as SSH, we'll set them up now:
useradd -m -s /bin/bash analyst1 # -m creates home directory, -s sets the shell
useradd -m -s /bin/bash analyst2
echo 'analyst1:Password1' | chpasswd # Set password
echo 'analyst2:Password2' | chpasswd
passwd -S analyst1 && passwd -S analyst2 # Verify password status
Without the -m flag, no home directory is created. Without -s, the shell may default to a restricted version that breaks the JupyterLab terminal. In the passwd -S output, the second field must be P (Password set). An L means the account is locked.
For a testing environment, chpasswd is convenient, but on a production machine, use the interactive passwd command to prevent passwords from appearing in your shell history.
Configure the firewall before launching the hub:
ufw default deny incoming # Block all incoming by default
ufw default allow outgoing # Allow all outgoing
ufw allow 22/tcp # Allow SSH
ufw allow 80/tcp # Web interface via proxy
ufw allow 443/tcp # HTTPS
ufw --force enable # Enable firewall without dropping the connection
The JupyterHub service will run on port 8000, which we will keep closed to the outside world. The machine will only expose standard web ports; a local reverse proxy will handle requests to the hub.
Installing NVIDIA Drivers and CUDA
While you can use our automated script, we will demonstrate how to perform a manual installation and verification:
First, check the hardware and system state:
lspci | grep -i nvidia # Check if the system detects the GPU on the bus
mokutil --sb-state # Check Secure Boot status
uname -r # Check current kernel version (the driver will be built for this)
If Secure Boot is enabled, the kernel module won't load unless it is signed. Also, the driver is built specifically for your current kernel; if you update the kernel without rebuilding the module, the GPU will disappear on the next reboot.
To ensure automatic updates, install the driver from the NVIDIA repository rather than using a standalone .run file:
wget https://developer.download.nvidia.com/compute/cuda/repos/ubuntu2604/x86_64/cuda-keyring_1.1-1_all.deb
dpkg -i cuda-keyring_1.1-1_all.deb # Add the key and repository
apt update
apt search nvidia-open | head # Check available versions
We are looking for the nvidia-open package. For Ampere-generation cards, the open-source kernel modules are the standard. Install and reboot:
apt install -y nvidia-open
reboot
After rebooting, verify the installation:
nvidia-smiResult:
+---------------------------------------------------------------+
| NVIDIA-SMI 610.57.04   KMD Version: 610.57.04
|                        CUDA UMD Version: 13.3                 |
+---------------------------------------------------------------+
|   0  NVIDIA GeForce RTX 3090   On  |  00000000:2B:00.0 Off |
|  0%  32C  P8  11W / 350W | 1MiB / 24576MiB | 0%  Default |
|                                    |              N/A  MIG M. |
+---------------------------------------------------------------+
| No running processes found                                    |
+---------------------------------------------------------------+
The output should show the driver version, CUDA version, and your GPU (RTX 3090). Finally, enable the persistence daemon to prevent the driver from unloading during idle periods, which reduces initialization latency:
systemctl enable --now nvidia-persistencedDo You Need the CUDA Toolkit?
It's a common question. Let's check if we need the full toolkit:
nvcc --versionIf it returns command not found, you don't have the compiler installed. For most users, this is fine. Pre-built PyTorch wheels include their own CUDA libraries (the nvidia-* packages). You only need the full CUDA Toolkit if you plan to compile custom C++/CUDA extensions or install packages directly from source. cuDNN is also typically handled automatically via PyTorch's nvidia-cudnn-cu13 package.
Installing Python and Virtual Environments
Ubuntu 26.04 comes with Python 3.14 pre-installed.
python3 -V # Check the system's interpreter version
Python 3.14.4
Running apt policy python3 will show version 3.14.3. This discrepancy is normal because python3 is a metapackage with its own versioning, whereas the actual interpreter is provided by the python3.14 package and is updated independently.
Attempting to install packages directly via pip results in an error:
error: externally-managed-environment
× This environment is externally managed
╰─> To install Python packages system-wide, try apt install
    python3-xyz, where xyz is the package you are trying
    to install.
    If you wish to install a non-Debian-packaged Python package,
    create a virtual environment using python3 -m venv path/to/venv.
This behavior is defined in PEP 668. The system interpreter belongs to the package manager; much of the OS itself relies on it, and installing third-party packages directly into the system Python can break core system utilities. The error message mentions the --break-system-packages flag, which bypasses this protection. To proceed, we first need to install the packages required to create virtual environments:
sudo apt install -y python3-venv python3-pip python3-dev # venv support, pip, and build essentialsOur architecture will utilize two environments. The Hub will be located at /opt/jupyterhub, and each of the two users (referred to as "analysts" hereafter — this is how they are named in the system, which simplifies things) will have their own environment in their home directory. This approach prevents dependency conflicts; for example, preventing a library update for one user from breaking the environment for another. To create an environment for an analyst:
sudo -u analyst1 bash -c 'python3 -m venv ~/venvs/ml'This command should be executed as the specific user to ensure they own the resulting files.
While the standard venv module is sufficient for our current task, if you plan to use non-Python dependencies (e.g., C++ libraries or CUDA), you will likely need Conda.
Installing JupyterLab
A few years ago, this step would have required generating a configuration file using jupyter lab --generate-config and setting a password via jupyter server password. However, when working through the Hub, these steps are unnecessary. JupyterLab is already installed twice: once in the Hub environment and once in each user's individual environment.
Installing Machine Learning Libraries
Install the libraries into the user's environment:
sudo -u analyst1 bash -c '~/venvs/ml/bin/pip install --upgrade pip'
sudo -u analyst1 bash -c '~/venvs/ml/bin/pip install torch'
This results in approximately 2 GB of dependencies:
nvidia-cublas-13.1.1.3      nvidia-cudnn-cu13-9.20.0.48
nvidia-cufft-12.0.0.61      nvidia-curand-10.4.0.35
nvidia-cusolver-12.0.4.66   nvidia-cusparse-12.6.3.3
nvidia-nccl-cu13-2.29.7     nvidia-nvjitlink-13.3.33
triton-3.7.1                torch-2.13.0
This is exactly how we get CUDA — the very thing we previously decided to avoid installing manually.
Verifying GPU Access in PyTorch
To verify the configuration, run the following command:
sudo -u analyst1 ~analyst1/venvs/ml/bin/python -c \
    "import torch; print(torch.__version__, torch.cuda.is_available(), \
    torch.cuda.get_device_name(0))"
The output is as follows:
UserWarning: Failed to initialize NumPy: No module named 'numpy' 2.13.0+cu130 True NVIDIA GeForce RTX 3090The cu130 tag indicates that this build is compiled for CUDA 13. The True value confirms that the GPU is accessible. Note that the nvcc compiler is not installed on the system. The NumPy warning occurs because the latest PyTorch version does not include it as a mandatory dependency. To resolve this, install NumPy and register the kernel so it appears in the Jupyter notebook kernel selection list:
sudo -u analyst1 bash -c '~/venvs/ml/bin/pip install numpy pandas matplotlib scikit-learn ipykernel jupyterlab-git nbdime'
sudo -u analyst1 bash -c '~/venvs/ml/bin/python -m ipykernel install --user --name ml --display-name "Python (ml)"'
After running the second command, you should see:
Installed kernelspec ml in /home/analyst1/.local/share/jupyter/kernels/mlThe environment is now configured with:
- numpy 2.5.2
- pandas 3.0.5
- scikit-learn 1.9.0
- ipykernel 7.3.0
- jupyterlab-git 0.54.1
- nbdime 4.0.4
Note that pandas 3.x introduces several changes, such as "copy-on-write" being the default behavior and the removal of certain SettingWithCopy warnings. Code written for pandas 2.x may require adjustments to maintain compatibility.
TensorFlow
We attempted to install TensorFlow on Ubuntu 26.04 using four different methods, and none of them worked. Attempting to install within a virtual environment failed immediately. The system comes pre-installed with Python 3.14, and there are currently no official TensorFlow builds available for this interpreter:
ERROR: Could not find a version that satisfies the requirement
tensorflow[and-cuda] (from versions: none)
ERROR: No matching distribution found for tensorflow[and-cuda]
Next, we tried using the deadsnakes PPA. While this is an option, it is not the most secure approach; the maintainers warn that timely security updates are not guaranteed. Using such a repository on a production server should be done at your own risk.
add-apt-repository -y ppa:deadsnakes/ppa
apt install -y python3.13 python3.13-venv
sudo -u analyst1 bash -c 'python3.13 -m venv ~/venvs/tf13'
sudo -u analyst1 bash -c '~/venvs/tf13/bin/pip install "tensorflow[and-cuda]"'
The installation completed, and TensorFlow 2.21.0 was deployed, but the GPU failed to register:
Cannot dlopen some GPU libraries.
Skipping registering GPU devices...
2.21.0 []
Workarounds involving virtual environments with older Python versions also failed to yield results. The official Ubuntu 26.04 repositories do not support these older Python versions:
apt install -y python3.13
Error: Unable to locate package python3.13
The official Docker images yield the same results for both tags: latest-gpu and 2.21.0-gpu, even when the GPU is correctly passed into the container using standard NVIDIA runtime tools.
If your workflow strictly requires TensorFlow, it is worth considering using a legacy OS with a version 12.x driver. While PyTorch has been adapted for modern hardware and the latest OS releases, TensorFlow has not yet caught up.
JupyterHub Installation
JupyterHub requires a proxy because routes to user servers change dynamically every time a user logs in or stops a session:
apt install -y nodejs npm nginx # nodejs and npm are required for the proxy; nginx serves as the external-facing web server
npm install -g configurable-http-proxy # the proxy handles routing to user sessions
Installing npm via the default Ubuntu repositories pulls in 538 packages and consumes 494 MB of disk space. This includes Vulkan drivers, fonts, X11 libraries, and a terminal emulator — all unnecessary for a headless server. Essentially, the package brings along the entire JavaScript development toolchain. You can mitigate this by using the --no-install-recommends flag or by installing Node from the NodeSource repository instead.
python3 -m venv /opt/jupyterhub # create a virtual environment for JupyterHub
/opt/jupyterhub/bin/pip install --upgrade pip # upgrade the package installer
/opt/jupyterhub/bin/pip install jupyterhub jupyterlab # install JupyterHub and the JupyterLab environment
/opt/jupyterhub/bin/pip install jupyterhub-systemdspawner # enable session management via systemd
/opt/jupyterhub/bin/pip install jupyterhub-idle-culler # automatically stop idle sessions
The resulting software stack is as follows:
- JupyterHub 5.5.1
- JupyterLab 4.6.3
- jupyter-server 2.20.0
- ipykernel 7.3.0
- systemdspawner 1.0.2
- idle-culler 2.0.0
- pamela 1.2.0
The environment occupies 347 MB, and no packages were built from source.
Multi-user Access
Let's set up a minimum configuration:
c.JupyterHub.bind_url = 'http://127.0.0.1:8000' # Listen on localhost only
c.Spawner.default_url = '/lab' # Open JupyterLab instead of the classic interface
c.Spawner.cmd = ['/opt/jupyterhub/bin/jupyterhub-singleuser'] # Command to launch the server
Immediately, we encounter an error: the server starts, the interface loads, and authentication works, but users cannot log into the web interface and receive the following message:
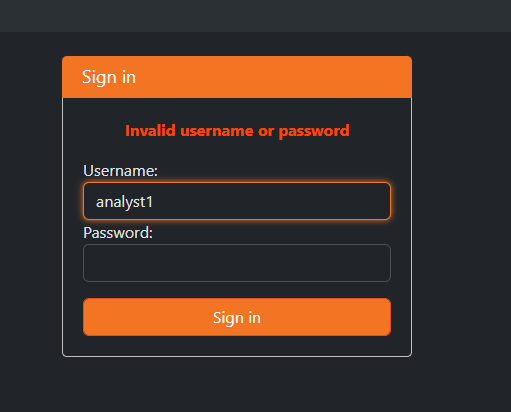
The message in the screenshot is misleading. Even though the credentials are correct, the error can be traced in the logs:
[W JupyterHub auth:758] User 'analyst1' not allowed.
[W JupyterHub base:998] Failed login for 'analyst1'
[W JupyterHub log:192] 403 POST /hub/login
This error is caused by the change in default behavior introduced in JupyterHub version 5. In this version, an empty allowed_users list means all users are denied access. Previously, the Hub allowed any user who successfully passed password verification.
To fix this, configure the allowed users:
c.Authenticator.allowed_users = {'analyst1', 'analyst2'} # Authorized users
c.Authenticator.admin_users = {'analyst1'} # User with administrative privileges
An alternative is to use the allow_all parameter. This allows any user who has authenticated via SSH to access the Hub. While this might work for small, trusted teams, it is extremely dangerous for any server with a public IP address.
Upon successful authorization, the logs will show the full event chain:
[I JupyterHub base:988] User logged in: analyst1
[I JupyterHub spawner:2068] Spawning /opt/jupyterhub/bin/jupyterhub-singleuser
[I JupyterHub base:1143] User analyst1 took 4.715 seconds to start
[I JupyterHub proxy:331] Adding user analyst1 to proxy /user/analyst1/ => http://127.0.0.1:40833
The process runs under the user's identity, which can be verified using the ps command:
analyst1 /opt/jupyterhub/bin/python3
        /opt/jupyterhub/bin/jupyterhub-singleuser
On our clean test environment, the startup process took 4.7 seconds; however, on a production server under load, this time may increase significantly.
systemd Service
Once the hub is running, it is beneficial to use a unit file capable of surviving both network interruptions and system reboots:
[Unit]
Description=JupyterHub
After=network-online.target # Start only after the network is up
Wants=network-online.target

[Service]
User=root # Root privileges required for password management and limits
WorkingDirectory=/etc/jupyterhub # Directory where the cookie secret and SQLite database will be stored
Environment="PATH=/opt/jupyterhub/bin:/usr/local/sbin:/usr/local/bin:/usr/sbin:/usr/bin:/sbin:/bin"
ExecStart=/opt/jupyterhub/bin/jupyterhub -f /etc/jupyterhub/jupyterhub_config.py
Restart=always # Restart automatically if the process crashes
RestartSec=5 # Delay to prevent log flooding during rapid restart loops

[Install]
WantedBy=multi-user.target
The WorkingDirectory is explicitly set because the hub generates a cookie secret file and an SQLite database in that location. You will see a warning upon the first launch:
[I JupyterHub app:1885] Writing cookie_secret to /etc/jupyterhub/jupyterhub_cookie_secretAdditionally, a startup warning explains why a reverse proxy is necessary later:
[W JupyterHub proxy:748] Running JupyterHub without SSL. I hope there is SSL termination happening somewhere else...Automatic Idle Session Termination
JupyterLab kernels keep data loaded in memory until the session is explicitly stopped. This can lead to wasted resources if, for example, a user leaves a session running without actively working. You can prevent this by configuring an idle culler:
    c.JupyterHub.services = [
        {
            'name': 'idle-culler',
            'command': [
                '/opt/jupyterhub/bin/python3',
                '-m', 'jupyterhub_idle_culler',
                '--timeout=3600',
            ],
        }
    ]

    c.JupyterHub.load_roles = [
        {
            'name': 'list-and-cull',
            'scopes': [
                'list:users',
                'read:users:activity',
                'read:servers',
                'delete:servers',
            ],
            'services': ['idle-culler'],
        }
    ]
I have used an explicit path to the interpreter as a best practice. While the documentation suggests using the sys.executable variable — which correctly points to the interpreter used to launch the hub — this requires adding import sys at the top of your configuration file; otherwise, the configuration will fail to load.
Resource Limiting
The default user server spawning mechanism does not impose resource limits. While this is convenient for a single user, it can quickly exhaust server resources in a multi-user environment. By replacing the spawning mechanism with systemd, you can enforce limits via Linux kernel cgroups:
c.JupyterHub.spawner_class = 'systemdspawner.SystemdSpawner' # Required for resource limits
c.SystemdSpawner.mem_limit = '8G' # Memory ceiling per user
c.SystemdSpawner.cpu_limit = 4.0 # CPU time expressed in cores
c.SystemdSpawner.isolate_tmp = True # Dedicated tmp directory; user files are isolated
After configuration, verify whether the limits have been applied to the system or if they are only present in the config file:
systemctl show jupyter-analyst1-singleuser --property=MemoryMax,CPUQuotaPerSecUSec,MemoryCurrent,TasksCurrent # Shows active limits

MemoryCurrent=136945664
TasksCurrent=4
CPUQuotaPerSecUSec=4s
MemoryMax=8589934592
This setup limits memory to 8 GB and CPU usage to a 4-core quota. An empty environment consumes 136.9 MB. The unit exists only while the user is active; if there is no active session, the command will report infinity.
From the user's perspective, the limits manifest differently. A cell that consumes 500 MB of RAM per step will eventually hit the 8 GB limit and stall. The browser will report that the kernel has died without specifying the cause, which may lead the user to assume their code is broken.
Memory cgroup out of memory: Killed process 8697 (python)
total-vm:13635980kB, anon-rss:8342092kB, UID=1000
oom-kill:constraint=CONSTRAINT_MEMCG,
oom_memcg=/system.slice/jupyterhub-analyst1-singleuser.service
The CONSTRAINT_MEMCG string indicates that our specific cgroup limit was hit, rather than a general system-wide memory shortage (as over 50 GB of RAM remained free on the machine).
The CPU quota works differently. The cpu_limit is converted into allowed CPU time per real-world second. A 4-core limit does not tie the process to four specific physical cores; instead, the scheduler distributes processes across all 24 threads, appearing as ~16% utilization in system monitoring.
Let's verify this. Run a 24-thread load in a notebook and check the CPU time consumed over 30 seconds:
A=$(systemctl show jupyter-analyst1-singleuser -p CPUUsageNSec --value); sleep 30; B=$(systemctl show jupyter-analyst1-singleuser -p CPUUsageNSec --value); echo "cores used: $(echo "scale=2; ($B - $A) / 30000000000" | bc)"

cores used: 3.99
The system-side view looks like this:
top -bn1 | head -3

top - 16:55:59 up 1 day,  1:16,  1 user,  load average: 0.03, 0.03, 0.01
Tasks: 414 total,  25 running, 389 sleeping,   0 stopped,   0 zombie
%Cpu(s): 15.8 us,  0.4 sy,  0.0 ni, 83.8 id
The 15% CPU usage across 24 threads corresponds exactly to the requested 4-core quota.
GPU Limits
When launching a user server, the hub injects a variable to distribute GPUs:
GPU_MAP = {'analyst1': '0', 'analyst2': ''}
def assign_gpu(spawner):
    spawner.environment['CUDA_VISIBLE_DEVICES'] = GPU_MAP.get(spawner.user.name, '')
c.Spawner.pre_spawn_hook = assign_gpu
If GPU_MAP contained 0 and 1, each user would see their assigned card. Since we have only one GPU, the second analyst receives an empty string, forcing them to use the CPU.
Verification for the first user:
import torch
print(torch.cuda.is_available(), torch.cuda.get_device_name(0))
# True NVIDIA GeForce RTX 3090
The second user will get an import error if PyTorch is not installed, but they can still see the environment variable:
import os
print(os.environ.get('CUDA_VISIBLE_DEVICES'))
# empty string
This method has limitations. A user can override the variable directly from their notebook:
import os
os.environ['CUDA_VISIBLE_DEVICES'] = ''
import torch
print(torch.cuda.is_available())
# False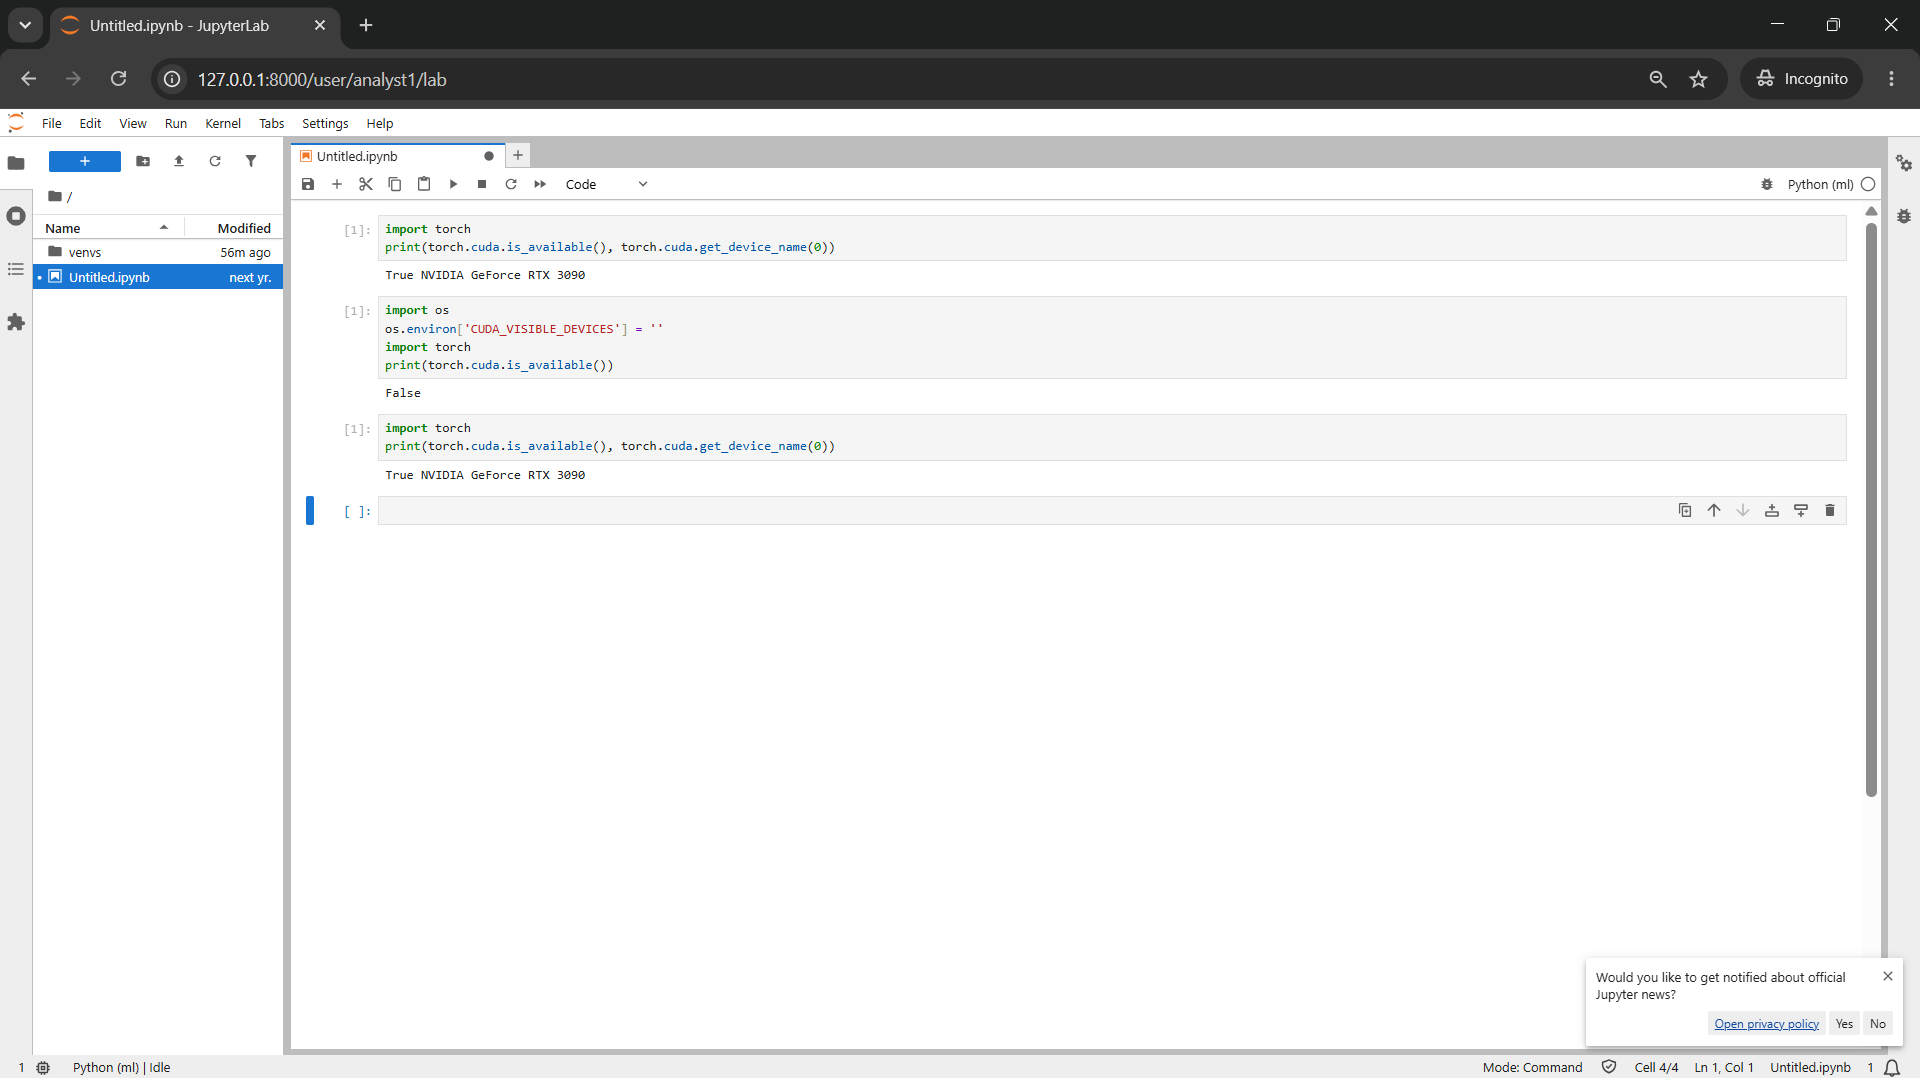
Since a user can clear the variable, they can also attempt to point it to a different GPU. The hub does not block device access; it merely suggests which devices the library should use.
Security Configuration
Reverse Proxy
Using SSH tunnels for access is cumbersome and only suitable for testing or very small teams. For production, you need a standard URL. We will set up Nginx as a reverse proxy in front of the hub:
server {
    listen 80;
    server_name jupyter.example.com;

    location / {
        proxy_pass http://127.0.0.1:8000;
        proxy_http_version 1.1;
        proxy_set_header Upgrade $http_upgrade;
        proxy_set_header Connection "upgrade";
        proxy_set_header X-Real-IP $remote_addr;
        proxy_set_header Host $host;
        client_max_body_size 2G;
    }
}
The proxy_http_version, Upgrade, and Connection headers are mandatory. Without them, the UI might load and files will be visible, but kernels will fail to start because they require a persistent WebSocket connection. The client_max_body_size parameter is necessary for uploading large datasets via the file browser.
Enable the configuration, disable the default site, and reload Nginx:
ln -sf /etc/nginx/sites-available/jupyterhub /etc/nginx/sites-enabled/
rm -f /etc/nginx/sites-enabled/default
nginx -t && systemctl reload nginx
Now, the hub will warn that the connection is insecure.
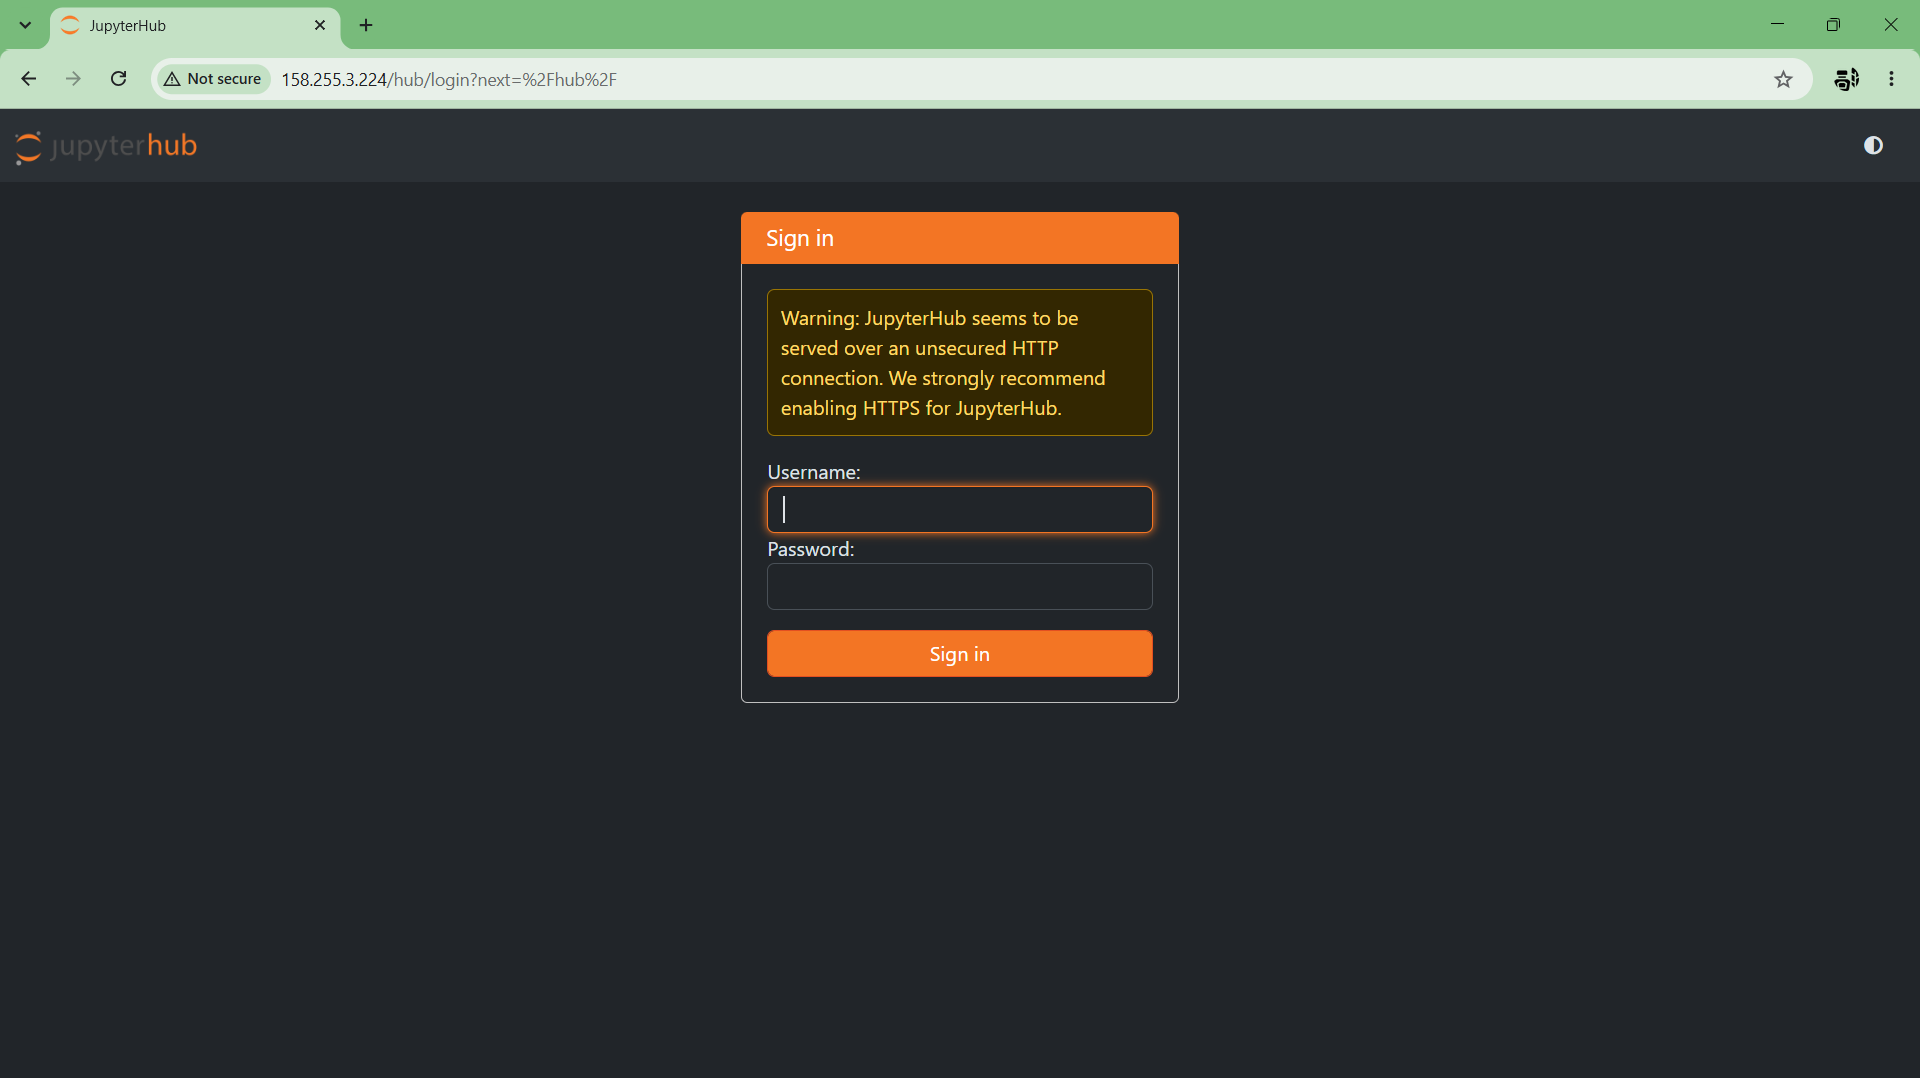
Let's Encrypt Certificate
To issue a certificate, you need an A record in your DNS pointing to the server. Verify this with:
dig +short jupyter.example.com # Should return the server IPBefore issuing a live certificate, perform a dry run to avoid hitting Let's Encrypt's weekly rate limits:
apt install -y certbot python3-certbot-nginx
certbot certonly --nginx -d jupyter.example.com --dry-run
The --dry-run flag only tests certificate acquisition and does not modify your web server configuration. Once the dry run succeeds, issue the actual certificate:
certbot --nginx -d jupyter.example.comIf the certificate is issued but fails to install automatically (common if you used a wildcard server_name _ in Nginx), you can manually link it:
sed -i 's/server_name _;/server_name jupyter.example.com;/' /etc/nginx/sites-available/jupyterhub
nginx -t && systemctl reload nginx
certbot install --cert-name jupyter.example.com
Verify the installation:
certbot certificates
# Verify Expiry Date and Certificate Name
and
curl -sI http://jupyter.example.com | head -2
# Should show HTTP/1.1 301 Moved Permanently (if configured)
The certificate has a 90-day validity period, and the 301 redirect ensures that any unencrypted requests are properly redirected.
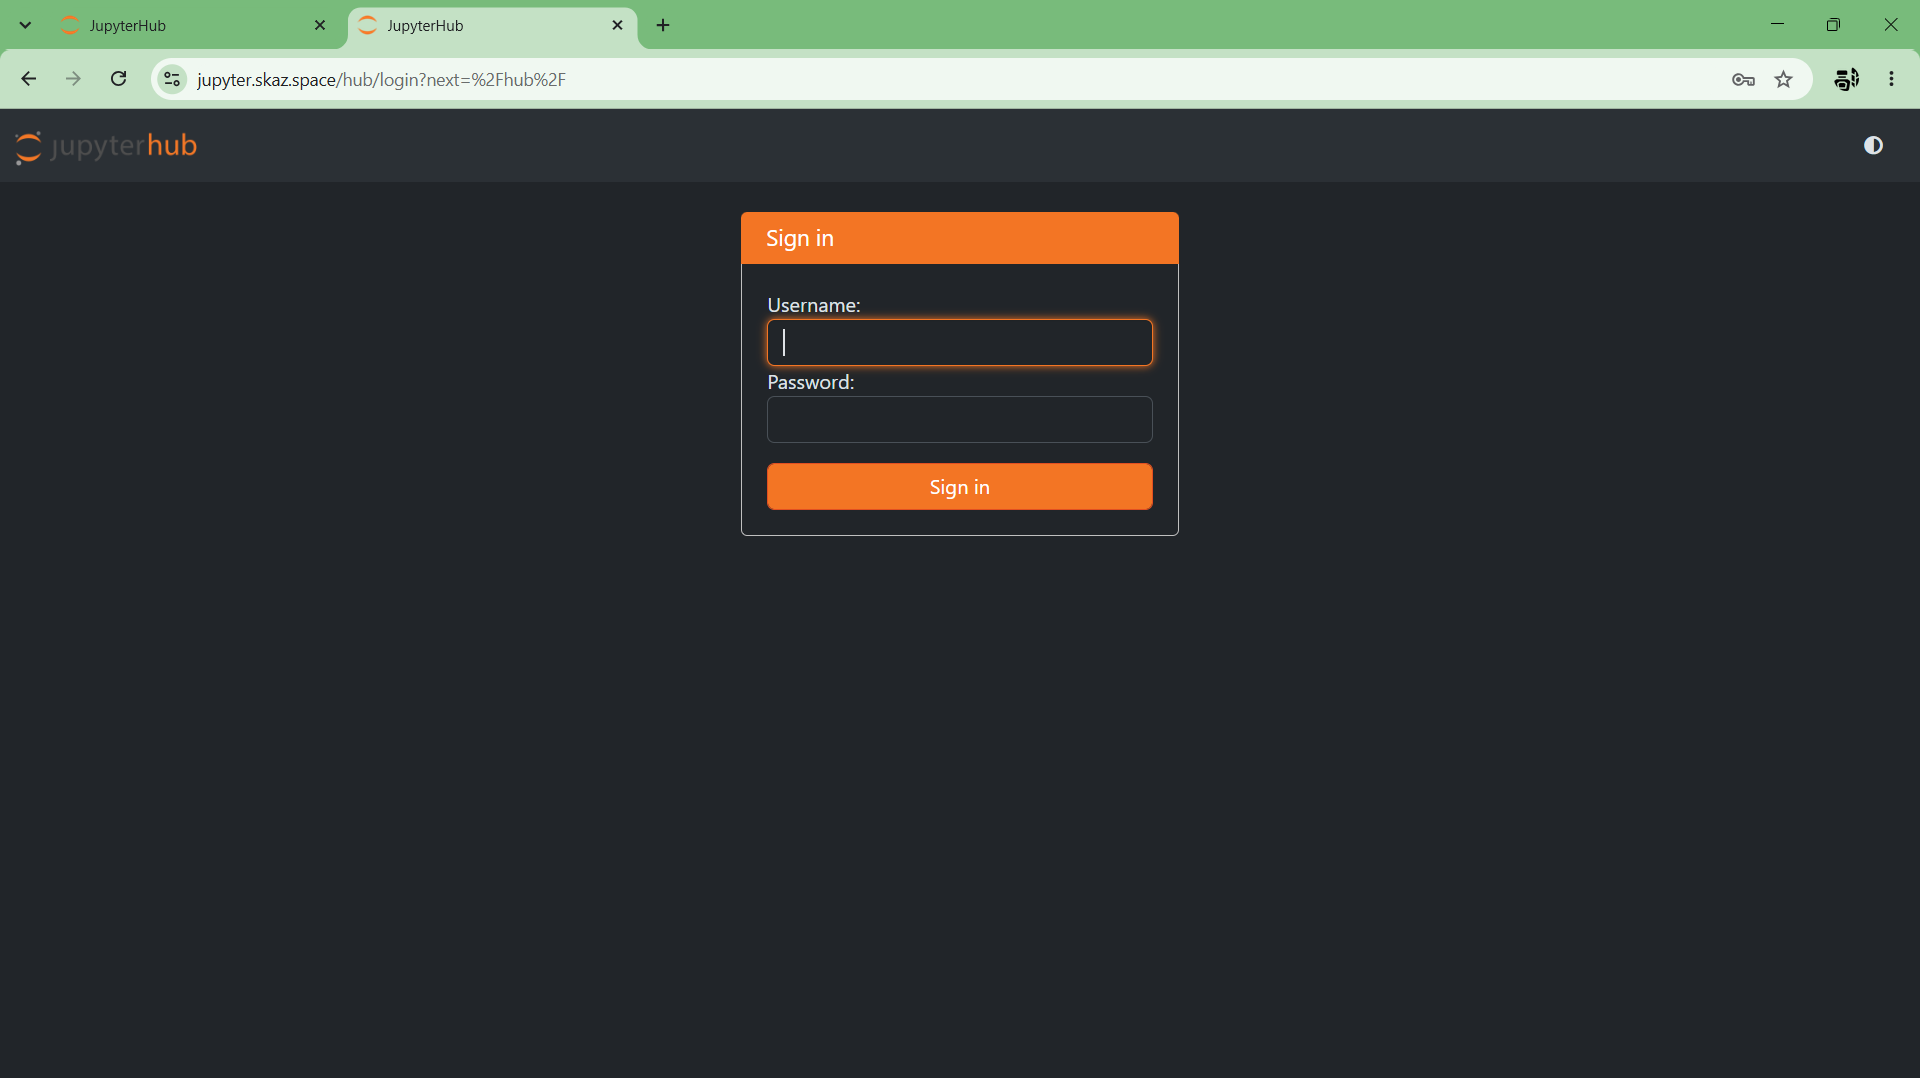
Monitoring and Logging
Since user servers are separate systemd units, they are best managed via systemctl:
systemctl list-units 'jupyter-*'                     # Active sessions
systemd-cgls -u jupyter-analyst1-singleuser.service   # Process tree
systemd-cgtop provides a high-level overview of resource usage across all services. For GPU status, use:
nvidia-smi              # Snapshot
watch -n1 nvidia-smi    # Live update
Logs should be categorized for easier troubleshooting:
journalctl -u jupyterhub -f            # Hub logs
journalctl -u jupyter-analyst1-singleuser # User session logs
dmesg -T | grep -iE "oom-kill|killed process" # Kernel OOM messages
For full-scale monitoring, the hub exposes Prometheus metrics at /hub/metrics (note: the documentation mentions /metrics, but that path often redirects). Access requires the read:metrics scope. Key metrics includejupyterhub_running_servers and jupyterhub_server_spawn_duration_seconds.
Backup
Backing up entire /home directories is resource-intensive. In our setup, /home was 7.9 GB, but an optimized backup with exclusions was only 348 KB. We exclude environments, caches, and temporary files that can be easily reinstalled.
#!/bin/bash
set -euo pipefail # Exit on error
# Exclude venvs, caches, checkpoints, and runtime files
rsync -a --delete \
  --exclude 'venvs/' \
  --exclude '.cache/' \
  --exclude '.ipynb_checkpoints/' \
  --exclude '.local/share/jupyter/runtime/' \
  --exclude '__pycache__/' \
  /home/ /backup/home/
We use a systemd timer instead of cron for backups, as it provides better logging and state management.
Service File (/etc/systemd/system/backup-notebooks.service):
[Unit]
Description=Backup notebooks
[Service]
Type=oneshot
ExecStart=/usr/local/bin/backup-notebooks.shTimer File (/etc/systemd/system/backup-notebooks.timer):
[Unit]
Description=Backup notebooks daily
[Timer]
OnCalendar=daily
Persistent=true[Install]
WantedBy=timers.targetStart the timer and verify the next scheduled execution:
systemctl daemon-reloadsystemctl enable --now backup-notebooks.timer # Enables the daily backup
systemctl list-timers backup-notebooks --no-pager # Shows the next scheduled runNEXT LEFT LAST PASSED UNIT ACTIVATES
Wed 2026-08-12 00:00:00 CEST 6h - - backup-notebooks.timer backup-notebooks.serviceThe Persistent parameter ensures that missed runs are caught up if the machine was powered off during the scheduled time. Keeping a local copy on the same server protects against accidental file deletion. However, to guard against total server failure, an external storage solution must be used. Notebook version history is managed via a version control system.
Troubleshooting
ModuleNotFoundError for installed libraries
Each kernel looks at its own environment. The default Python 3 (ipykernel) uses the hub's environment, which lacks scientific libraries. You must use the specific kernel (e.g., Python (ml)) registered from the user's environment.
Password correct, but login failed in Web UI
This occurs when the browser reports invalid credentials, but the logs show User ... not allowed. This is typically a permissions/RBAC issue.
Account locked
Similar symptoms to a wrong password, but the root cause is that no password has been set. passwd -S username should show a P (Password set) rather than L (Locked). Using --disabled-password during user creation results in the L state.
Service active, but not responding
The status shows active (running), but the hub is unreachable.
Active: activating (auto-restart) (Result: exit-code)
Process: 8928 ExecStart=... (code=exited, status=1/FAILURE)
The Restart=always directive automatically restarts the failed service. This makes it appear healthy from the outside, but the PID in the logs changes every few seconds.
The root cause is visible in the logs:
[ConfigProxy] error: listen EADDRINUSE: address already in use 127.0.0.1:8000
tornado.httpclient.HTTPClientError: HTTP 403: Forbidden
A zombie proxy process from a previous session is still running, causing the new instance to fail when attempting to bind to the occupied ports. Additionally, the hub receives a "Forbidden" error because it cannot access the existing proxy, as the previous session used a different security key.
You won't be able to identify the culprit by name, as the proxy process simply appears as node in the process list.
ss -tlnp | grep -E ':8000|:8001'
LISTEN 127.0.0.1:8000 users:(("node",pid=9340,fd=24))
The simplest and most reliable fix is to clear the ports:
systemctl stop jupyterhub
fuser -k 8000/tcp 8001/tcp  # Kills whatever is holding the hub ports
systemctl start jupyterhub
A healthy service should show a single PID, nine active tasks, and consume approximately 128 MB of memory.
Out of Memory (OOM)
If a kernel dies without an error message in the browser, check the kernel logs (dmesg). This is a classic OOM event, detailed in the "Resource Limiting" section.
Alternatives and Add-ons
Collaborative interactive data work doesn't always require a dedicated GPU server. There are several other options to consider.
Google Colab vs. Self-Hosted Servers
The free tier of Google Colab is sufficient for many educational tasks, one-off experiments, and demonstrations; it also removes the need for hardware administration overhead. However, the lack of infrastructure management leads directly to its main drawback: sessions are time-limited, and GPU resources are allocated on a best-effort basis — you might not receive a GPU at all. Another downside is the necessity of mounting data via Google Drive.
Paid tiers lift some of these restrictions, but data privacy remains a concern. If strict data sovereignty is required, a self-hosted server is the better choice; it gives you full control over your data, though it also makes you responsible for system security.
VS Code Server
If your workflow involves writing modular code rather than using notebooks, two different solutions might suit your needs. Code-server can be installed on a GPU-enabled server, allowing you to access the editor via a web browser. Alternatively, Microsoft's Remote Tunnels feature connects your local editor to a remote server via an intermediary; however, this requires a GitHub or Microsoft account, which may be a dealbreaker in corporate environments due to compliance policies.
For R users, RStudio Server is available in both free and paid versions. It is installed on a server (with or without a GPU) and accessed through a browser.
Summary
Setup takes approximately one full business day once the server is delivered; using an older OS version will reduce this time.
The process is much smoother if you keep a few critical points in mind. You rarely need to manually install the CUDA toolkit, as computation libraries typically bundle their own copies. JupyterHub version 5 will deny all access until you define an allowed users list. A service in a running state may still be non-functional, occasionally crashing and entering a boot loop. Memory limits often manifest to the user as a kernel death without any clear explanation. Finally, distributing environment variables manages access but does not inherently secure it.