
Author: Nikita Zubarev, Head of the DevOps Department at HOSTKEY
At the beginning of August this year, Debian 13 “Trixie” was released, and almost immediately, we started receiving requests from customers eager to upgrade to the new version. While updating existing systems fell on the customers themselves, the quick deployment of the new distribution on newly ordered machines proved to be a challenge for us. Fortunately, we didn’t waste time; we began preparing the necessary templates as soon as the release was announced, but it still took until late summer and early autumn to complete everything. Proxmox, which is closely integrated with Debian, also received an update in version 9.0 around the same time, so we had to update our catalog of operating systems and software accordingly.
What’s New in the Releases?
Let’s take a look at the changelogs for these two new versions. While most of the changes in Debian 13 are standard improvements, there are a few notable points:
- The Linux kernel version 6.12 brings more drivers and updated security patches;
- The reworked EFI partitioning logic in the installer requires some script adjustments;
- HTTP Boot in the installer appears to be an alternative to PXE boot via HTTP/HTTPS, potentially offering better firewall compatibility and faster performance.
As for Proxmox 9, customers are drawn to its innovative features:
- Virtual machine snapshots stored on LVM with advanced resource allocation technology;
- Enhanced high-availability (HA) mechanisms for node and resource failover;
- Support for software-defined networking (SDN) frameworks;
- A modernized mobile web interface for easier management;
- ZFS support for adding new devices to existing RAIDZ arrays with minimal downtime;
- An upgrade to AppArmor 4 for enhanced security.
Next Steps
The tasks for the coming weeks are already clear:
- Debian 13 in Foreman: We need to adjust our deployment process to work with Debian 13. The main challenge is dealing with the changes in EFI partition management. Our HKM-based deployment mechanism worked flawlessly on Debian 12; now we need to identify and fix any issues that may have arisen.
- Proxmox VE 9 as a Management Tool: Proxmox 9 is available, and customers want it added to our product portfolio. The general approach remains the same: we’ll use a standard Debian 13 base, with Proxmox providing the virtualization management via a web interface. We already have Ansible scripts for version 8; we need to adapt them for Proxmox 9.
What is HKM Deployment (and Why Do We Use It)?
Maintaining support for multiple operating systems is time-consuming and inefficient from a business perspective. Therefore, we adopted a more streamlined approach by establishing a set of requirements for our new system. We’ve detailed the specifics of our deployment process here.
In short, to simplify things and speed up server delivery to clients, we created our own LiveCD based on Rocky Linux. This approach eliminates the need to handle various operating systems individually; all we need is a junior engineer and a few hours of their time. The process is straightforward: we create a virtual machine, install Debian 13 from an ISO, and it’s ready to use. We’ll provide more details about this “golden image” in future articles.
One caveat, however: since the installation occurs through a separate operating system, potential compatibility issues with existing hardware may only become apparent during the first boot of a pre-installed system. Nevertheless, adding support for new hardware is much easier this way—there’s no need to deal with udeb packages for Debian/Ubuntu or manually reconfigure the installer with each driver update.
Debian 13 in Foreman
Let's take a look at the steps we've taken to simplify the deployment of Debian 13 in our infrastructure.
Setting Up a Chroot Environment
We proceed with the following steps in sequence. The first step is to create a mount point:
mkdir /mnt/debiancd /mnt/Next, we activate LVM (Logical Volume Management):
vgchange -ayFinally, we mount the file systems:
mount /dev/mapper/debian-root /mnt/debianmount /dev/sda1 /mnt/debian/bootmount -t proc proc /mnt/debian/procmount -t sysfs sys /mnt/debian/sysmount --bind /tmp /mnt/debian/tmpmount --bind /dev /mnt/debian/devmount --bind /dev/pts /mnt/debian/dev/ptsLet's not forget to configure the interfaces:
cat >etc/network/interfaces <<'EOF'
auto lo
iface lo inet loopback

auto ens1
iface ens1 inet manual

auto vmbr0
iface vmbr0 inet dhcp
    bridge-ports ens1
    bridge-stp off
    bridge-fd 0
EOF
Then we copy the DNS settings:
cp -v /etc/resolv.conf /mnt/debian/etc/resolv.confFinally, we perform the login into the chroot environment:
chroot /mnt/debian /usr/bin/env -i HOME=/root TERM="$TERM" /bin/bash --loginSetting up the system in chroot
The sequence of actions was as follows:
Updating the system.
nano /etc/apt/sources.listCleaning the configuration files and removing machine-specific settings.
rm -rf /etc/fstabnano /etc/issuerm -f /etc/ssh/ssh_host_*rm -rf /boot/*rm -f /etc/network/interfacesrm -rf /etc/network/interfaces.d/If necessary, you could also update the kernel version, but we leave that to the user’s discretion and install the systems with a “stable” version of the kernel. However, this could be done using the following commands:
ls /lib/modules (check kernel version)apt-get install --reinstall linux-image-<you kernel version>update-initramfs -c -k <you kernel version>grub-install /dev/sdanSetting up SSH
Editing the SSH configuration files:
nano /etc/ssh/sshd_confignano /etc/ssh/ssh_configWe then set the following parameters::
PasswordAuthentication yes
PermitRootLogin yes
Unmounting and Archiving
Exiting from chroot:
exitUnmounting the file systems:
cd debianumount ./procumount ./sysumount ./dev/ptsumount ./devumount ./tmpCreating an archive:
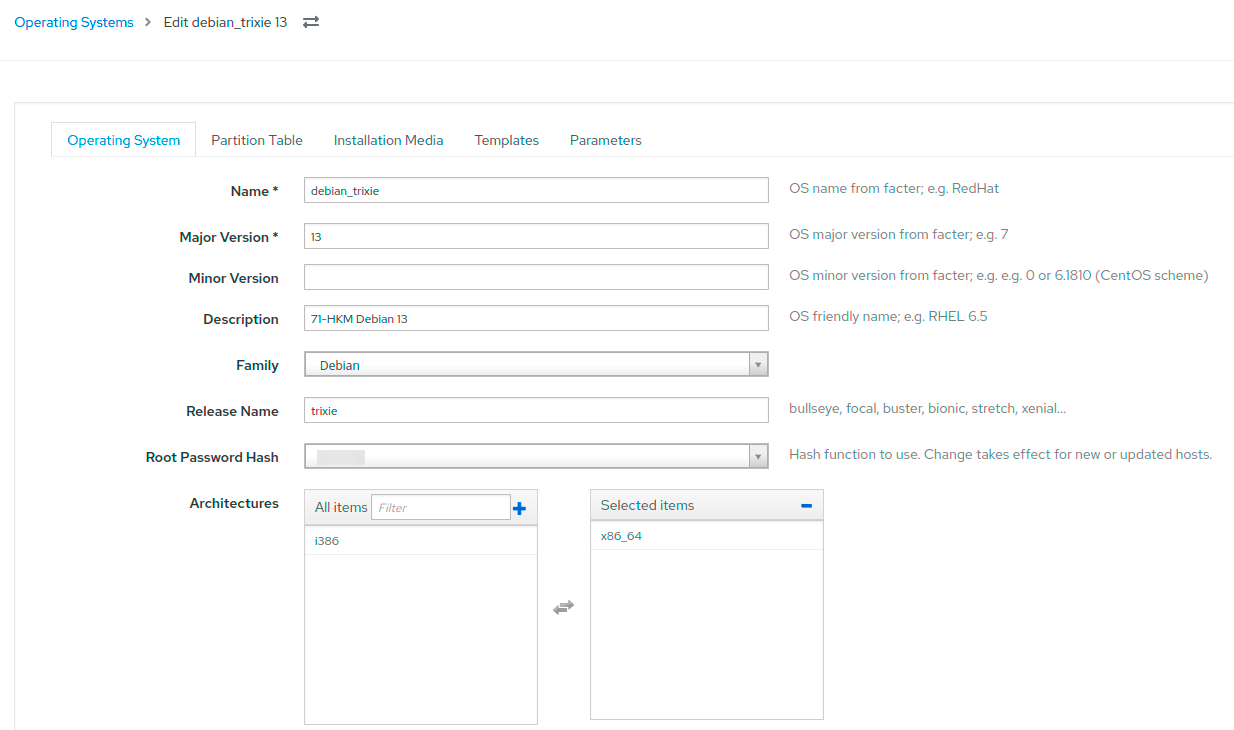
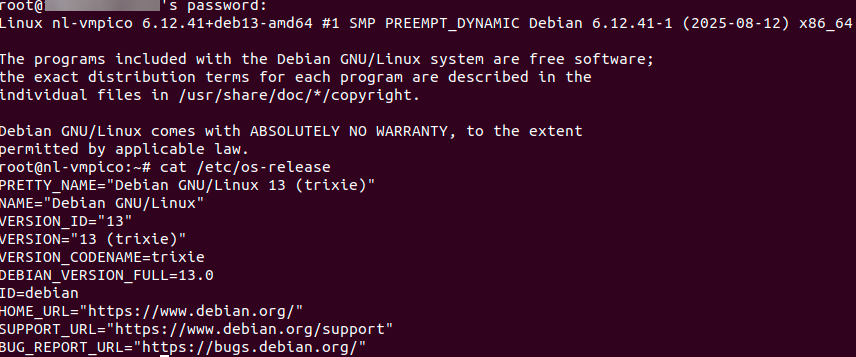
tar -czvf debian_trixie.tar.gz .We then upload the image to the repository and register the operating system in Foreman and Invapi (our device management panel for clients). After that, the operating system will automatically be available on the website.
This is what the new operating system looks like in Foreman. We discussed the architecture of the entire system in the article “Foreman in Isolation: How We Built a Fault-Tolerant and Secure System for Mass OS Deployment”:
Before releasing the software, we conduct smoke tests and send it to the Quality Assurance (QA) team for verification on various hardware configurations and types of virtual machines.
We have now mastered the basics of using Debian 13. Next, we’ll continue to improve the Ansible playbook for installing Proxmox VE 9.0 on top of this system.
Proxmox VE 9.0 as a management panel: improving the existing Ansible playbook
The official documentation recommends installing Proxmox VE directly on a clean Debian Trixie installation. It’s suggested to use the expert mode of the installer to set a static IP address from the beginning. Only the standard utilities and an SSH server are required from the packages; a graphical interface is not necessary, as Proxmox will include all the necessary components for QEMU and LXC by default.
Аdd the Proxmox repository
 - name: Add the Proxmox VE repository key debian 13
  ansible.builtin.get_url:
	url: "https://enterprise.proxmox.com/debian/proxmox-release-{{ ansible_distribution_release }}.gpg"
	dest: "/etc/apt/trusted.gpg.d/proxmox-release-{{ ansible_distribution_release }}.gpg"
	checksum: sha512:8678f2327c49276615288d7ca11e7d296bc8a2b96946fe565a9c81e533f9b15a5dbbad210a0ad5cd46d361ff1d3c4bac55844bc296beefa4f88b86e44e69fa51
  when: ansible_distribution == "Debian" and ansible_distribution_release == "trixie"
We are installing the Proxmox kernel:
  - name: Install ProxmoxVE kernel debian 13
  ansible.builtin.apt:
	name: proxmox-default-kernel
	state: present
  retries: 3
  when: ansible_distribution == "Debian" and ansible_distribution_release == "trixie"
Next, we clean up the standard settings:
- name: Remove the Debian Kernel debian 13
  ansible.builtin.shell: apt remove linux-image-amd64 'linux-image-6.12*' -y
  environment:
	DEBIAN_FRONTEND: noninteractive
  when: ansible_distribution == "Debian" and ansible_distribution_release == "trixie"
Finally, we update the bootloader:
- name: Update and check grub2
  ansible.builtin.command: update-grub
 - name: Remove the os-prober Package
  ansible.builtin.apt:
	name: os-prober
	state: absent
We are commenting on the code related to the use of the enterprise repository:
For versions prior to Debian 13:
- name: Comment  Proxmox enterprise repo file for apt update working for pre 13 debian
  ansible.builtin.replace:
	path: /etc/apt/sources.list.d/pve-enterprise.list
	regexp: '^([^#].*)$'
    replace: '# \1'
  when: ansible_distribution == "Debian" and ansible_distribution_release != "trixie"
For Debian 13 (Trixie):
- name: Comment  Proxmox enterprise repo file for apt update working for debian 13
  ansible.builtin.replace:
	path: /etc/apt/sources.list.d/pve-enterprise.sources
	regexp: '^([^#].*)$'
	replace: '# \1'
  when: ansible_distribution == "Debian" and ansible_distribution_release == "trixie"
After testing the playbook functionality, don’t forget to check the third-level domain and the SSL certificate. For testing purposes, simply running the task on Debian 13 should be sufficient.
ISO or Debian + Playbook: Why the latter?
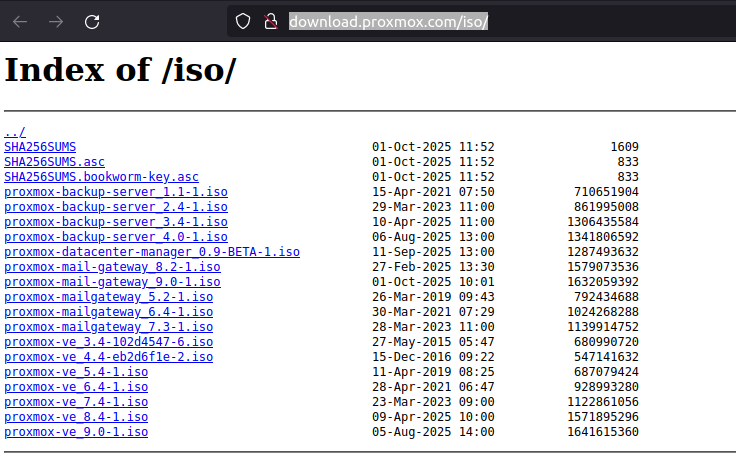
Officially, Proxmox VE developers recommend installing Proxmox from an ISO image on bare metal (which can be downloaded here). However, there are situations where it makes sense to install it over an existing Debian system (e.g., when you need non-standard disk partitioning methods). Such cases are quite common, and this is precisely the reason for using a playbook.
The main difference in the process: When installing via a playbook, you first set up Debian 13 and then run the automation script. This takes more time but provides greater control over the system configuration from the outset.
Our “gold” image already contains all the necessary partitioning information and basic settings, so installing Proxmox using a playbook only takes 5–10 minutes. It’s much more convenient for large-scale deployments than having to burn an ISO every time and use the installer manually.
Summary
With the implementation of the HKM setup, deploying a new operating system or initiating another installation process is no longer a nightmare (although, to be honest, it used to make us consider quitting our jobs—even within the existing system!). It has now become a routine task that occurs every few months and can be easily entrusted to a newcomer.
As the number of locations and orders increases, we continuously improve the deployment system by analyzing logs of failed installations, testing new motherboards and server platforms in various modes, and gradually adding additional features such as more flexible disk partitioning, SSH key transfer, OS and network address configuration, and client notifications for installations, among others. The system is fully ready for further development and scaling.
We are currently seeing high demand for Proxmox. Our task is to deliver new installations promptly, support a variety of hardware configurations, and ensure that we meet the SLA (Service Level Agreement) requirements for server startup times. We also plan to expand our range of free hypervisors—please let us know in the comments which popular ones you think should be added: XEN, Hyper-V, OpenNebula, or perhaps OpenStack?
Author’s Conclusion
The Proxmox platform is constantly evolving, with regular updates released. If you need to manage dozens of virtual machines, Proxmox is a solid choice. However, don’t be deceived into thinking that an unprepared user can set up a high-availability (HA) cluster using Ceph and Open vSwitch in just a few hours, even with the help of ChatGPT.
As for upgrading from version 8, it’s worth testing, but in my opinion, it’s simpler and more reliable to migrate existing virtual machines to a new server.
For those who still decide to give Proxmox a try, make sure to read the official documentation. In our next article, we’ll show you how to use it at a user level.