



 +31 20 820 3777
 Support
  Documentation
 Login
Login 



Author: Sultan Usmanov, Hostkey DevOps
While working on optimizing our fleet of physical servers and compacting virtualization, we were faced with the task of migrating virtual servers from oVirt to VMware. Another problem was the need to maintain the ability to rollback to the oVirt infrastructure in the event of any complications during the migration process, since for a hosting company, the stability of the equipment is the top priority.
The following infrastructure was deployed for the server migration:
- NFS server, presented on oVirt, ESXi servers and the Mediation Server
- An intermediary server on which RAW and Qcow2 discs were converted to VMDK format.
Below are the scripts, commands and steps that we used during the migration.
To partially automate and streamline the connecting process to the oVirt servers, and in order to copy the disk of the virtual server and place it on NFS for further conversion, a bash script was written that ran on the proxy server and performed the following actions:
- Connect to Engine-server;
- Find the needed virtual server;
- Switch off the server;
- Rename (server names in our infrastructure should not be duplicated);
- Copy the server disk to the NFS partition mounted on the oVirt and ESXi servers.
Since we were working with tight deadlines, we wrote a script which only works with servers that have one disk.
Bash-script
#!/usr/bin/env bash

##Source
engine_fqdn_src= FQDN name Engine server
engine_api_src="https://${engine_fqdn_src}/ovirt-engine/api"
guest_id=$1

##Common vars
engine_user=user with rights to manage virtual servers
engine_pass=password
export_path=/mnt/autofs/nfs

OVIRT_SEARCH() {
	local engine_api=$1
	local api_target=$2

	local search
	if [[ ! -z $3 ]]&&[[ ! -z $4 ]];then
	local search="?search=$3=$4"
	fi

	curl -ks -user "$engine_user:$engine_pass" \
	-X GET -H 'Version: 4' -H 'Content-Type: application/JSON' \
		-H  'Accept: application/JSON' "${engine_api}/${api_target}${search}" |\
	jq -Mc
}

##Source
vm_data=$(OVIRT_SEARCH $engine_api_src vms name $guest_id)
disk_data=$(OVIRT_SEARCH $engine_api_src disks vm_names $guest_id)
host_data=$(OVIRT_SEARCH $engine_api_src hosts address $host_ip)

vm_id=$(echo $vm_data | jq -r '.vm[].id')
host_ip=$(echo $vm_data | jq -r '.vm[].display.address')
host_id=$(echo $vm_data | jq -r '.vm[].host.id')
disk_id=$(echo $disk_data | jq -r '.disk[].id')
stor_d_id=$(echo $disk_data | jq -r '.disk[].storage_domains.storage_domain[].id')

##Shutdown and rename vm
post_data_shutdown="<action/>"
post_data_vmname="<vm><name>${guest_id}-</name></vm>"

##Shutdown vm
curl -ks -user "$engine_user:$engine_pass" \
-X POST -H 'Version: 4' \
-H 'Content-Type: application/xml' -H 'Accept: application/xml' \
--data $post_data_shutdown \
${engine_api_src}/vms/${vm_id}/shutdown

sleep 60

##Shutdown vm
curl -ks -user "$engine_user:$engine_pass" \
-X POST -H 'Version: 4' \
-H 'Content-Type: application/xml' -H 'Accept: application/xml' \
--data $post_data_shutdown \
${engine_api_src}/vms/${vm_id}/stop

##Changing vm name
curl -ks -user "$engine_user:$engine_pass" \
-X PUT -H 'Version: 4' \
-H 'Content-Type: application/xml' -H 'Accept: application/xml' \
--data $post_data_vmname \
${engine_api_src}/vms/${vm_id}

##Copying disk to NFS mount point
scp -r root@$host_ip:/data/$stor_d_id/images/$disk_id /mnt/autofs/nfs
In cases when servers had two disks, the work described below was carried out.
Connecting to the engine and finding the right server
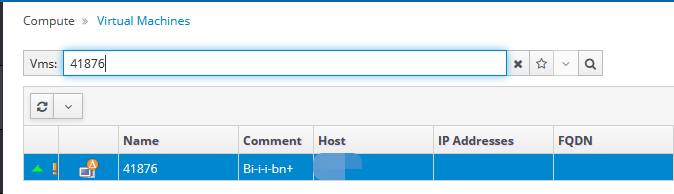
Under “Compute” >> “Virtual Machines” in the search box, enter the name of the server destined for migration. Find the server and disable it:
Follow to the “Storage” >> “Disks” section and find the server you want to migrate:
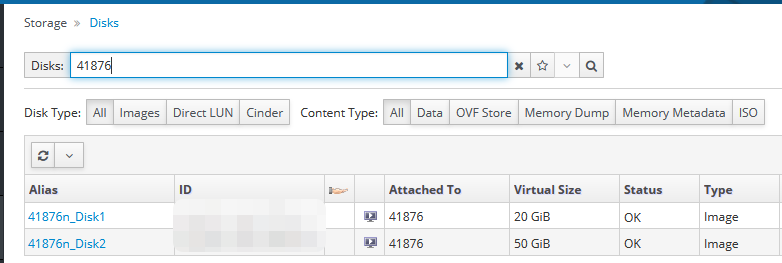
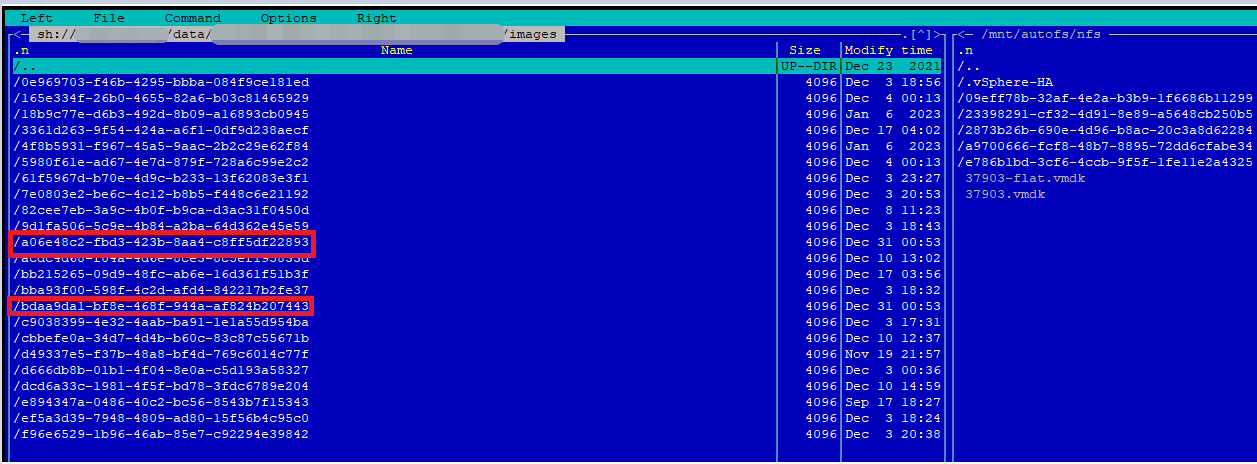
In this window, you need to remember the IDs of the drives connected to the server to be transferred. Then follow the proxy server via SSH and connect to the oVirt server where the virtual server is located. In our case, we used the “Midnight Commander” application to connect to the physical server and copy the necessary disks:
After copying the discs, it is necessary to confirm their format (raw or qcow). To check, you can use the qemu-img info command and specify the drive name. After selecting the format, you should perform the conversion using the following command:
qemu-img convert -f qcow2 (disk name) -O vmdk (disk name.vmdk) -o compat6In our case, we are converting from qcow2 format to vmdk.
At the end of the conversion, you need to go to vCenter or, if just an ESXi server is installed, navigate to it through the web interface and create a virtual server without a disk. In our case vCenter was installed.
Creating a virtual server
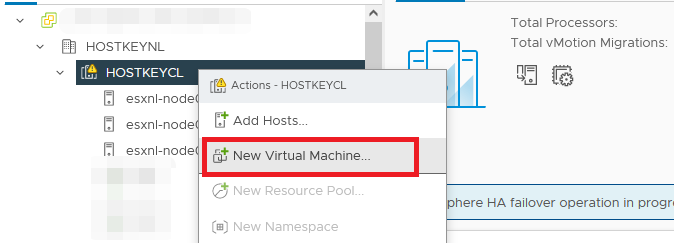
Since we have a cluster configured, you just need to right-click on it and select the “New Virtual Machine” option:
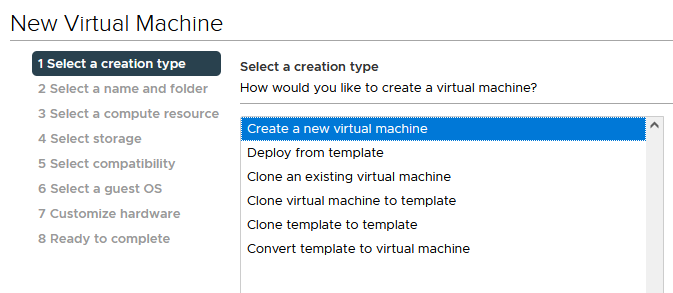
Then select “Create new virtual machine”:
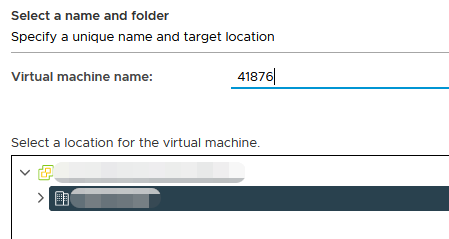
Set the server name and click “Next”:
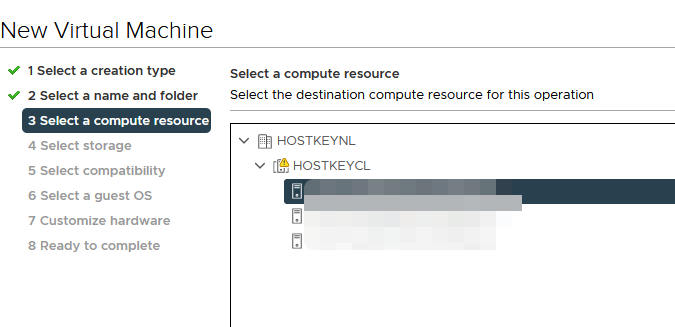
Select the physical server where you plan to host the virtual server and click “Next”:
 Select the storage where the server will be placed and click “Next”:
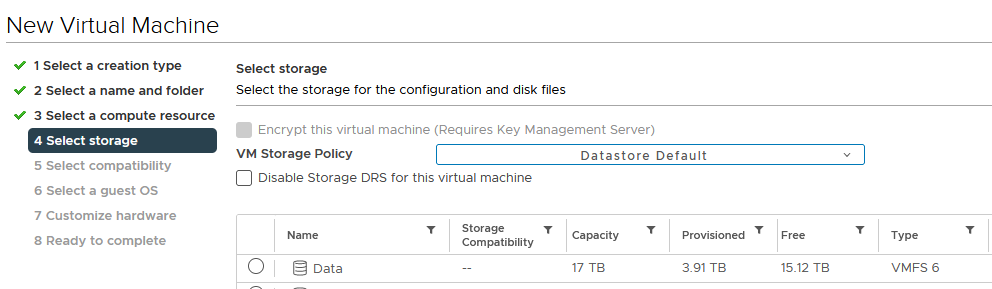
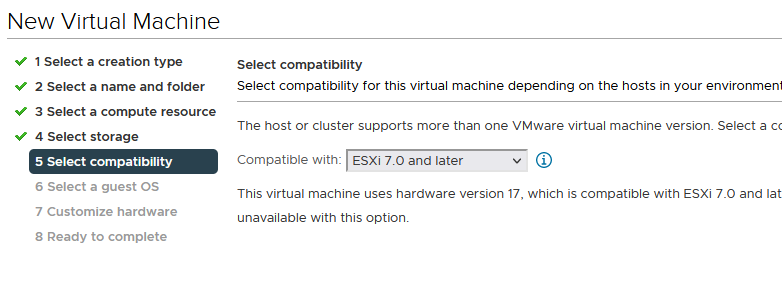
Specify the version of ESXi for compatibility. If there are servers with version 6 in the infrastructure, you must select the desired version. In our case we chose version 7.
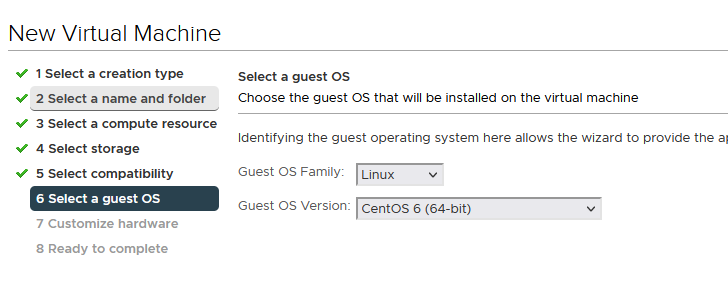
Select the operating system and version that was installed on the server that we are transferring to. We are using Linux with the CentOS 6 operating system here.
In the “Customize Hardware” window, you must set all the parameters identical to those that were set in the portable system. You also need to remove the disk because the converted disk will be connected instead.
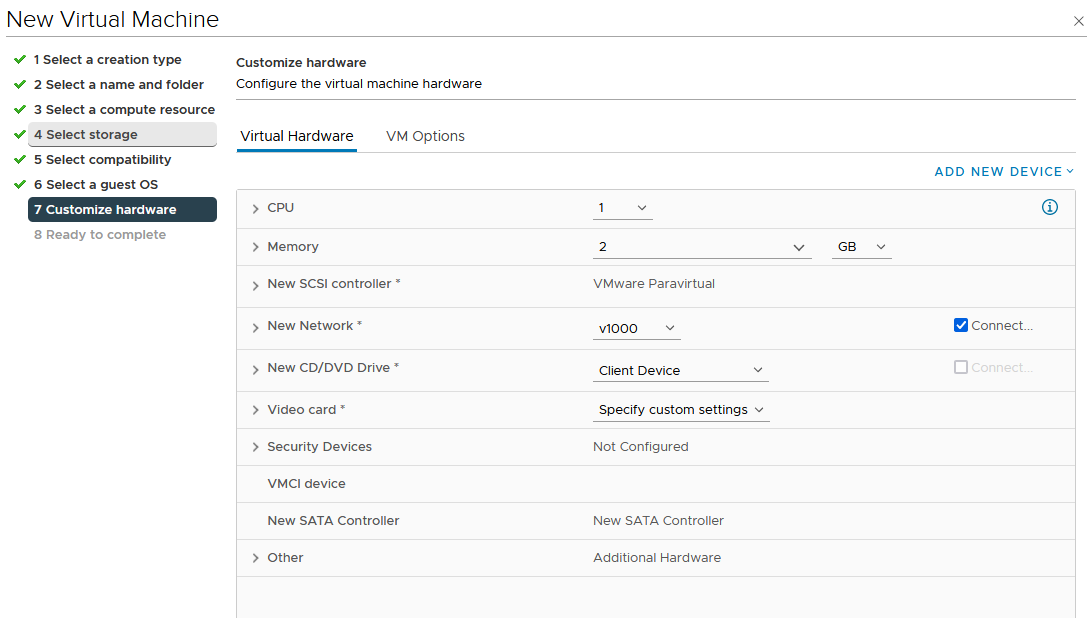
If you want to leave the old mac-address on the network card, you have to set it manually:
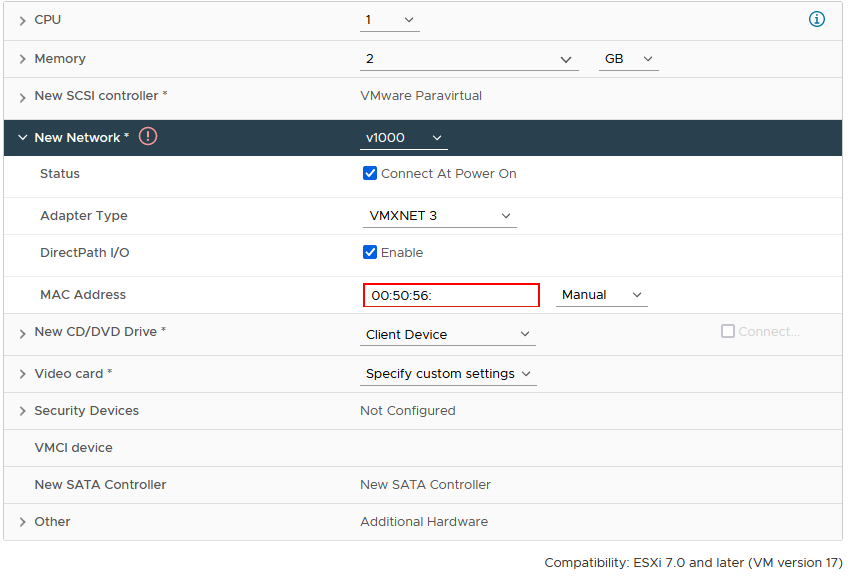
After creating a virtual server, you need to connect via SSH into the ESXi host and convert the disk from Thick to Thin provision and specify its location, i.e. the name of the server you created above.
vmkfstools -i /vmfs/volumes/NFS/disk name/disk name.vmdk(what we converted in the previous step) -d thin /vmfs/volumes/storage name on ESXi/server name/disk name.vmdkAfter the successful conversion, you should connect the disk to the server. Again, go to the web interface for ESXi or vCenter, find the desired server, right-click on its name and select “Edit Settings”.
In the window that opens, on the right side, click on “ADD NEW DEVICE” and select “Existing Hard Drive” from within the drop-down list.
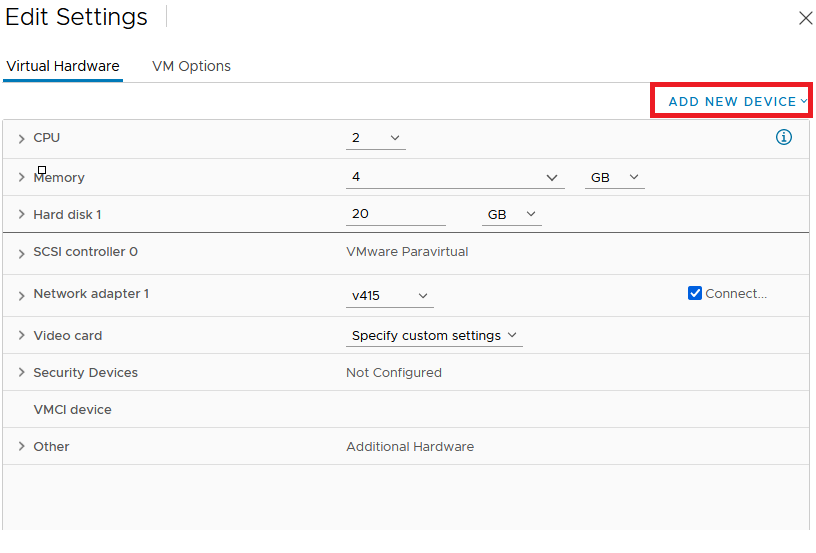
On our storage - ESXi disk, find the server and disk which we converted earlier, and click “OK”.
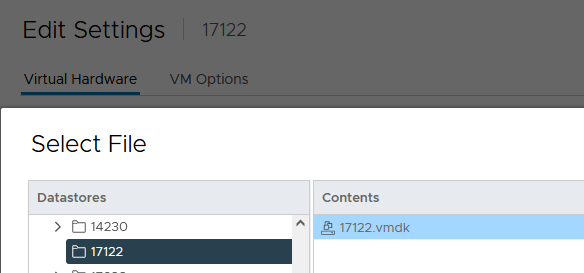
As a result of these actions, a virtual server will be created:
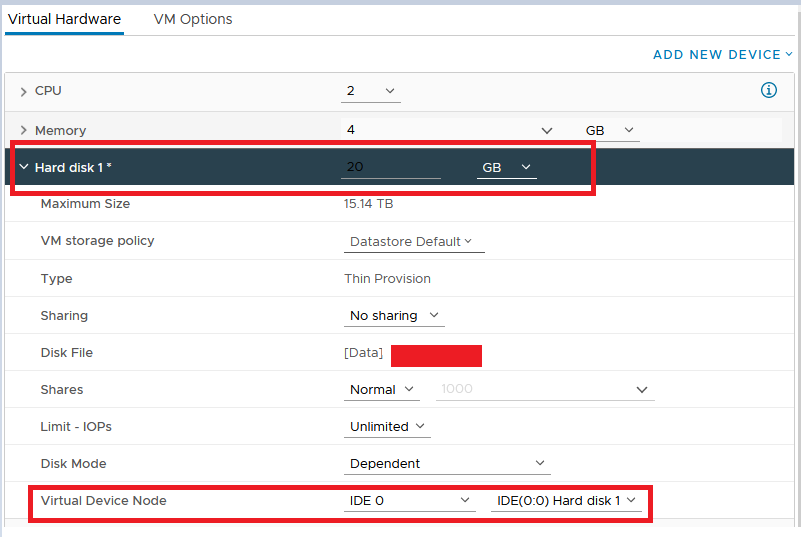
To start the server, you need to select the IDE controller in the disk settings in the “Virtual Device Node” section. Otherwise, when the system boots, a “Disk not found” message will appear.
The steps described above for creating a virtual server and connecting a disk will be enough to correctly start the system if the “Virtio-SCSI” interface was on the source server in the disk settings. You can check the interface type in the oVirt settings menu on the virtual server itself in the “Compute >> Virtual Machines” section. Just find the server and go to “Disks”:
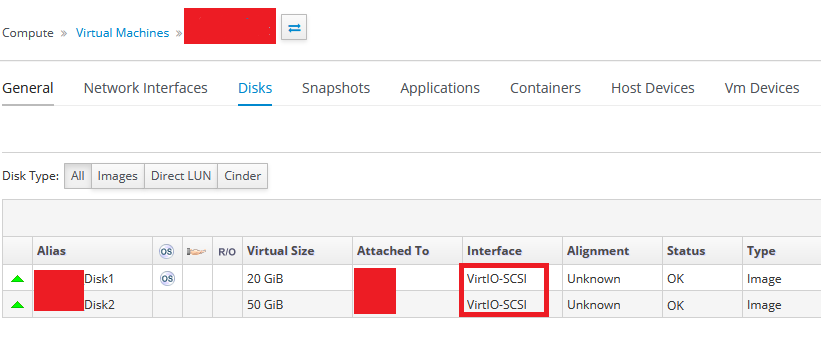
During the migration process, we encountered the problem of migrating servers from Virtio, which is an old controller and the disks in /etc/fstab are not labeled sda as in newer systems, but rather they are named vda. To transfer these kinds of servers, we employed the following solution: before starting the system, you must connect LiveCD and perform the following steps:
- Boot from LiveCD;
- Create and mount disks, for example:
mount /dev/sda1 /mnt/sda1; - Go to the mnt partition and connect to the system via chroot by running these commands:
mount -t proc proc /sda1/proc
mount -t sysfs sys /sda1/sys
mount -o bind /dev /sda1/dev
mount -t devpts pts /sda1/dev/pts

chroot /sda1
After logging in (chroot), you need to change the name of the disks in fstab and rebuild the grub configuration file:
vim /etc/fstabgrub2-mkconfig -o /boot/grub2/grub.cfg
After completing these steps, restart the server.
This solution allowed us to solve the problem of migrating a large fleet of servers. On average, transferring a disk with settings and starting a 15-20 GB server took from about 20 to 30 minutes, and larger ones with a volume of about 100 GB took from about one and a half to two hours.