

Many of you love it when work gets done for you, so automating your routine processes isn't a bad idea at all. Jumping ahead, let me say that the author of this text prefers writing various services in Python and doesn’t have much fondness for "builders."
However, mastering coding magic (even with neural networks) remains the privilege of a small group of geeks, so no-code tools are quite popular. One such powerful tool is n8n—a platform with open-source code designed to automate workflows and integrate various applications and services.
Starting in September 2019 as a personal project by Yann Oberlé, who aimed to make automation accessible to a broader audience beyond just experienced developers, n8n eventually became an international service solving the problem of disparate applications and the complexities of traditional programming in workflow automation.
What kind of tool is this thing called n8n?
The name n8n is a play on the word “nodemation”, which combines node and automation. This highlights its visual approach to no-code automation based on connecting blocks (nodes). It allows you to easily connect any applications with APIs, manipulate their data with minimal or no programming effort. The popularity of n8n stems from this freedom: customization options, running your own code, and deploying on your own servers without needing expensive software (even for the community version).
Who can benefit from such a tool? Practically everyone is looking to optimize their work. Marketers can automate advertising campaigns, e-commerce owners can process orders, and financial and operations departments use n8n to automate routine tasks ranging from billing to internal reporting. Essentially, it's a digital assistant that connects your applications and performs scheduled tasks or event-driven actions. With the ability to integrate language models, n8n has gained significant popularity during the neural network boom.
A key driver in n8n’s development is its active community. The platform offers an extensive library of ready-made nodes for connecting to dozens of services and allows users to create their own. Workflows created by users are shared within the community, becoming accessible to others. As of late 2024, the number of workflows available on the public n8n marketplace exceeded 3,292. This makes n8n a flexible and continually expanding tool.
The question arises: what’s better—n8n or custom applications written in Python or other languages? The answer, as often is the case, depends on the task (the author still votes for clean code). Custom scripts offer maximum flexibility and control but require time for development and maintenance. n8n allows you to quickly assemble visual automations, especially for standard integrations. Moreover, it can be extended with Python or JavaScript code, combining no-code convenience with programming power. Sometimes, assembling a process in n8n is easier and faster than writing and maintaining a separate application.
The n8n community has already shared numerous ready-made solutions. Among the most popular workflows are social media posting automation, data synchronization between CRM systems and Google Sheets, email processing, automated responses in Slack and WhatsApp using AI, task management in Trello or Jira, data backups, notifications triggered by events, and even complex chains for DevOps, among many others. These templates provide an excellent starting point for creating your own automations.
How to Quickly Start Using n8n on Your Own Server
Are you eager to build your first automations with n8n but want to avoid the hassle of installation and configuration? Let's walk through the process step-by-step so you can get started without any headaches.
With a virtual or dedicated server from HOSTKEY, where n8n is already pre-installed, you can dive straight into creating your workflows—no need to worry about installation nuances or configuration details.
We've been there ourselves: even seemingly straightforward installations can encounter hidden errors, dependencies, and other surprises that could delay your start for hours. That's why our engineers have handled all the routine setup work for you.
Order a server with pre-installed n8n, log into the control panel—and begin automating. Quickly, conveniently, and without any unnecessary obstacles.
Ordering a Server with Pre-installed n8n
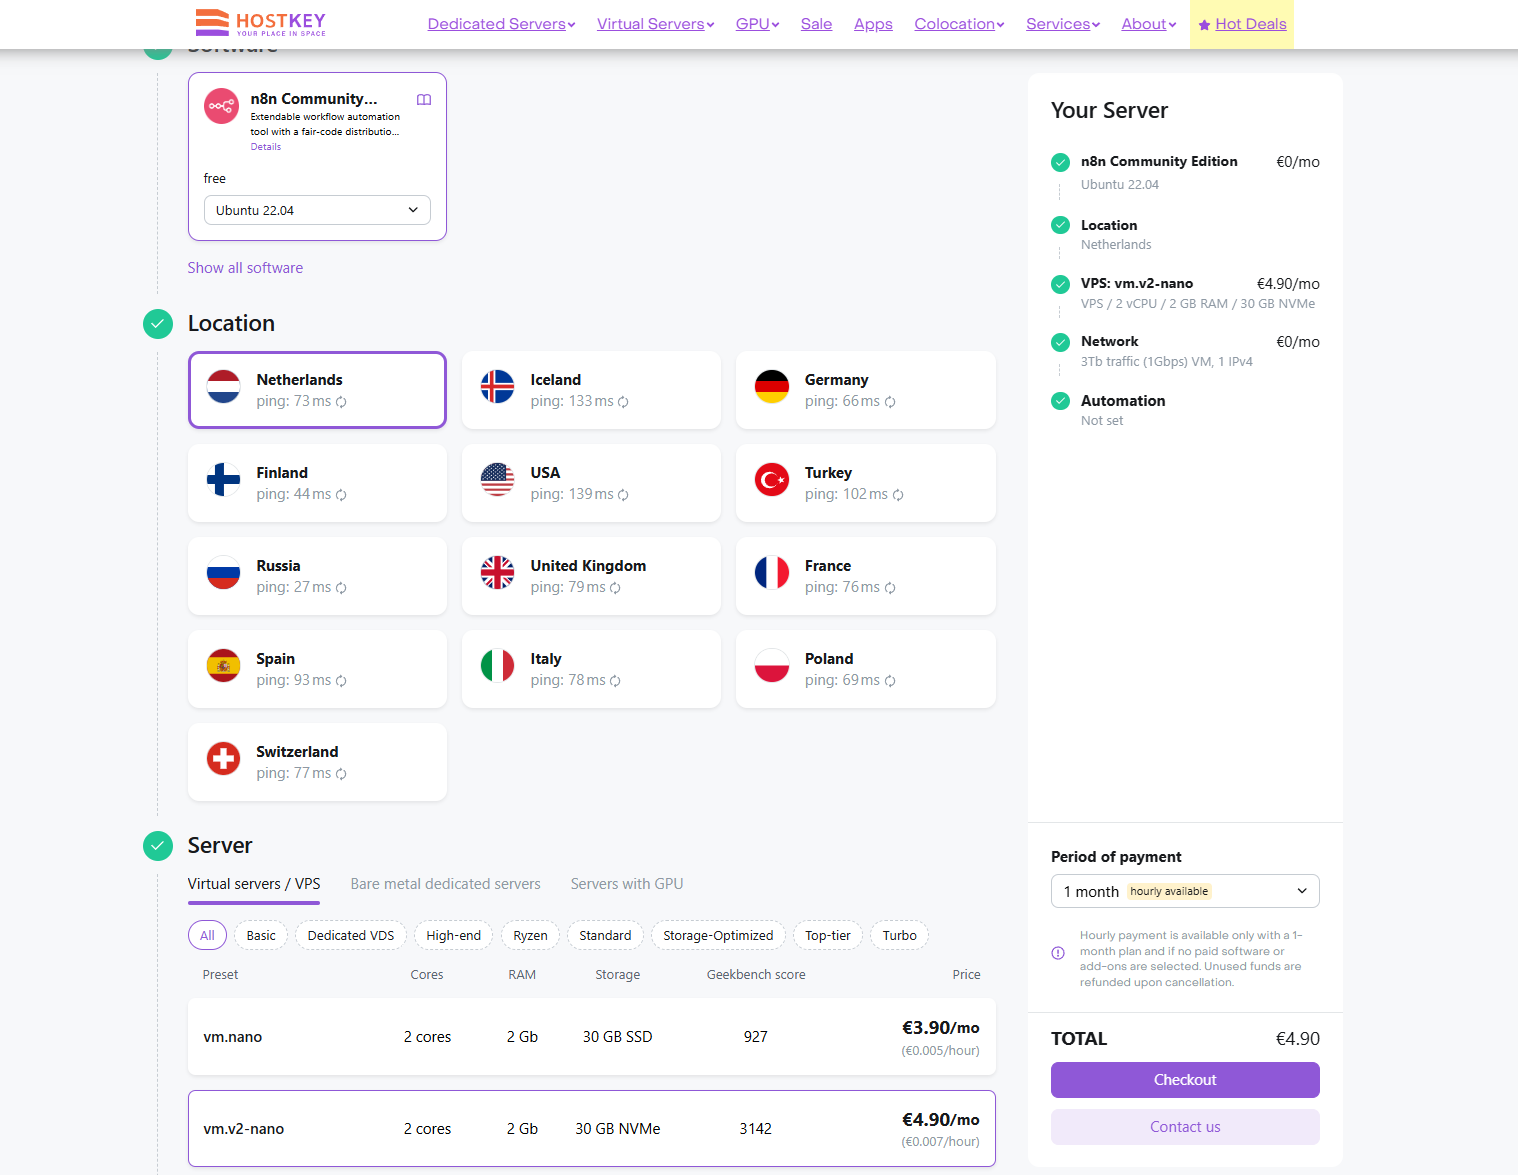
To set up a server with n8n effortlessly, head over to the HOSTKEY Applications Marketplace. Simply visit https://hostkey.com/apps/business-apps/n8n/ and click on “Order” from there, select the optimal location, payment term, and server type that best suits your needs.
For 1–2 workflows, a VPS from the nano line should suffice. Once you've made your selection, proceed with placing your order. If you don't already have an account, register in your personal dashboard; if you do, simply log in. After completing these steps, all that's left is to wait for the server deployment.
Setting Up Your First Business Workflow: Telegram Bot for Orders
Once your server is deployed, follow the link you received to access it. Begin by configuring an administrator account and filling out a brief questionnaire. You can complete this registration process free of charge. The procedure is straightforward; however, if you encounter any confusion, refer to our detailed guide in our documentation.
Our guide also provides answers to frequently asked questions, such as:
- Changing Volume Mounts for n8n: Learn how to adjust the storage settings to ensure your workflows have the necessary resources.
- Configuring Traefik for Domain Name Changes: Step-by-step instructions on updating the domain name used by your n8n instance.
- Migrating Docker Containers to a Non-root User: Ensure enhanced security by running containers without elevated privileges.
- Updating n8n: Keep your automation tool up-to-date with the latest features and security patches.
Creating Our First Simple Workflow
We will look at a specific small example of business process automation: we'll create a Telegram bot that communicates with the user about their orders, which our site saves in a table on Google Docs. And for now, we'll do without neural networks.
Our technical task is as follows: create a Telegram bot in n8n that responds to the /order command, finds the row by its orderid in the order table from Google Sheets and displays it to the user.
Configuring n8n
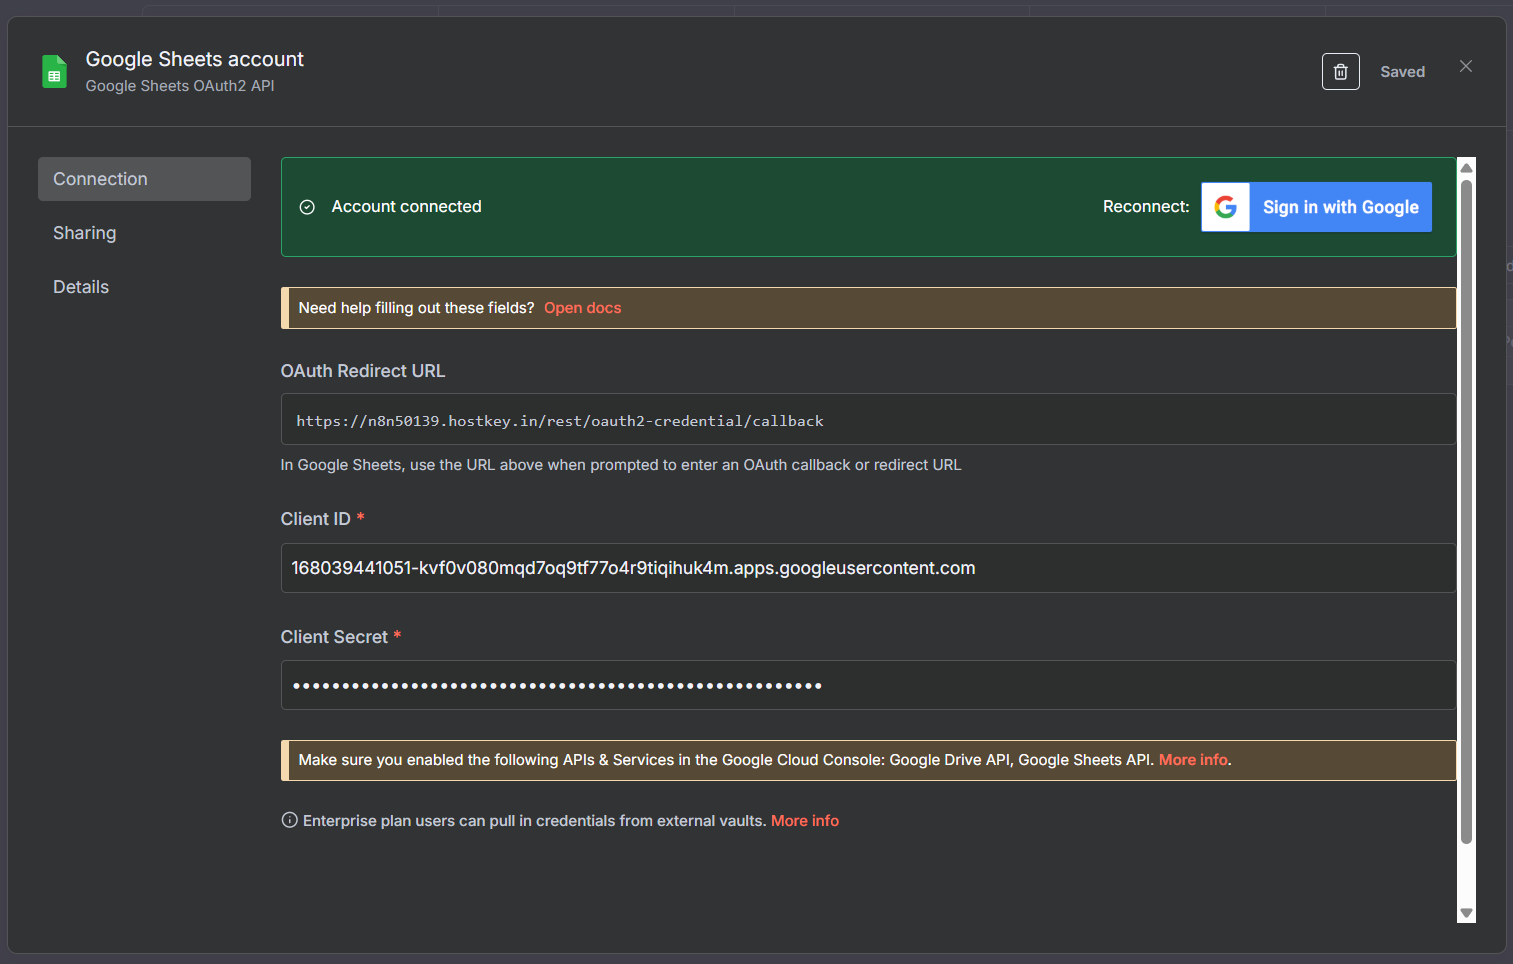
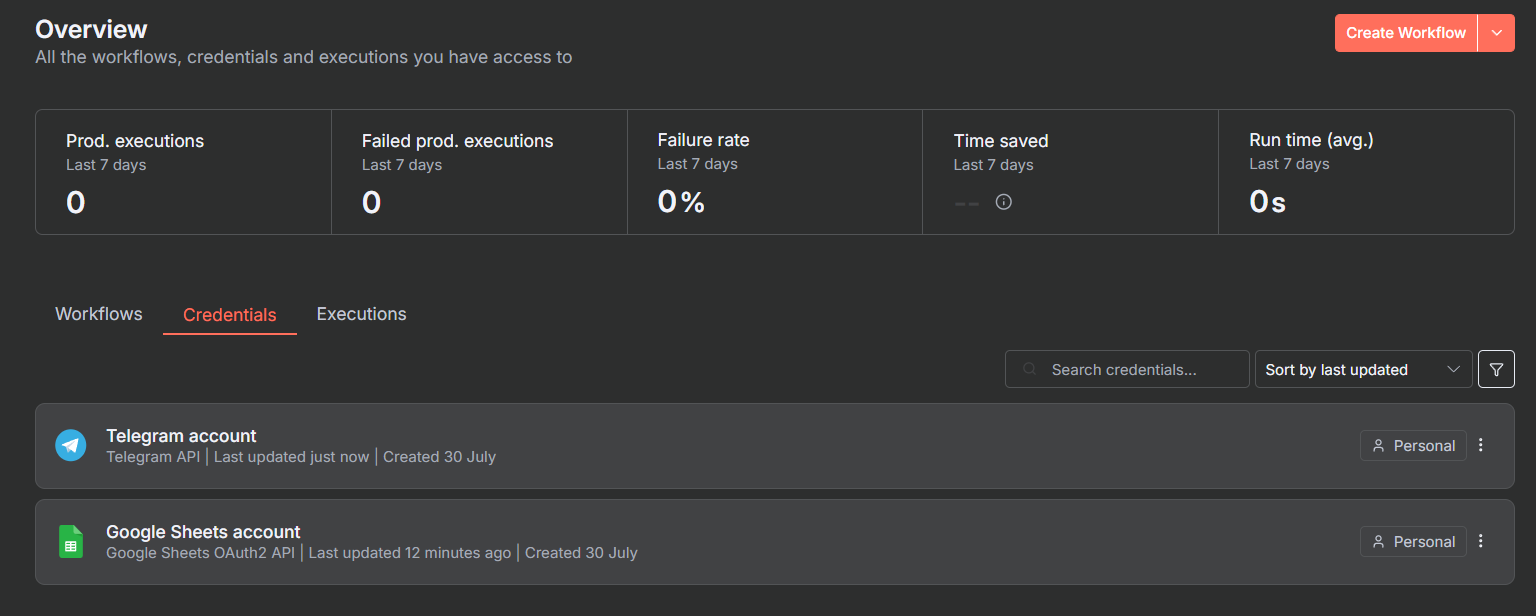
Configure Google Sheets by adding credentials for Google Sheets in n8n, choosing the type Google Sheets OAuth2 in the Credentials section.
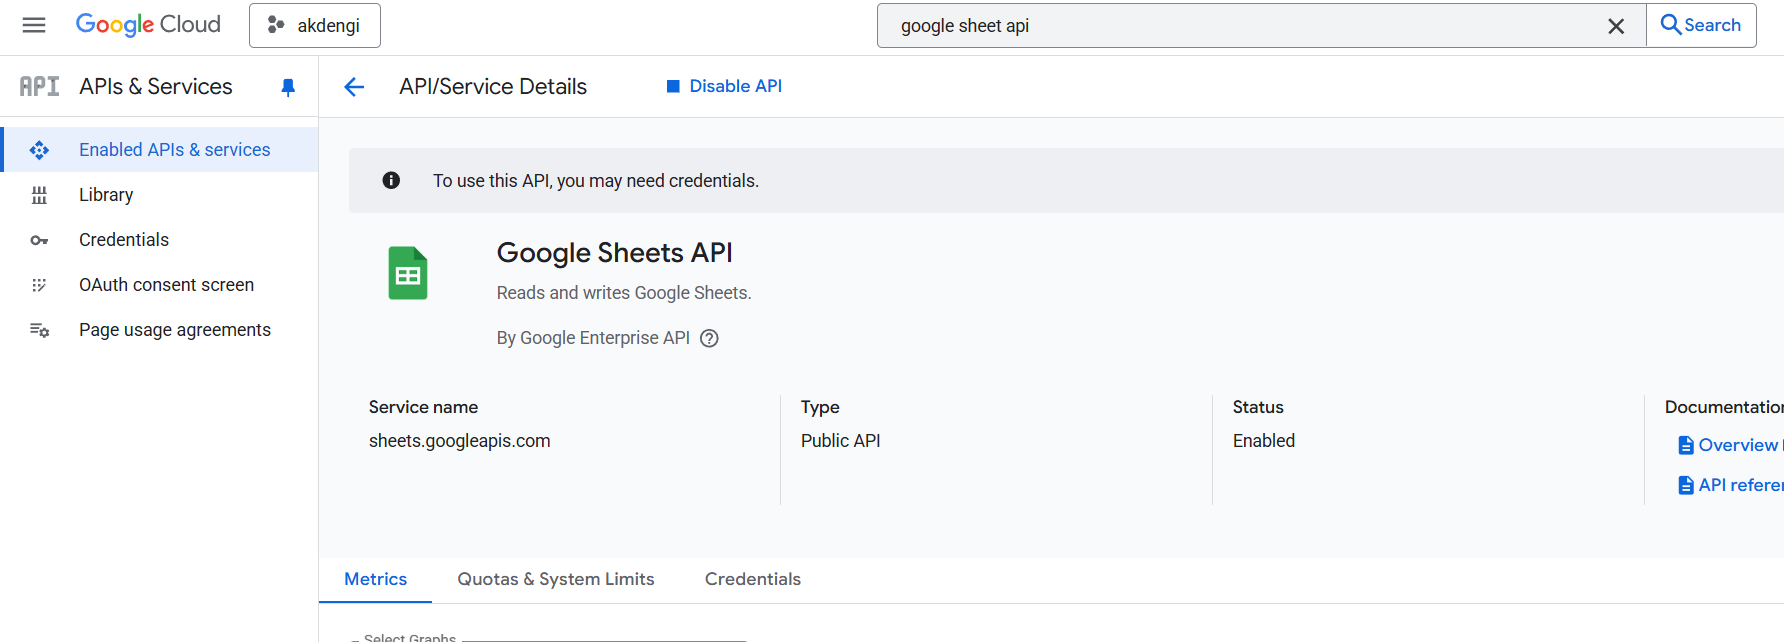
To obtain the Client ID and Client Secret, configure Google Cloud and API. For this, go to Google Cloud Console (https://console.cloud.google.com/), create a new project there (or use an existing one). Using search, find and enable the Google Sheets API.
Now we create an OAuth client and then return to the Google Sheets API section in Google Cloud Console. There, for our OAuth client, we:
- Specify the Callback URI from n8n (OAuth Redirect URL).
- Copy Client ID and Client Secret into the fields in n8n.
Publish your application for everyone in Google Cloud Console.
After that, click on the "Sign in with Google" icon and connect n8n to your tables.
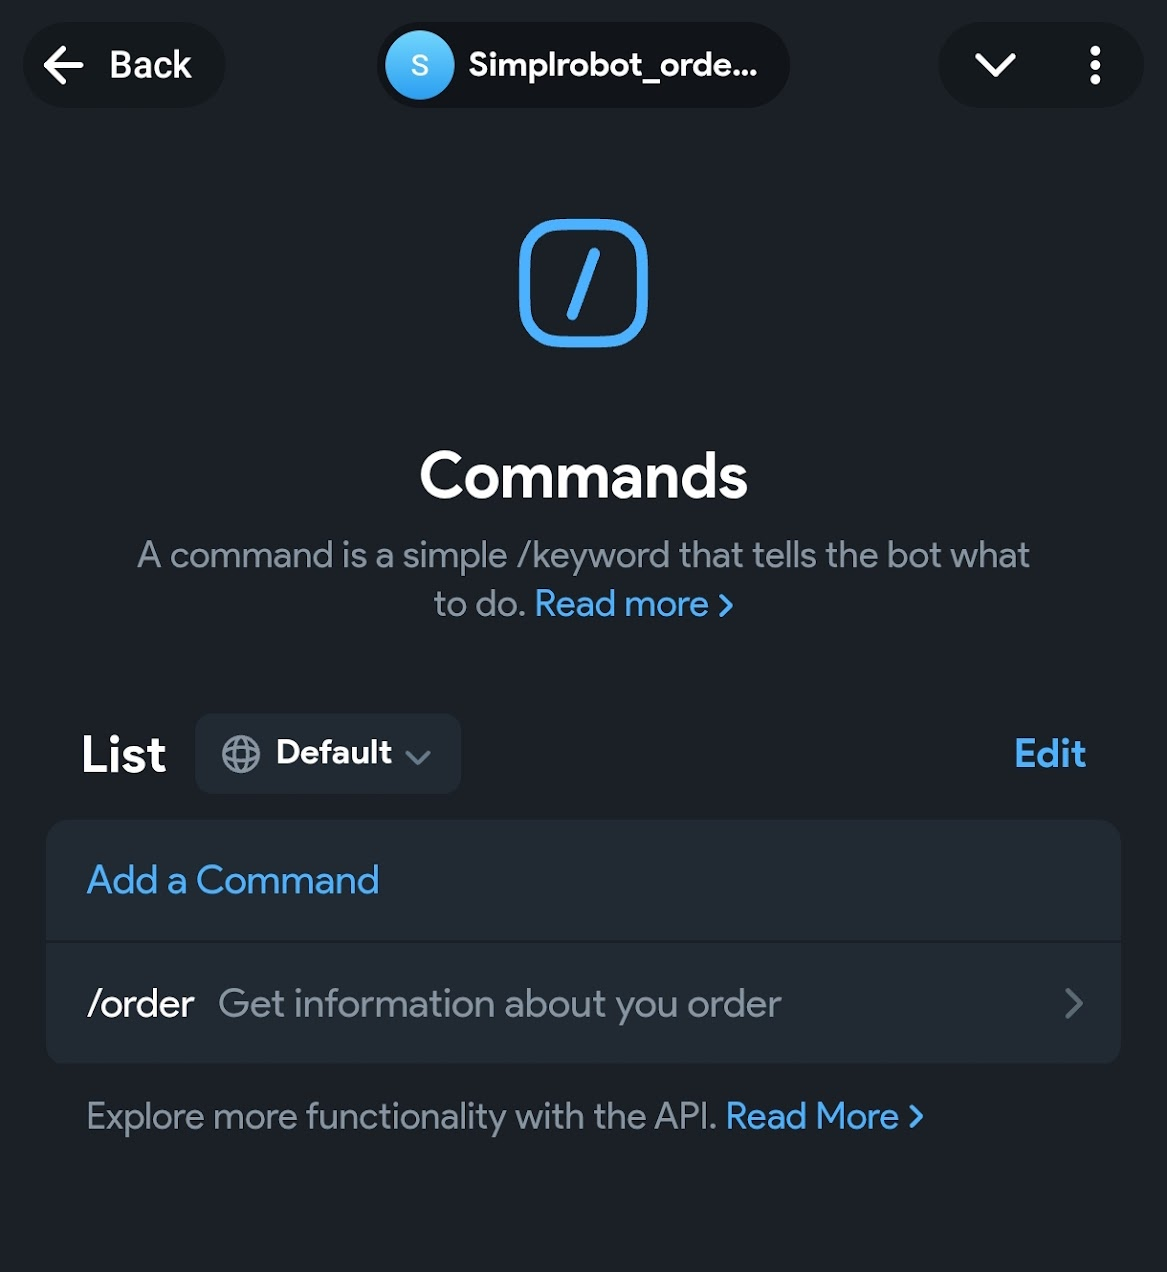
We do something similar with Telegram, where we create a Telegram bot:
- Open @BotFather on Telegram.
- Create a new bot following the instructions. Obtain a token for the bot and set up the command /order (get information about user order) for the bot.
Then we set permissions for the Telegram bot: go to + → Credentials → Create new → Telegram and enter our token.
Building Our Automation
After that, we can proceed directly to automation. Create a new workflow in n8n and name it, for example, `simplrobot_order`.
The entire "programming" process in n8n can be described by the following algorithm:
- Place a node, set its parameters,
- Drag data into the necessary fields from previous nodes,
- Set the required values in lists and cells,
- Run this node and move on to the next one.
Since we are testing a Telegram bot, we will need both to receive data from chat with it and send messages back to the chat.
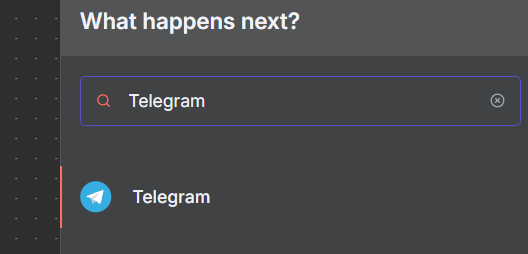
The first node will be Telegram Trigger, which reacts to the event "new message in chat". For this, call up the nodes panel (plus on the right or Tab key) and enter Telegram in the search.
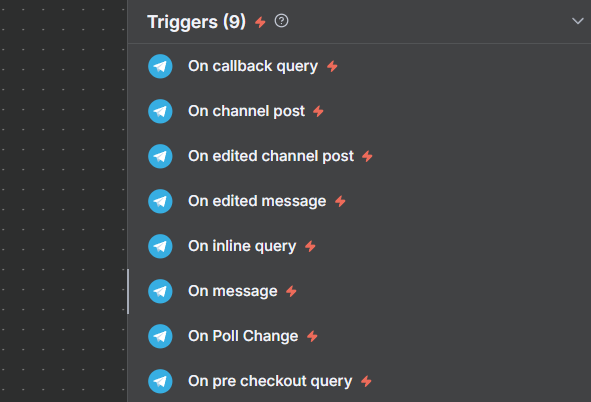
Then select Triggers - On Message.
The node settings window will open.
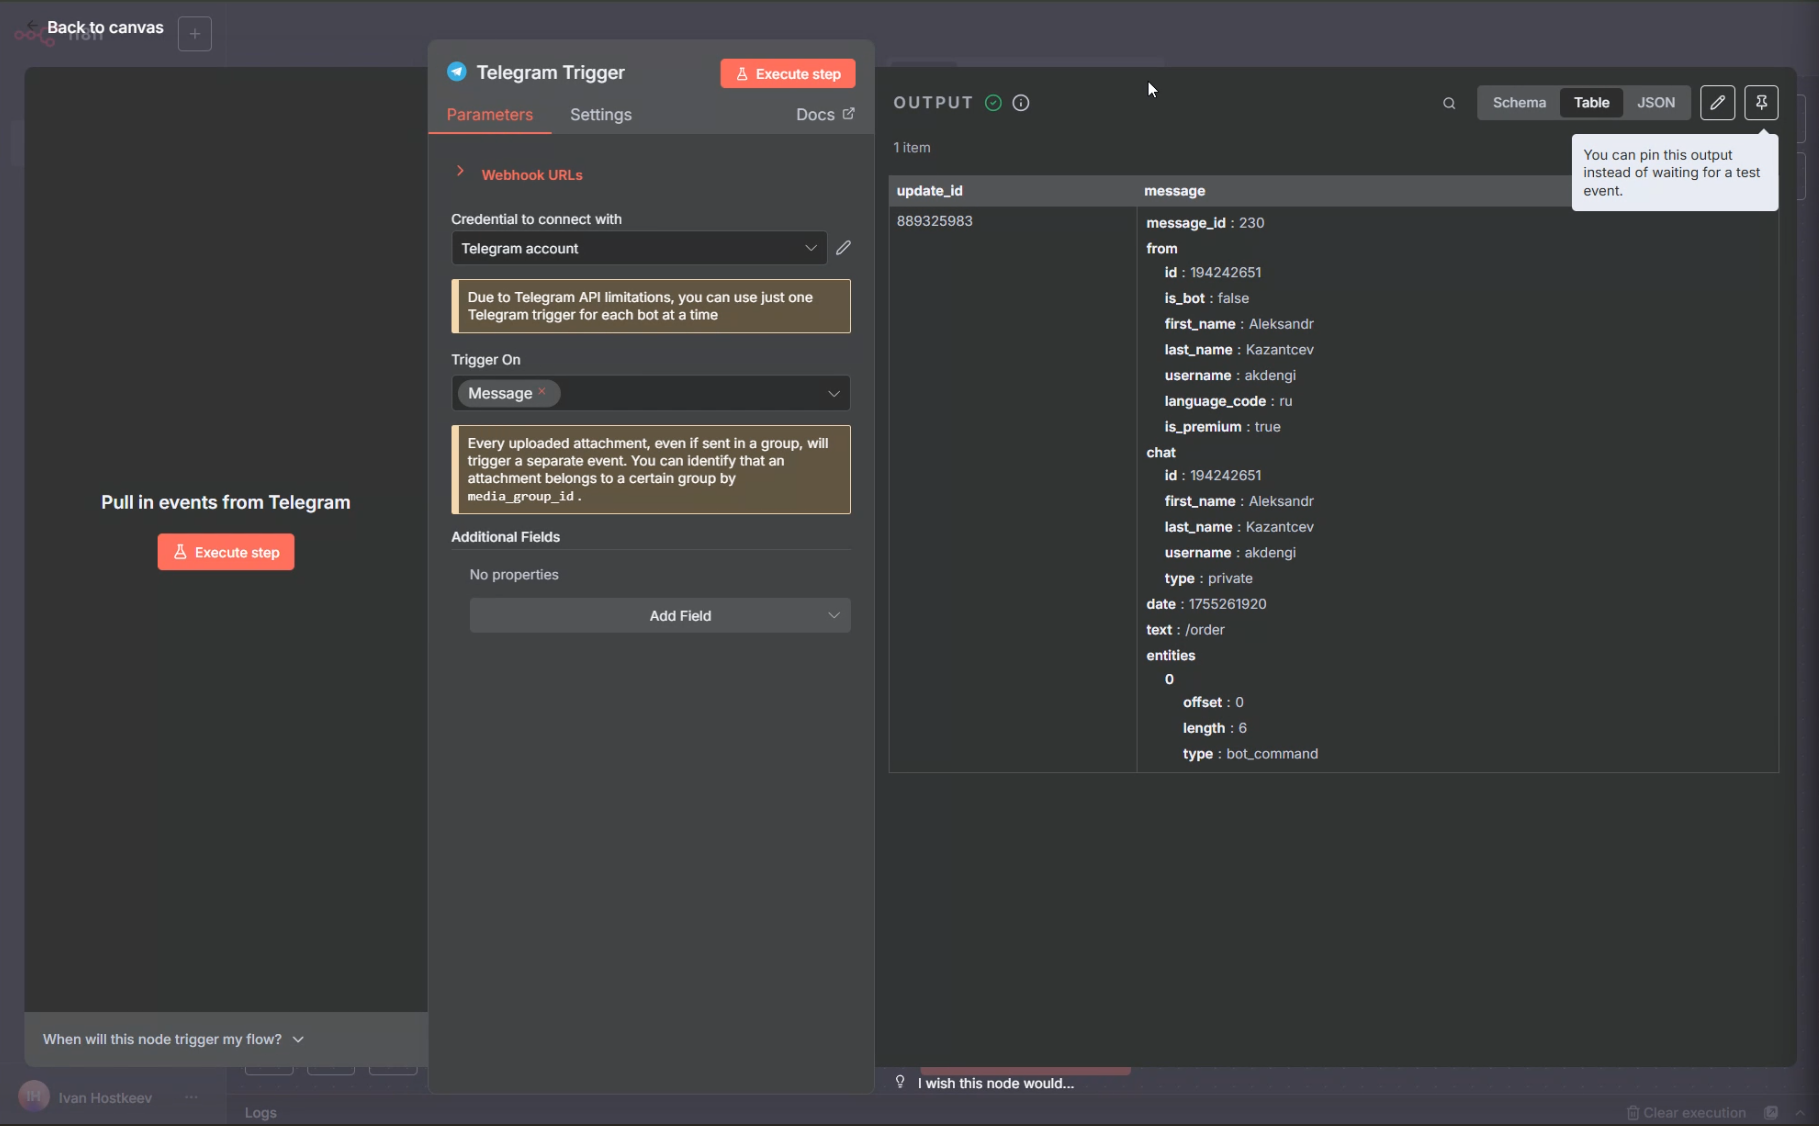
In it, you need to specify your Telegram account that you previously added in Credentials; nothing else is needed. Click the Execute step and select /order from our Telegram bot's menu.
Afterwards, click Back to canvas and, clicking the + at the end of the output from our trigger node, add a new node Switch.
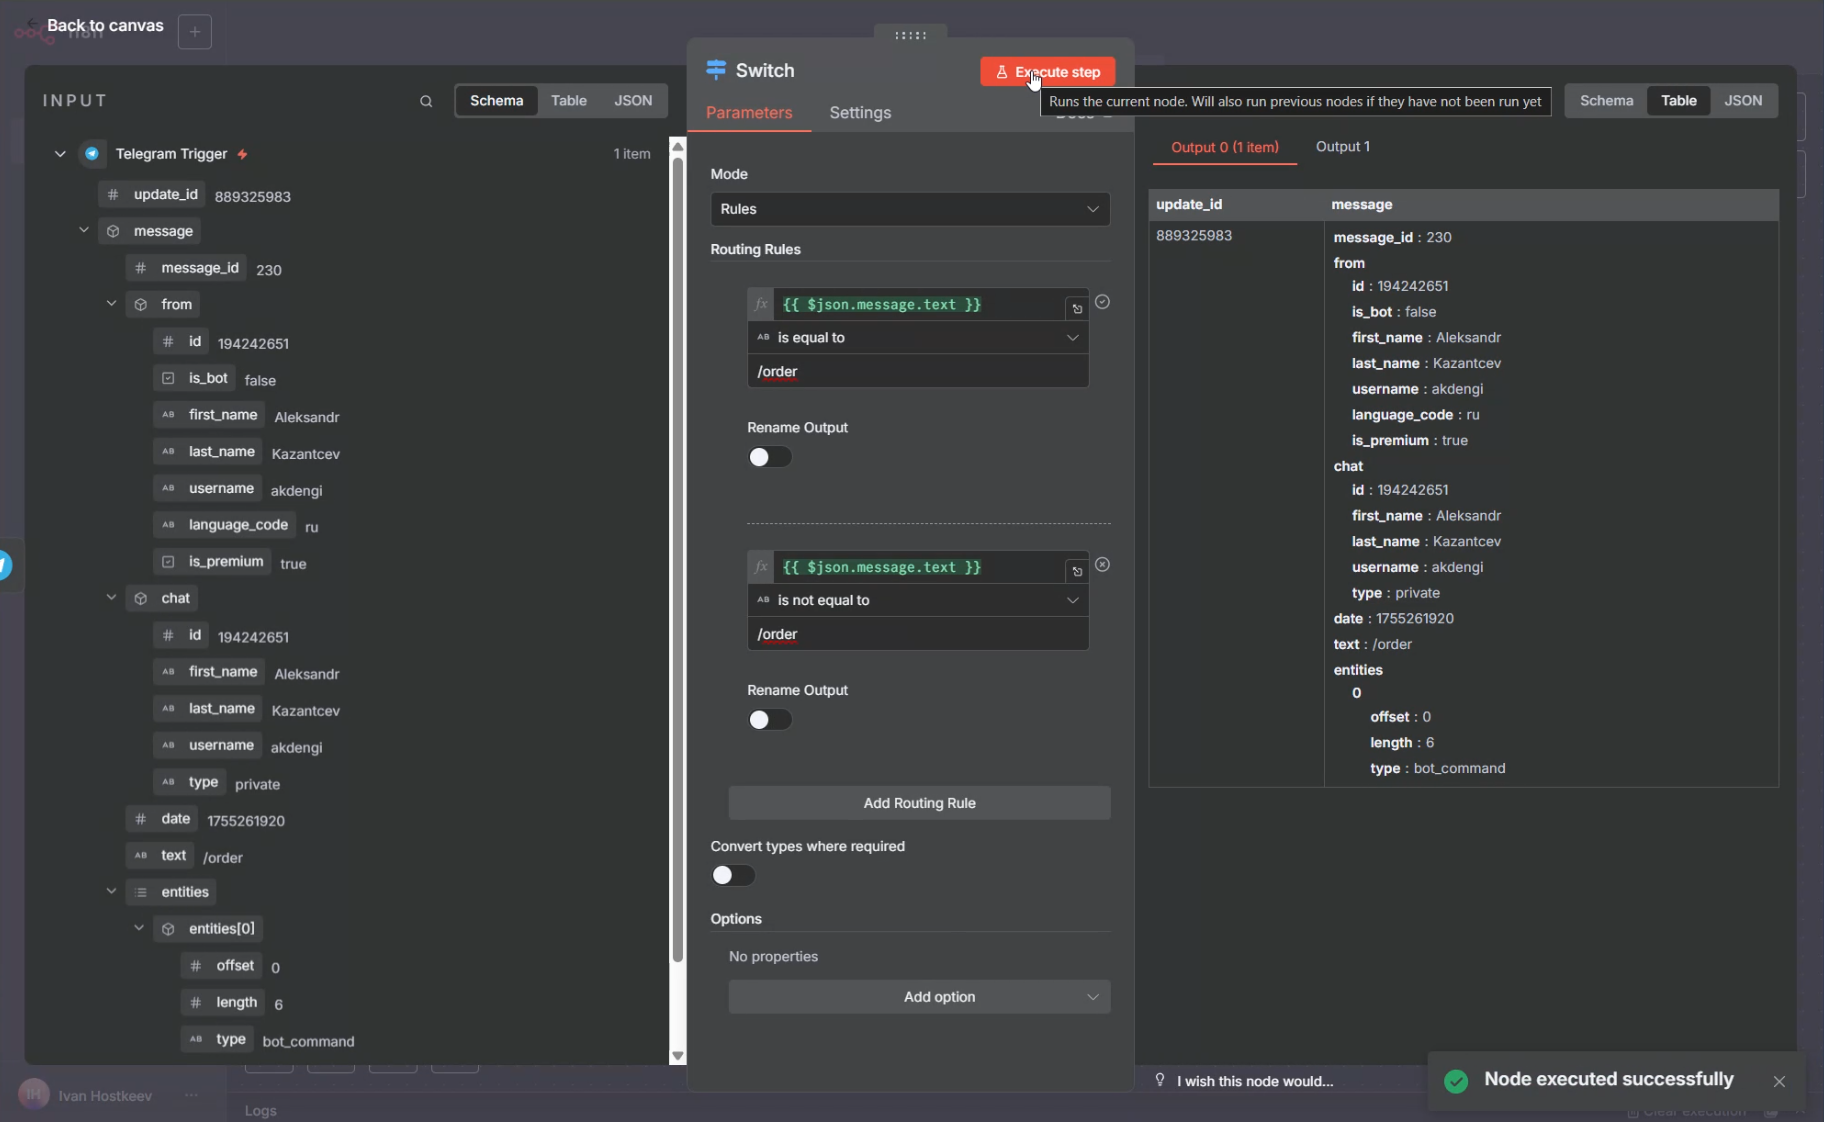
In it, create two rules and, dragging the text field into the Routing Rules condition area, set them to equal and not_equal values /order. Click Execute step again, receive data, and click Back to canvas. Remember to save your results occasionally with the Save button.
On our Switch schema, there are two outputs: 0 for equal/order and 1 if not equal.
Add a node Telegram → Send message and wait response on the branch 0.
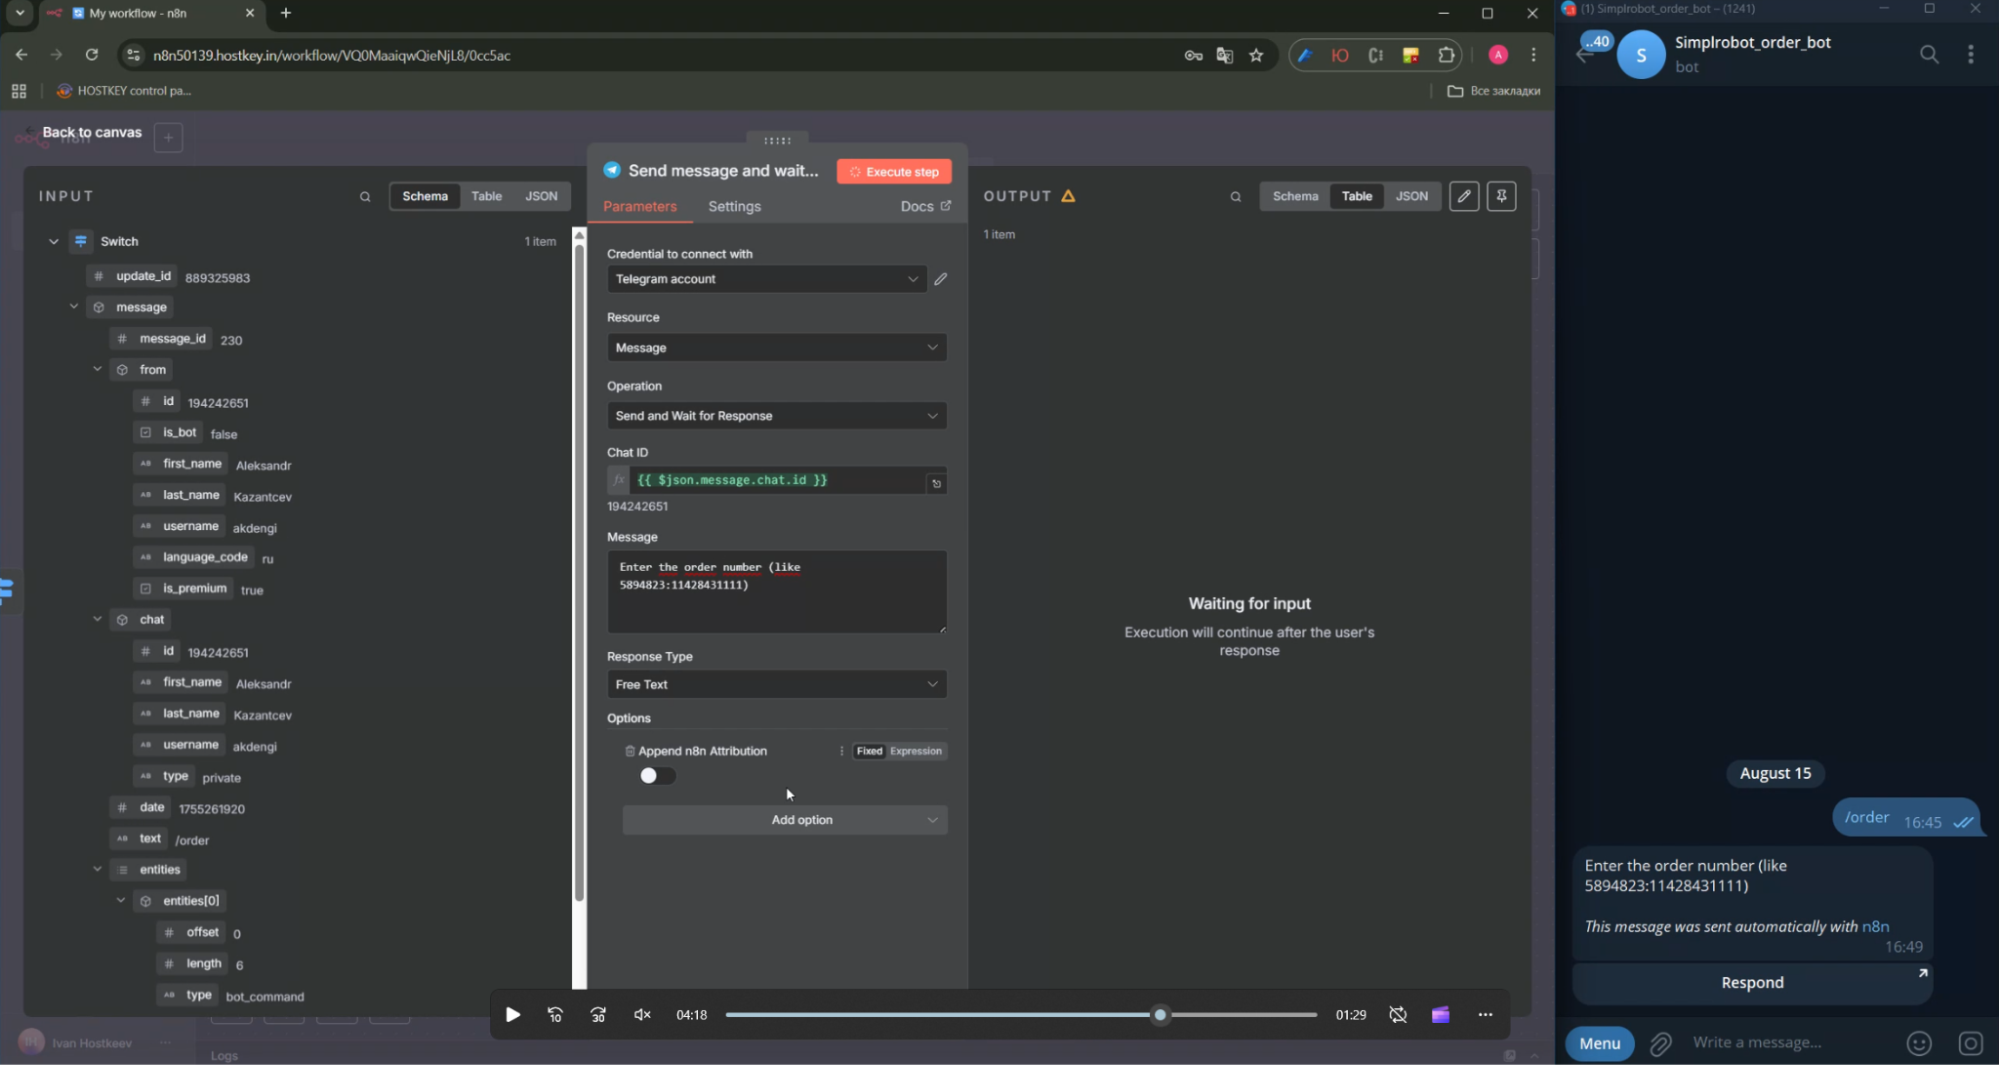
Fill out the form as shown in the screenshot, taking the Chat ID from the id field in the left column of the input data. In the message, write "Enter the order number (e.g., 5894823:11428431111)," and in the Response Type field, select Free Text. Run the Execute step, and a message will appear in the Telegram bot asking to enter the order number with a button labeled Respond.
Clicking the button in the bot will take us to the input field for the order number from n8n.
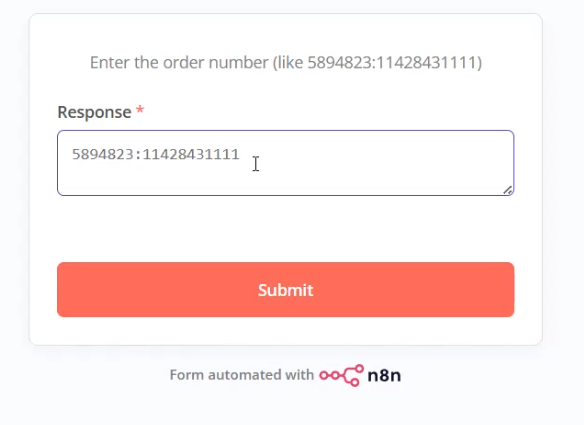
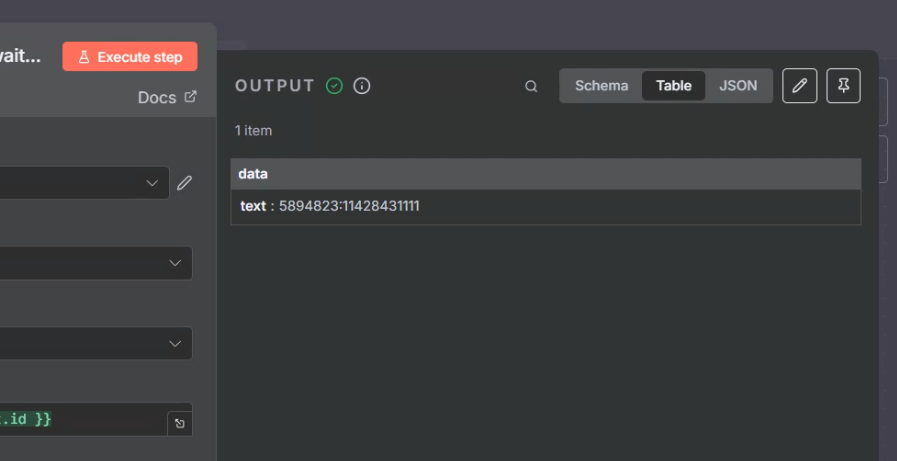
And in the Output field on the right side of the node, the text with this value will appear.
Go back to the canvas and add the Google Sheet - Get Raw(s) in sheet block.
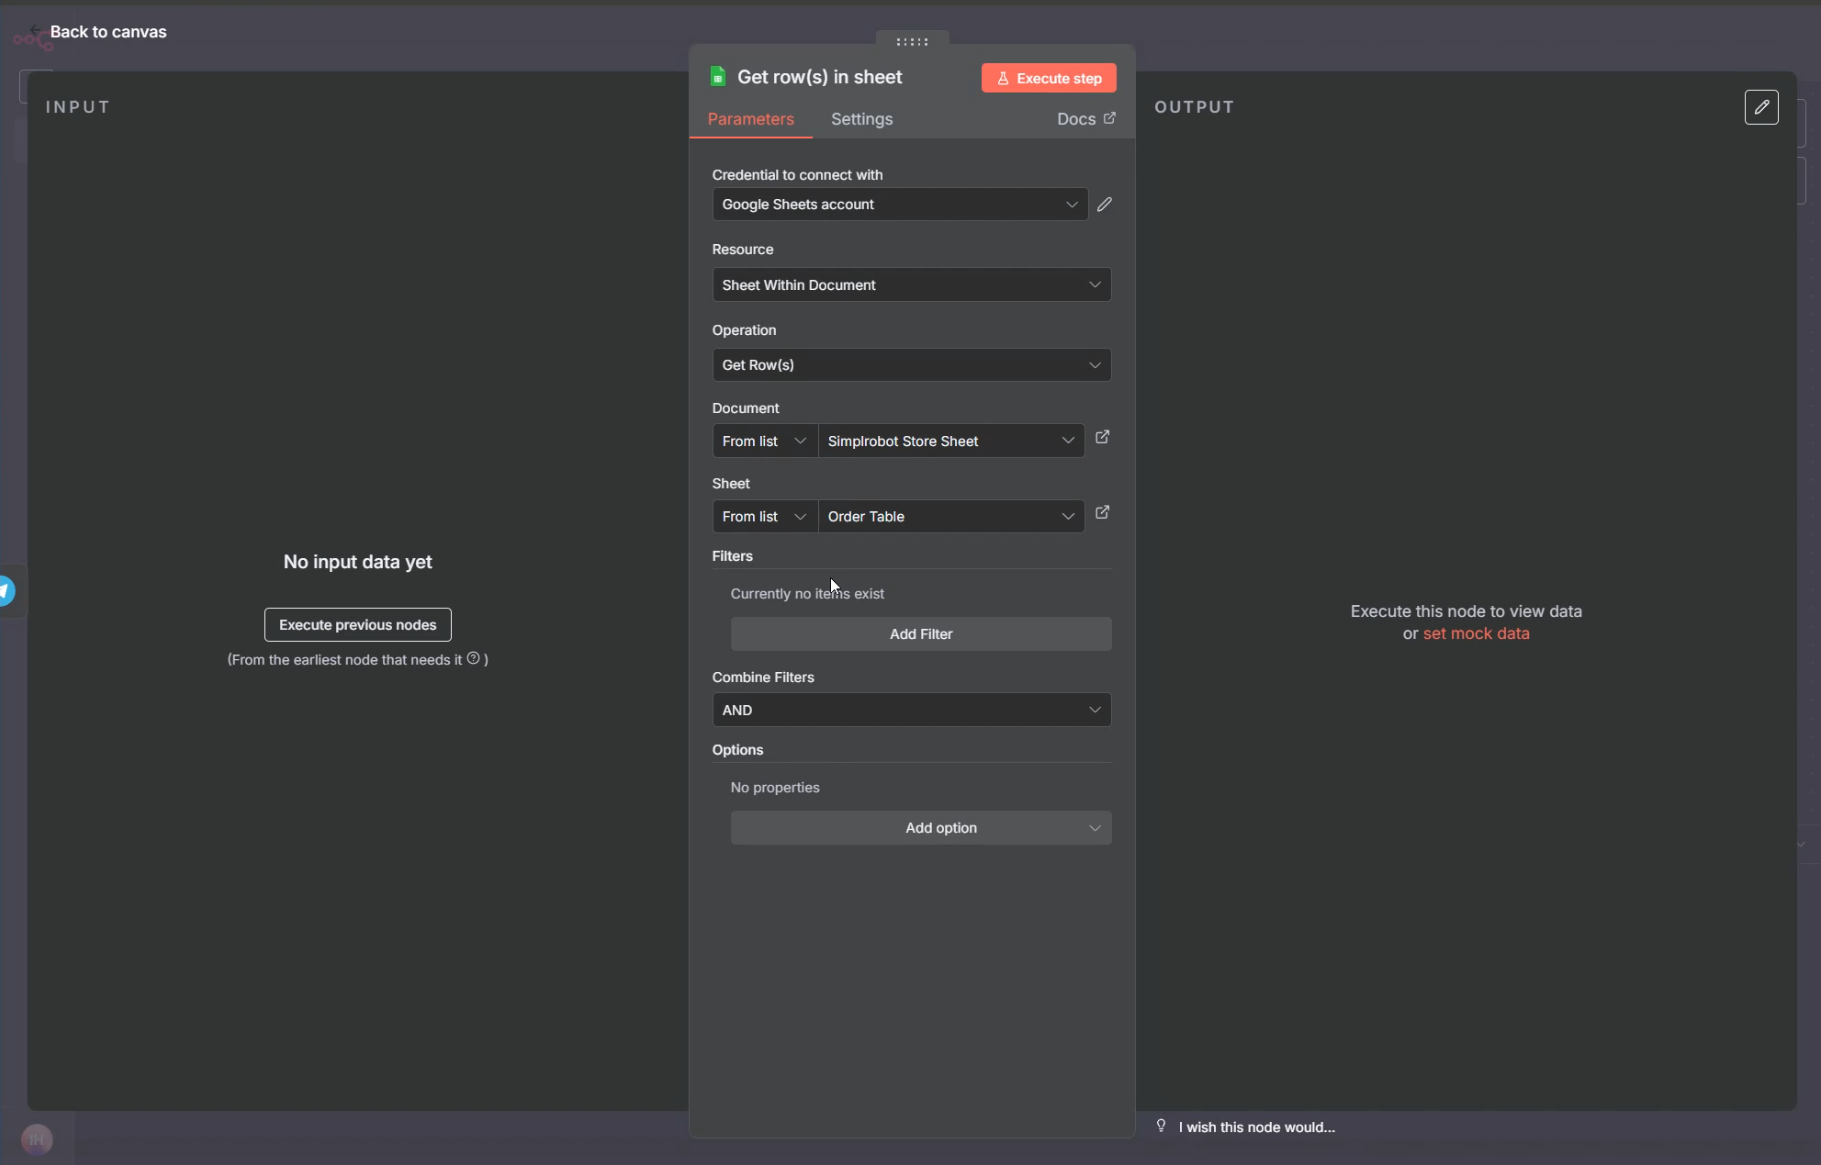
Select your Google Sheets connection, then in Documents, choose your file with the table, and in Sheet, select the specific sheet. Next, click Add Filter, and in the Column field, select orderid (this will automatically load all columns from your table). Drag the text block containing the order number from the left Input column into the Value field. Click Execute step.
If everything is set up correctly, the Output will display a row containing your order.

Go back to the canvas and add the next node: Telegram - Send a text message.
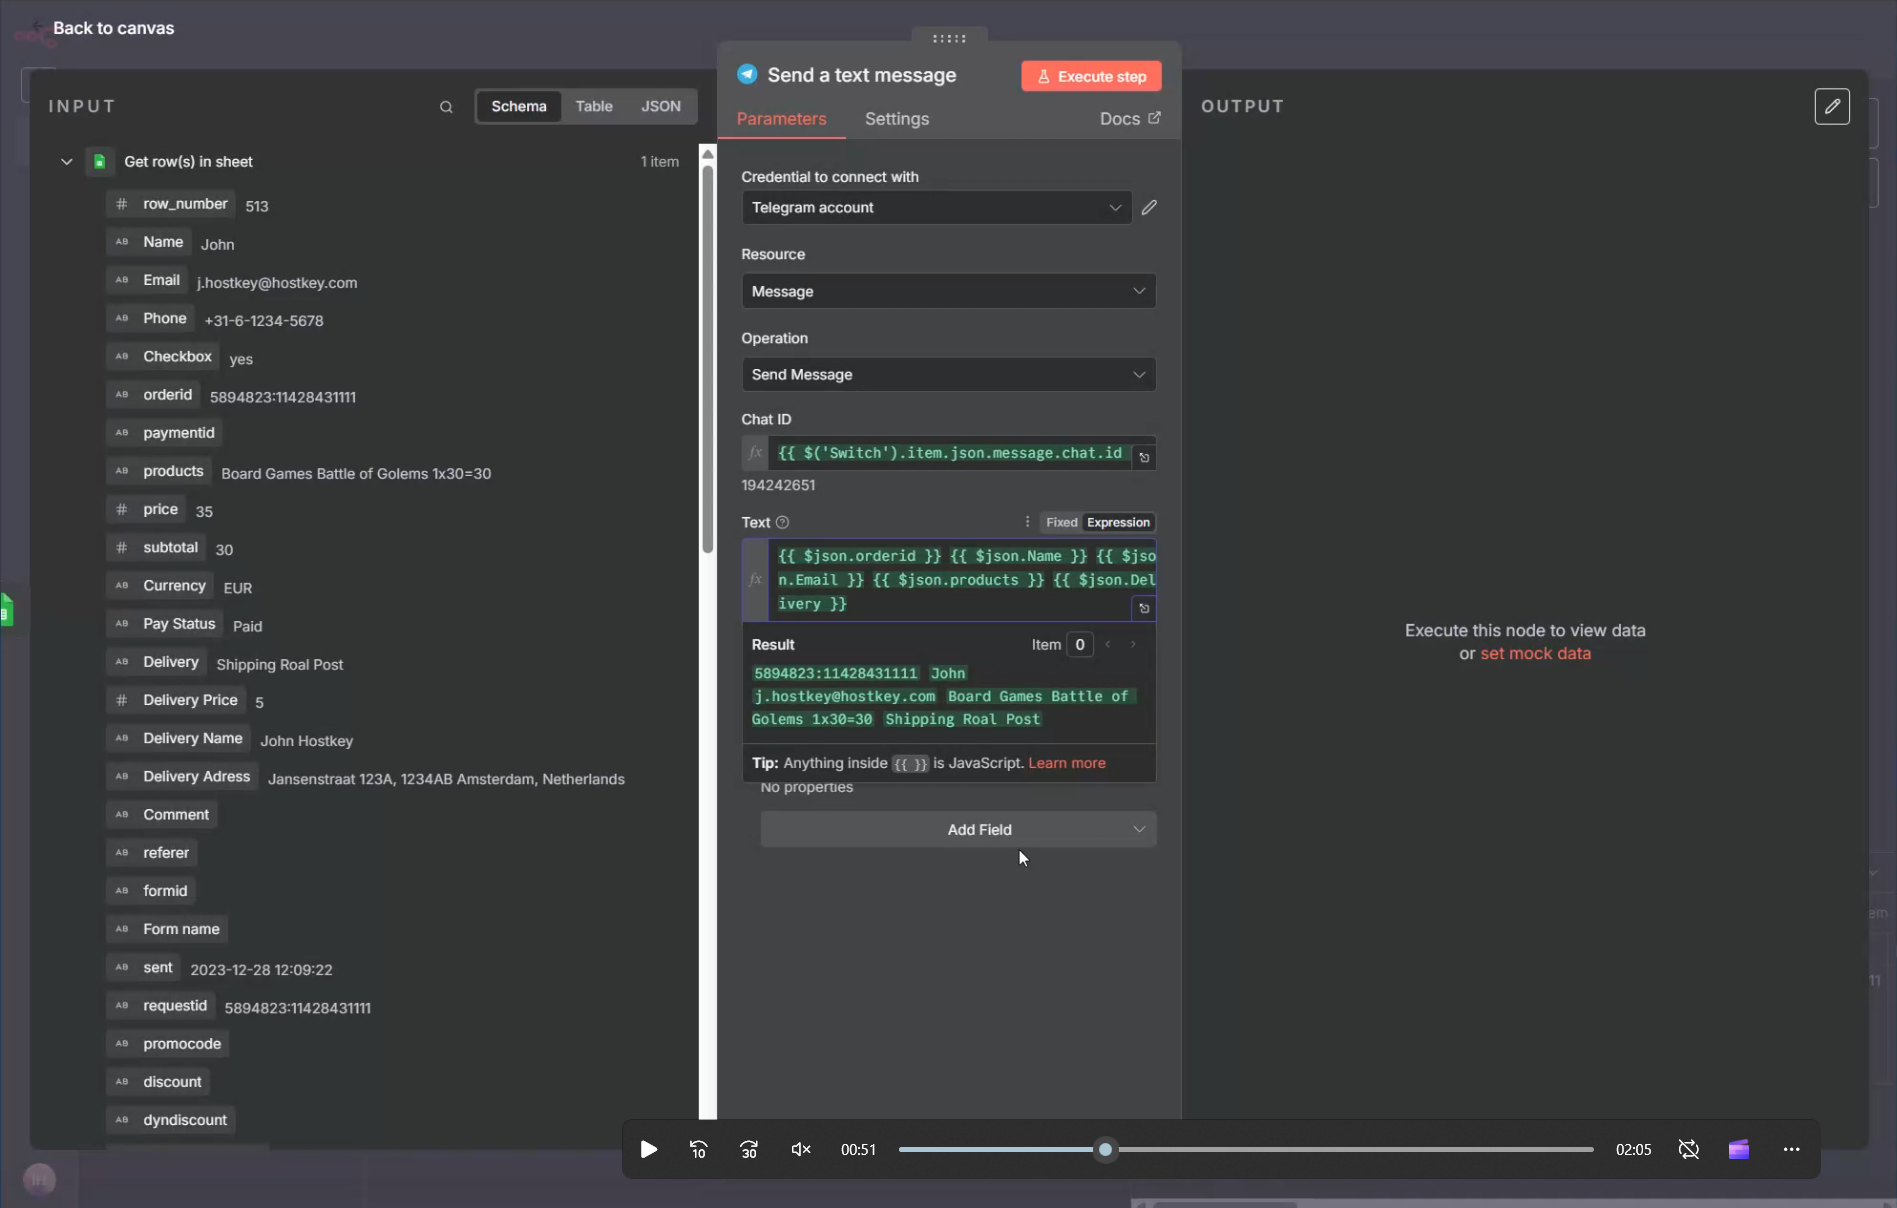
Take the Chat ID value from the id field of the Switch node by scrolling down the Input field. In the Text field, move the necessary output fields and format them as you prefer.
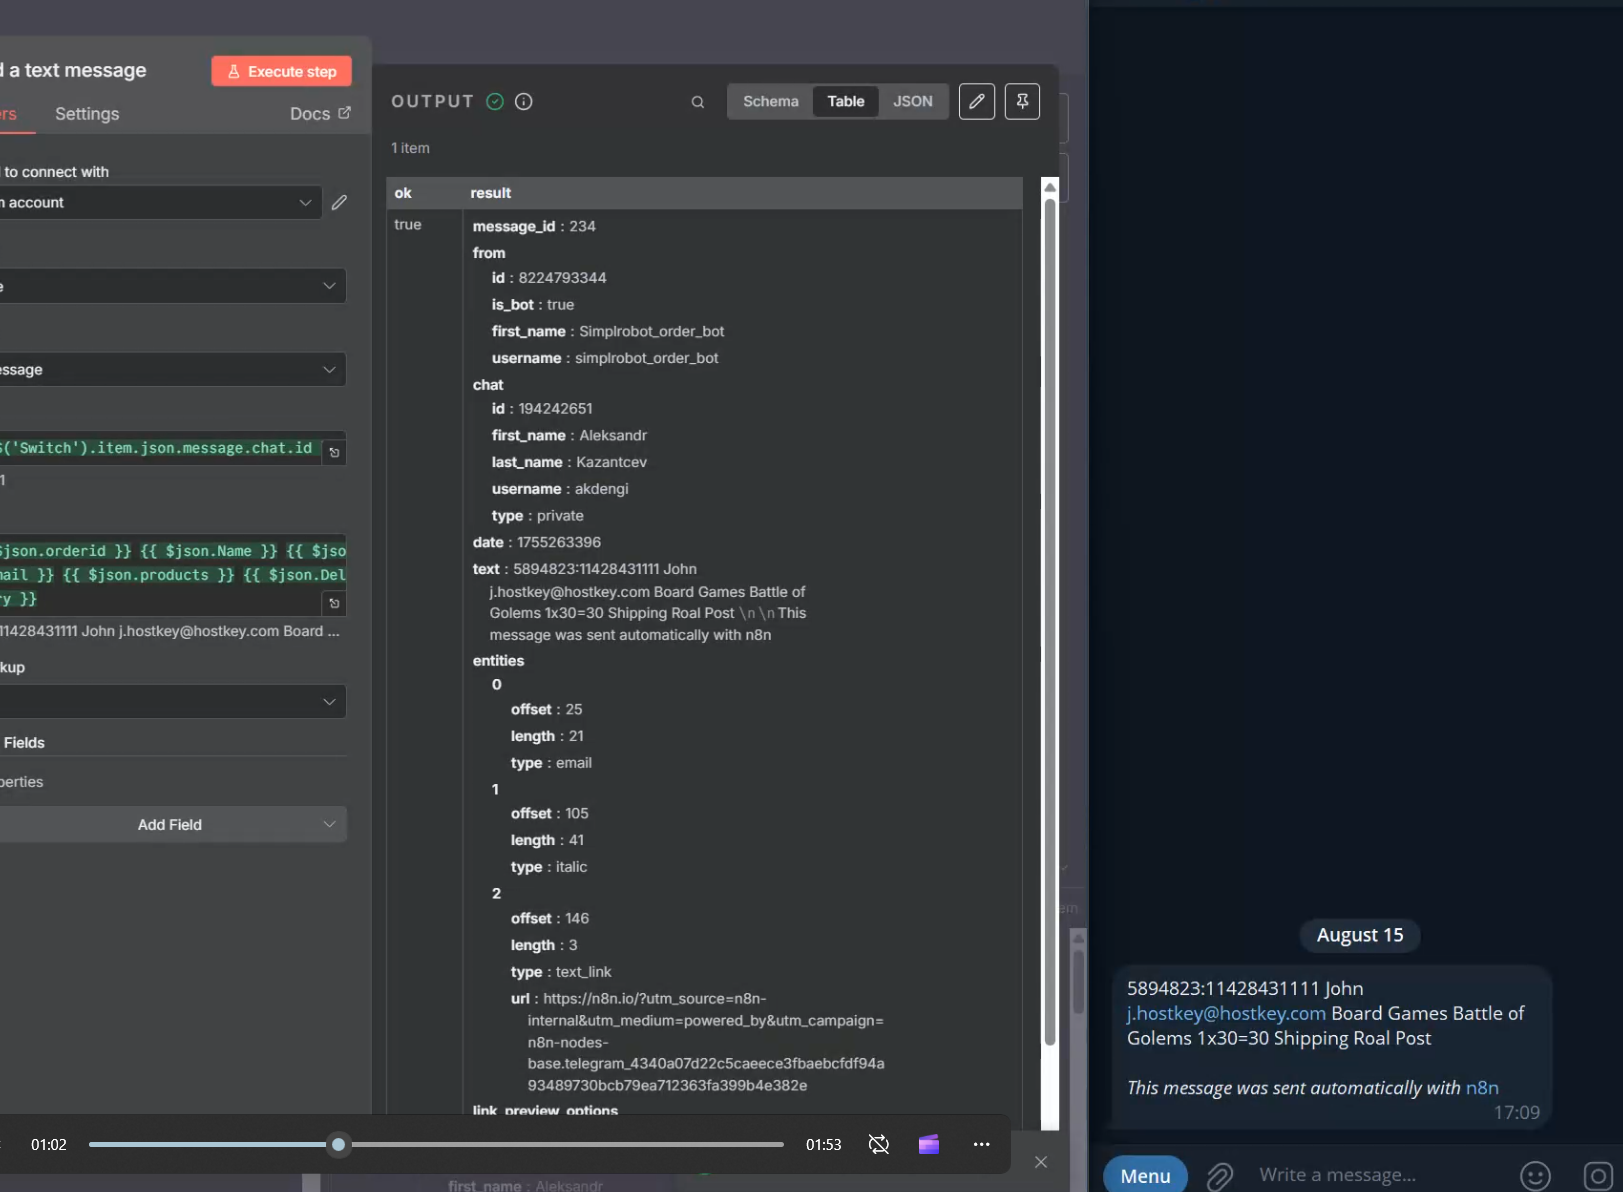
Click Execute step and check that the order information has arrived in Telegram.
To ensure your workflow doesn't fail when an error occurs—such as if the order number isn't found—go to Settings and set On Error to Continue.
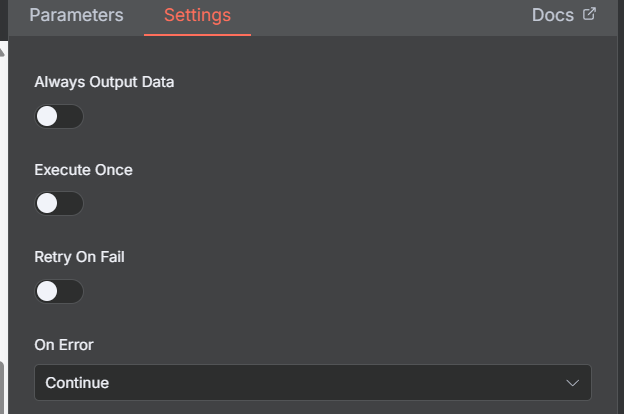
To set up the output for branch 1 of our Switch node, copy the value from the Chat ID field in the Send message and wait response block. Insert the Telegram — Send a text message node and fill it out as shown in the screenshot.
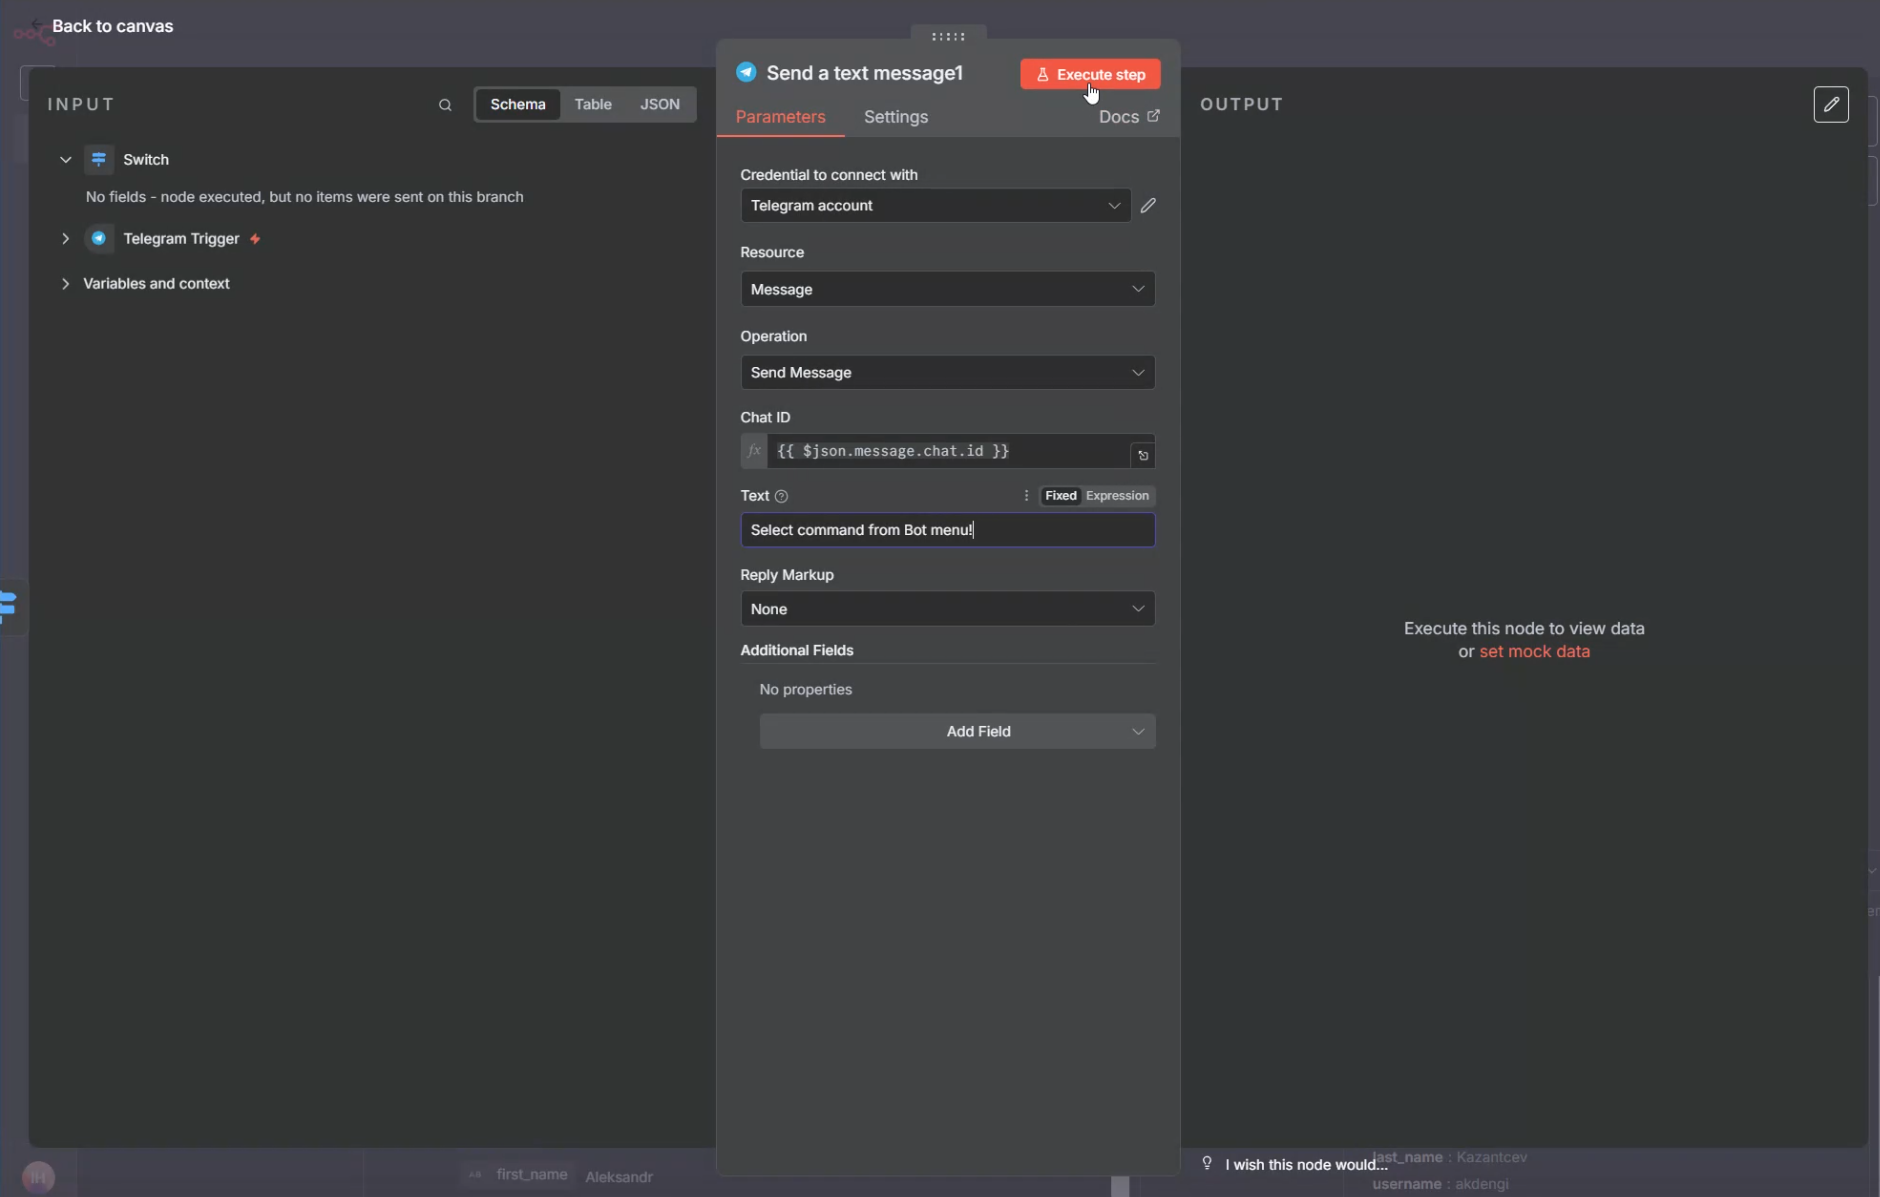
That’s it! Our workflow for one of the bot’s commands is now fully set up. Don’t forget to also set On Error to Continue for this node branch to ensure the workflow doesn’t fail if an error occurs in this path.
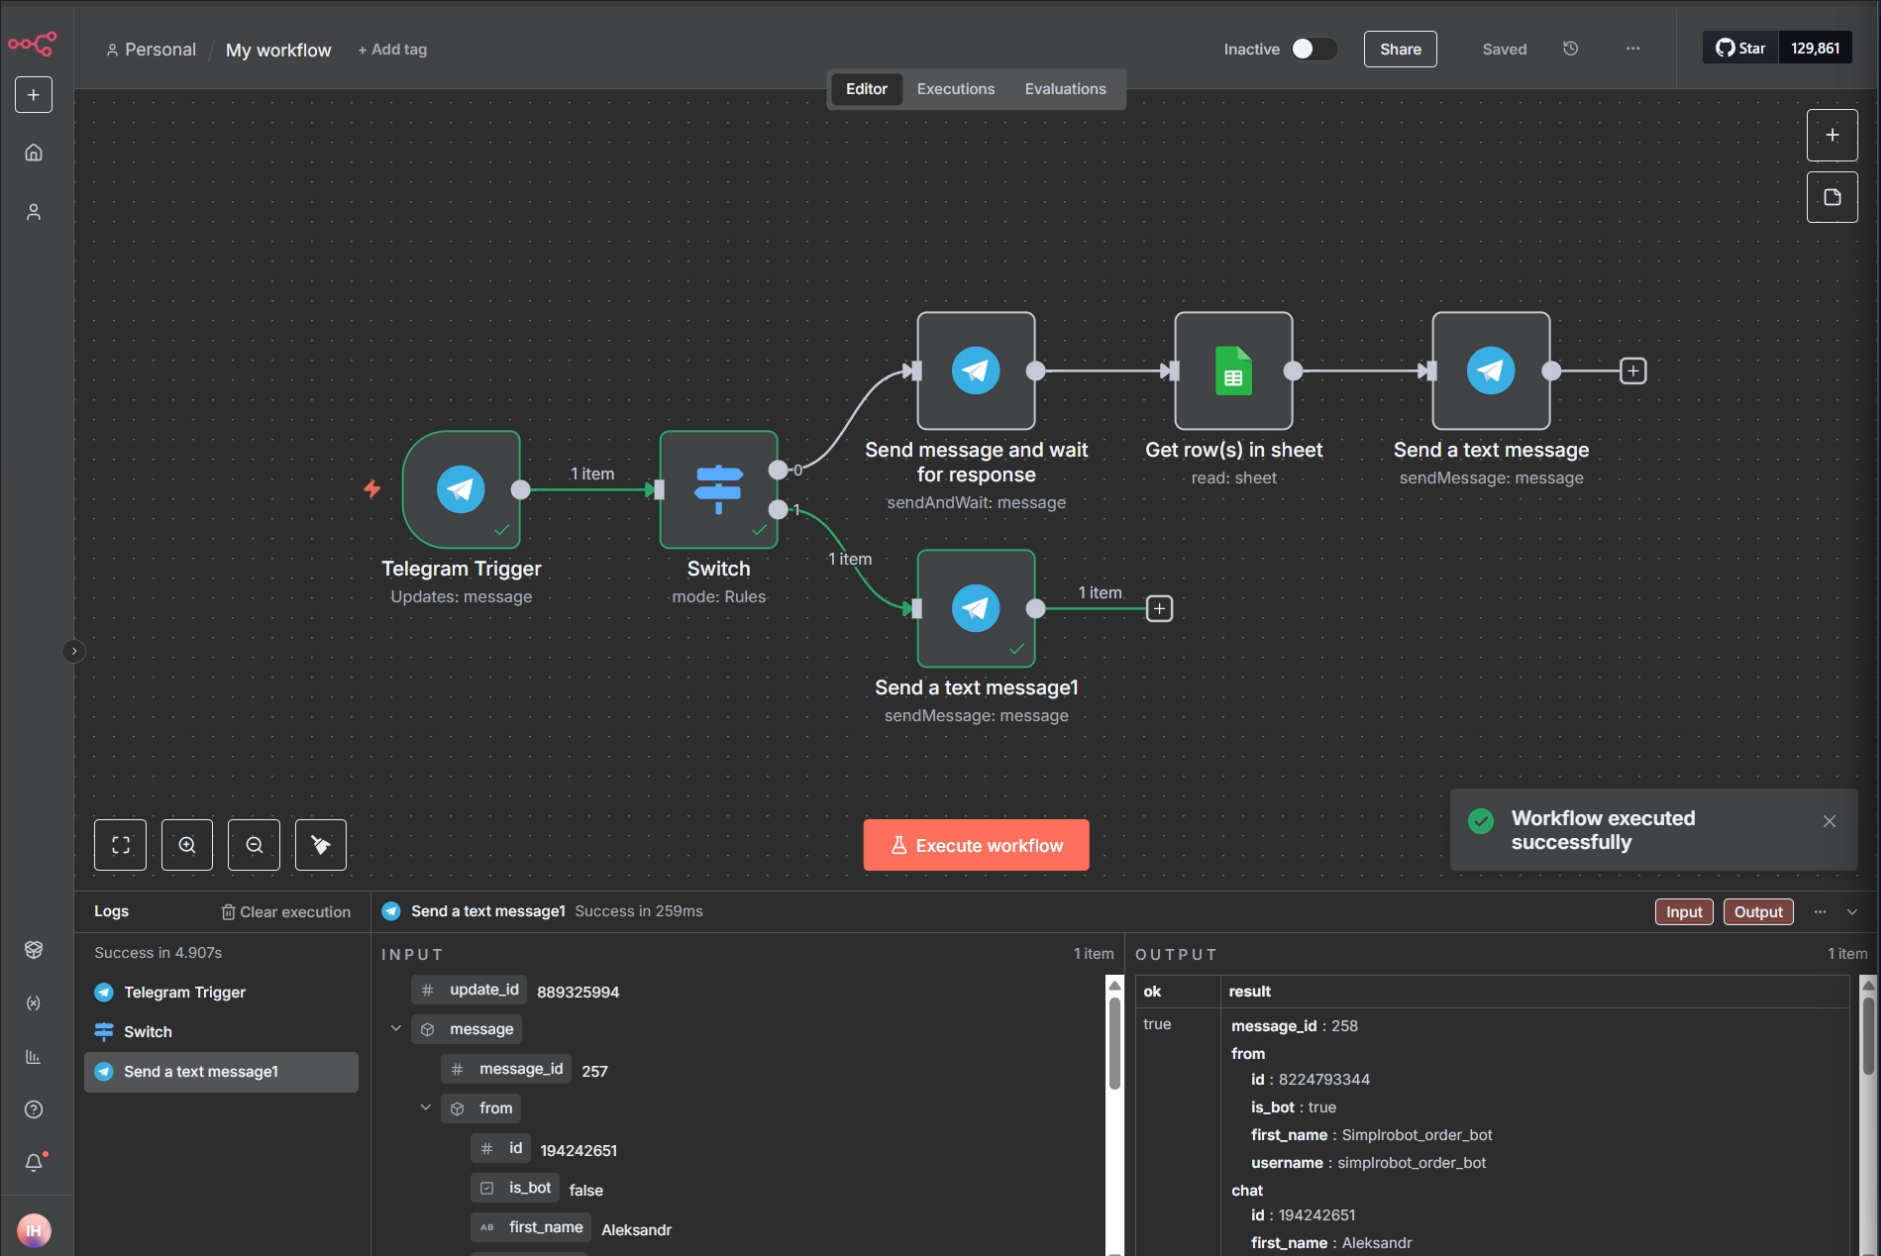
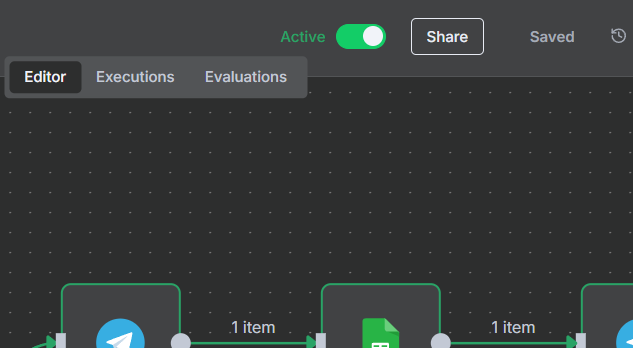
You're currently in test mode and can run through the workflow's branches by clicking the Execute workflow button (once per branch). To enable real-time monitoring of commands and messages in the bot, switch the workflow from Inactive to Active mode.
Hooray! You've created a Telegram bot without writing a single line of code. And this is just the tip of the iceberg: n8n allows you to do much more.
We've launched our first working workflow.
With n8n, you can also automate other processes:
- Automated processing of new applications from your website;
- Inventory synchronization between your website and warehouse via API;
- Notifications about negative reviews or low ratings (e.g., from Google Reviews);
- Reminders to customers about abandoned carts via email or SMS;
- And much more—the only limit is your imagination.
Write to us if you'd like to continue this topic (e.g., connecting n8n with Ollama and OpenWebUI), whether you use n8n yourself, and suggest which workflow we should explore next!