Mounting ISO using IPMI
In this article
Accessing the remote console and mounting the ISO
To launch the console, the device must have Java installed. Some motherboards also provide the ability to connect via the console without installing Java. To enable IPMI, follow these instructions, and then follow the steps for your server's motherboard.
Supermicro
Authorisation:
To access the IKVM/Native Console, go to the Remote control tab and click the IKVM/HTML5 button:
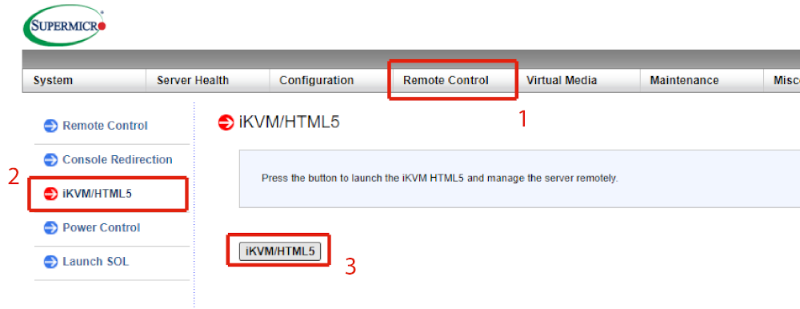
Note
The existence of an Native Console depends on hardware generation. IKVM is available for all hardware generations.
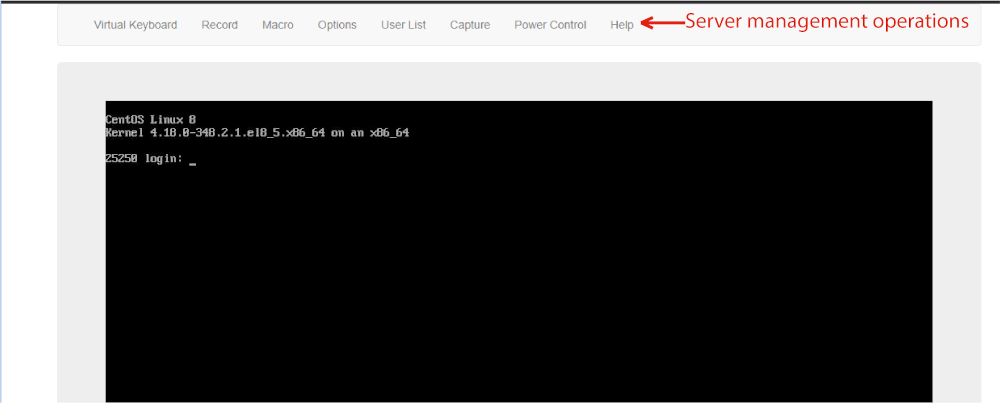
The credentials of a specific server are used for authorization in the console. It is possible to implement various actions to manage the equipment in the console:
Attention
It is prohibited to make changes to the IPMI/BIOS settings on your own, as well as set a password to boot the BIOS or flash new BIOS by (HOSTKEY Terms of Service - Technical requirements - subparagraphs m and n). These actions may lead you to lose control of the server.
Restoring settings in case of loss of access to the server due to negligence or mistake is a paid service, and goes through the current rate of internal work on the server.
If you need to install an operating system that is not on our list, you need to perform the following steps:
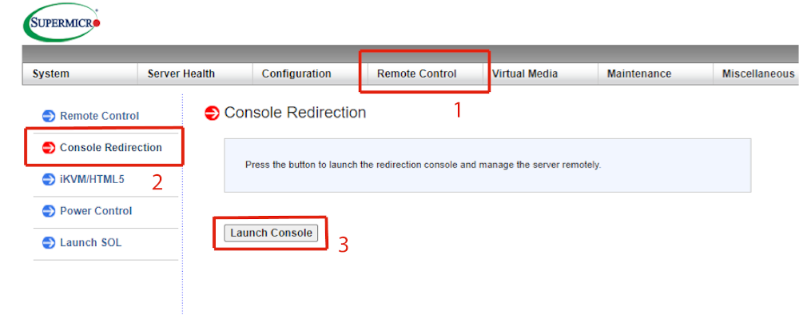
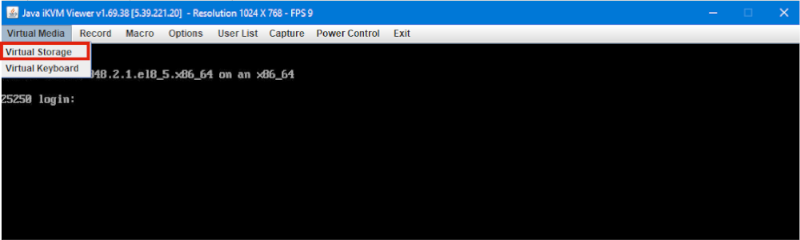
Go to the Remote Control >> Console Redirection tab and launch the console with the Launch console button in the web interface:
As a result of this action, the jnlp-file will be downloaded to the device. The console will be opened after running this file. You can mount the ISO in the Virtual media >> Virtual storage menu:
In the opened menu, select the type of logical disk – ISO and specify the location for storing the ISO file and click the Plug in and Ok buttons:
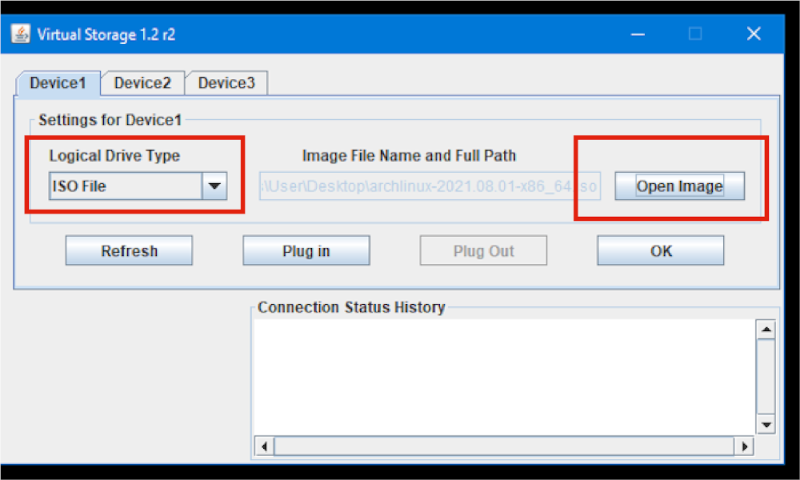
Then you should restart the server (F6 key) menu Power control >> Set power reset. After restarting the server, you should boot from the selected ISO.
Attention
The created IP addresses in the Console tab are active only 2 hours from the moment of creation.
Access will become invalid after 2 hours. You will need to refresh the page https://invapi.hostkey.com/ and get new access.
Dell
Authorisation:
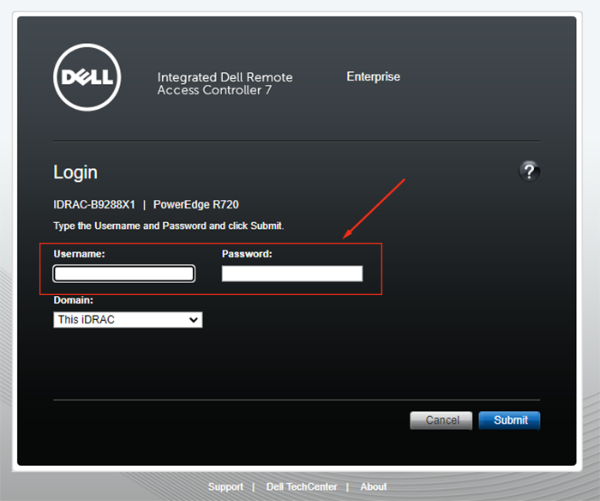
To use your own ISO image as virtual media on the server, you need to launch the Virtual Console in iDRAC and click Connect Virtual Media:
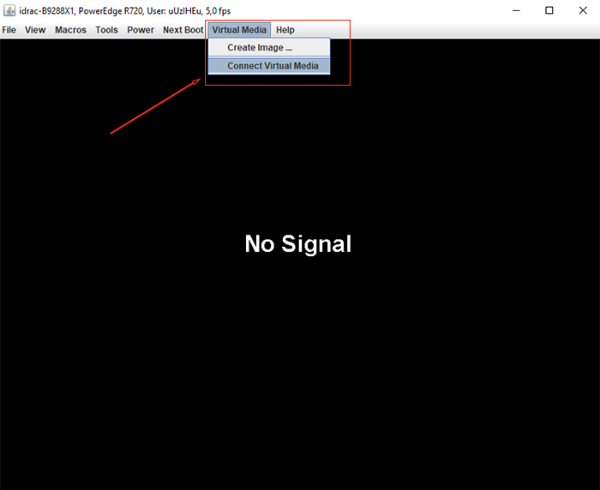
As a result of this action, the jnlp file will be downloaded to the device. After running this file, the console will open. Then select the ISO file:
After restarting the server, you should boot from the selected ISO.
Attention
It is prohibited to make changes to the IPMI/BIOS settings on your own, as well as set a password to boot the BIOS or flash new BIOS by (HOSTKEY Terms of Service - Technical requirements - subparagraphs m and n). These actions may lead you to lose control of the server.
Restoring settings in case of loss of access to the server due to negligence or mistake is a paid service, and goes through the current rate of internal work on the server.
Attention
The created IP addresses in the Console tab are active only 2 hours from the moment of creation.
Access will become invalid after 2 hours. You will need to refresh the page https://invapi.hostkey.com/ and get new access
MegaRAC
MegaRAC (Megarends IPMI/KVM/SOL) - an embedded solution for remote server management. Supports IPMI 2.0 and Redfish standards, ensuring compatibility with management systems such as OpenStack, VMware, and Kubernetes.
Getting Started
Activating IPMI Access

-
On the first screen, choose one of the activation options:
- Activate IPMI access for basic activation;
- Activate IPMI access for 24h for temporary access for 24 hours;
- Create temp IPMI admin for creating a temporary administrator.
-
After activation, information about access will appear:
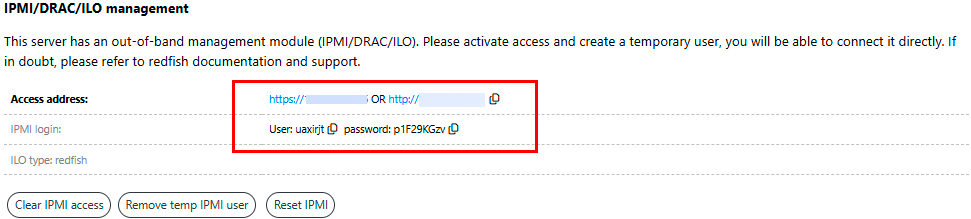
- Access Address:
https://<IP>orhttp://<IP>; - Login and Password are automatically generated upon each activation and valid only for the selected period.
- Access Address:
Logging into MegaRAC
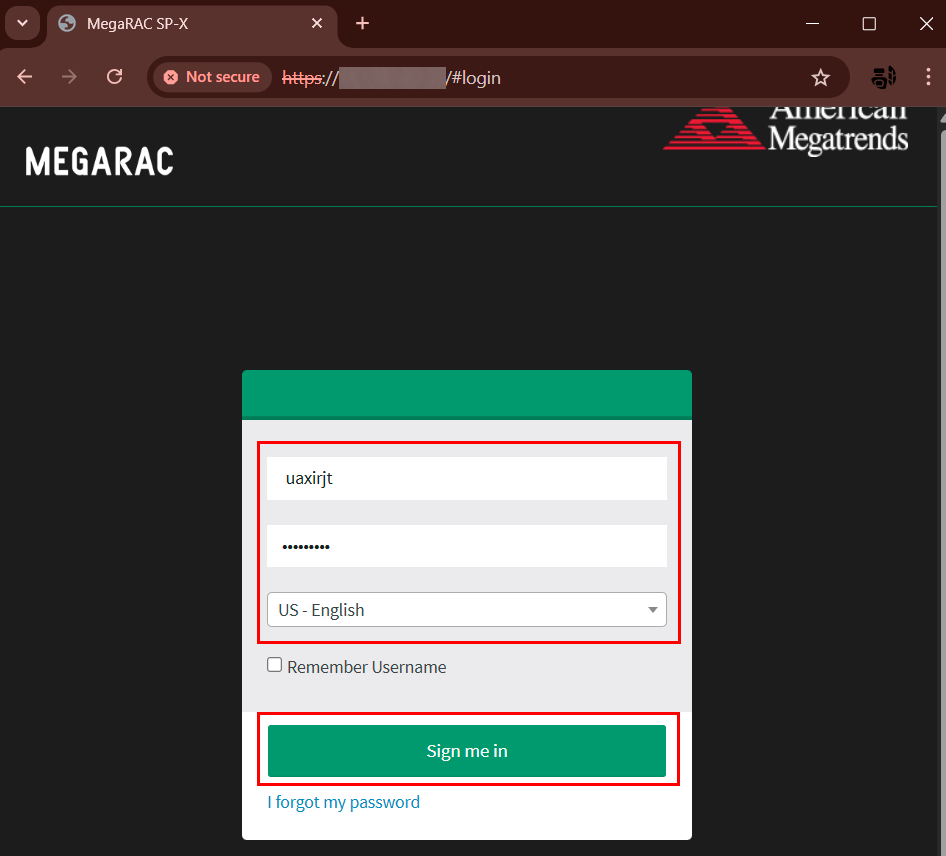
- Open a browser and go to
http://<IP>; - In the login form, enter:
- Username: generated username;
- Password: generated password;
- Click on
Sign me in.
Remote Management
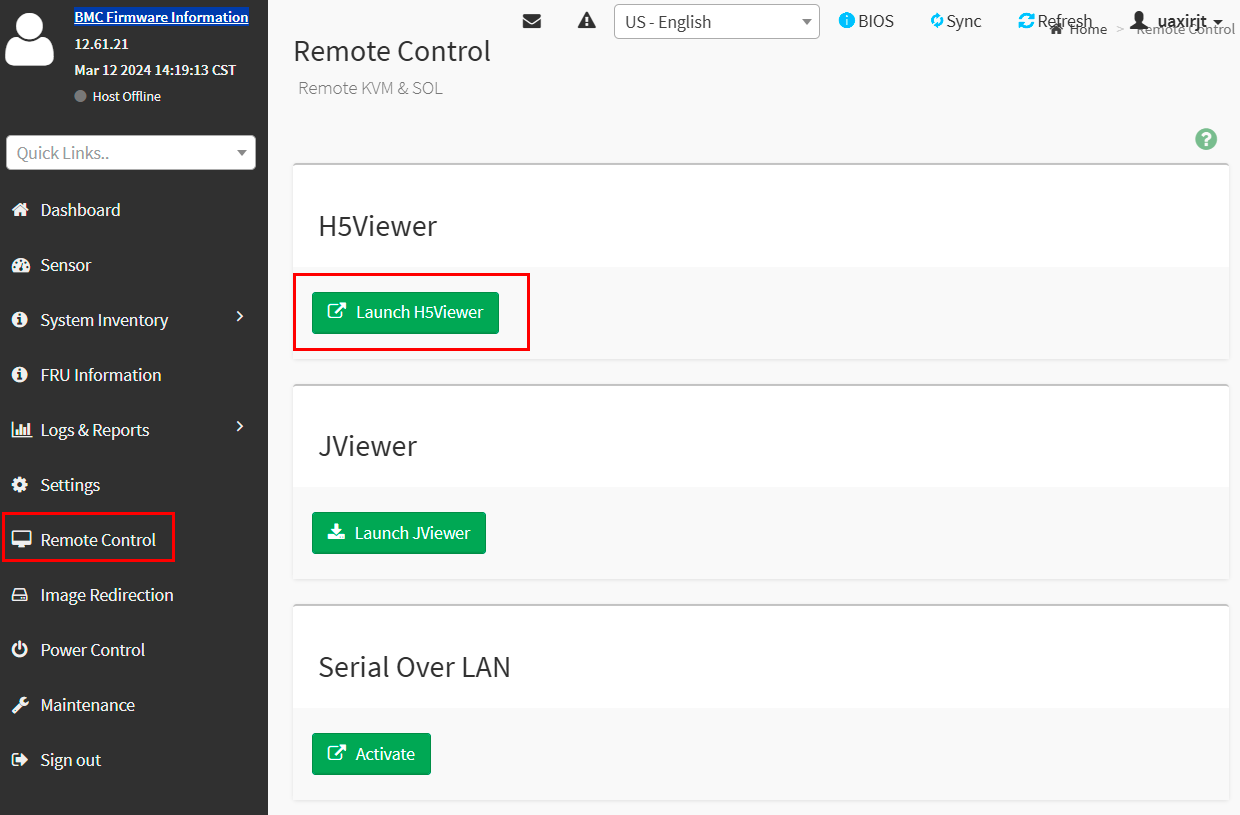
After successful login, you will be directed to the Remote Control section. Available options include:
H5Viewer (recommended method)
- Click on
Launch H5Viewer; - Opens an HTML5-based remote management console.
JViewer (alternative method)
- Click on
Launch JViewer; - Requires Java installation.
Serial Over LAN:
- Click
Activateto activate console access over LAN.
Monitoring and Control
In the left menu, available are:
- Dashboard — system status overview;
- Sensor — sensor data (temperature, voltage);
- System Inventory — list of installed hardware;
- FRU Information — component details (manufacturer, serial number);
- Logs & Reports — event logs;
- Settings — network and security settings;
- Remote Control — KVM management;
- Image Redirection — ISO image connection;
- Power Control — server reboot/shutdown;
- Maintenance — firmware update.
Server Management
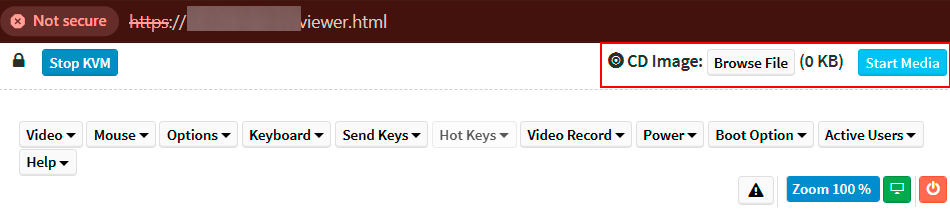
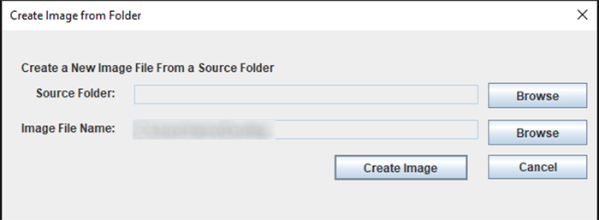
Connecting an ISO Image:
- In the KVM interface, find CD Image;
- Click
Browse Fileto select an ISO file; - Click
Start Mediato connect the image.


Ending Session
- After finishing work, click
Sign outin the left menu - Disable IPMI access:
- Return to the first screen;
- Choose
Clear IPMI accessorReset IPMI.