Getting started with Terraform
In this article
- What you need to work with Terraform
- Step 1. Install Terraform
- Step 2. Create an API key
- Step 3. Prepare the configuration
- Step 4. Initialize the provider
- Step 5. Validate the configuration
- Step 6. Order the server
- Step 7. Change the configuration
- Step 8. Destroy the resources
- Importing existing servers
- Troubleshooting
Information
Terraform is an infrastructure as code tool developed by HashiCorp. The desired state of the infrastructure is described in configuration files written in HCL, and Terraform brings the real resources in line with that description by calling the API of the service provider through a dedicated module known as a provider. Every operation it performs is recorded in a state file, so the tool knows what already exists and applies only the missing changes on the next run. Terraform supports previewing changes before applying them, keeping the configuration in version control and reproducing identical environments, which makes it a convenient way to manage servers, networks and services regardless of who hosts them.
When you only run one server, ordering it by hand is faster. Once there are fifteen of them, created at different times by different administrators, nobody remembers why one runs Ubuntu 20.04 while the machine next to it runs 22.04. A configuration file keeps that history on its own, and it also lets you bring the same environment back up without reconstructing a sequence of clicks from memory.
With our provider the workflow looks as follows. The file lists the preset, the location, the operating system and the traffic plan, after which terraform apply places the order and waits for the deployment to finish. Running it again duplicates nothing, since Terraform remembers the resources it created. The terraform plan command shows the upcoming changes without performing any of them.
The provider works with the entire catalog, including VPS, VDS, dedicated and GPU servers, additional IP addresses, SSH keys and DNS zones. Full reference for the resources and data sources is available in the Terraform Registry and in the hostkey-cloud/terraform-provider-hostkey-com repository. What follows is the basic scenario, ordering a virtual server.
What you need to work with Terraform
- An account in the Invapi control panel with funds on the balance, since ordering a server is a paid operation;
- an API key;
- an SSH key;
- Terraform 1.0 or newer.
Attention
The account must have at least one server. Invapi does not issue a session for an account with no services, and authentication fails with No appropriate servers found. If the account is new, order the first server through the control panel and create the rest with Terraform.
Step 1. Install Terraform
Terraform runs on Linux, macOS and Windows, and you can install it in two ways, either through a package manager or manually, by downloading and unpacking the prebuilt binary.
Windows
Download the archive, unpack terraform.exe into a dedicated folder such as C:\terraform, and add that folder to the Path environment variable.
Close and reopen the terminal afterwards, since the new Path value is not applied until you do. To verify the installation:
Linux
wget https://releases.hashicorp.com/terraform/1.15.8/terraform_1.15.8_linux_amd64.zip
unzip ./terraform_1.15.8_linux_amd64.zip
sudo mv ./terraform /usr/local/bin
terraform -v
macOS
Step 2. Create an API key
The key is created in the Invapi control panel. Click your user name in the top right corner and select API keys:
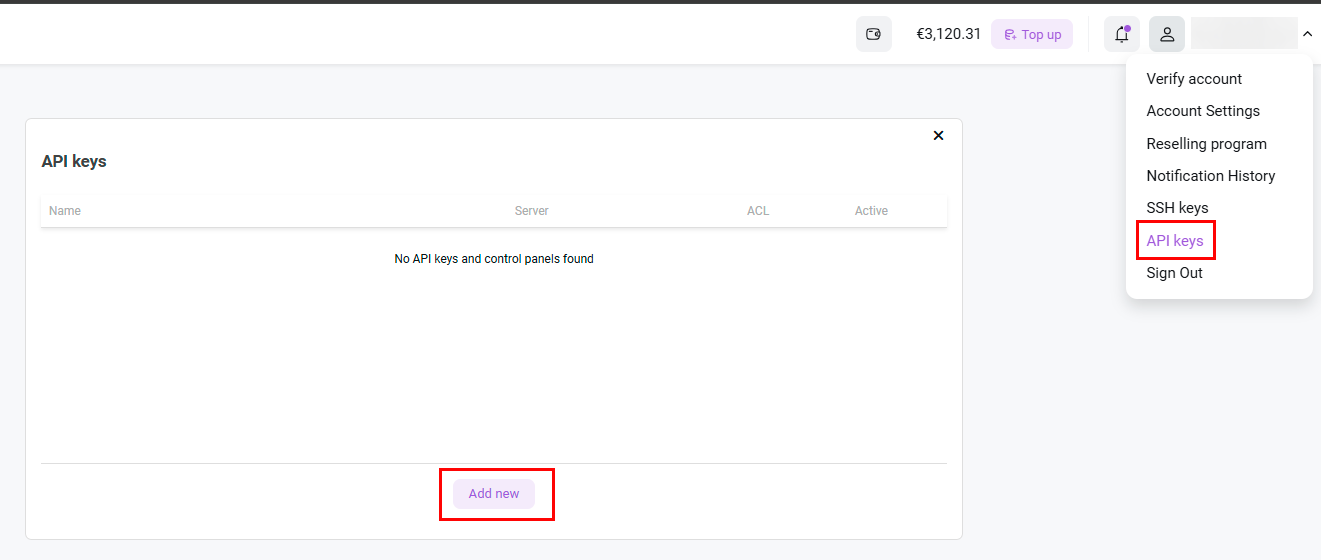
Click Add new and fill in the form.
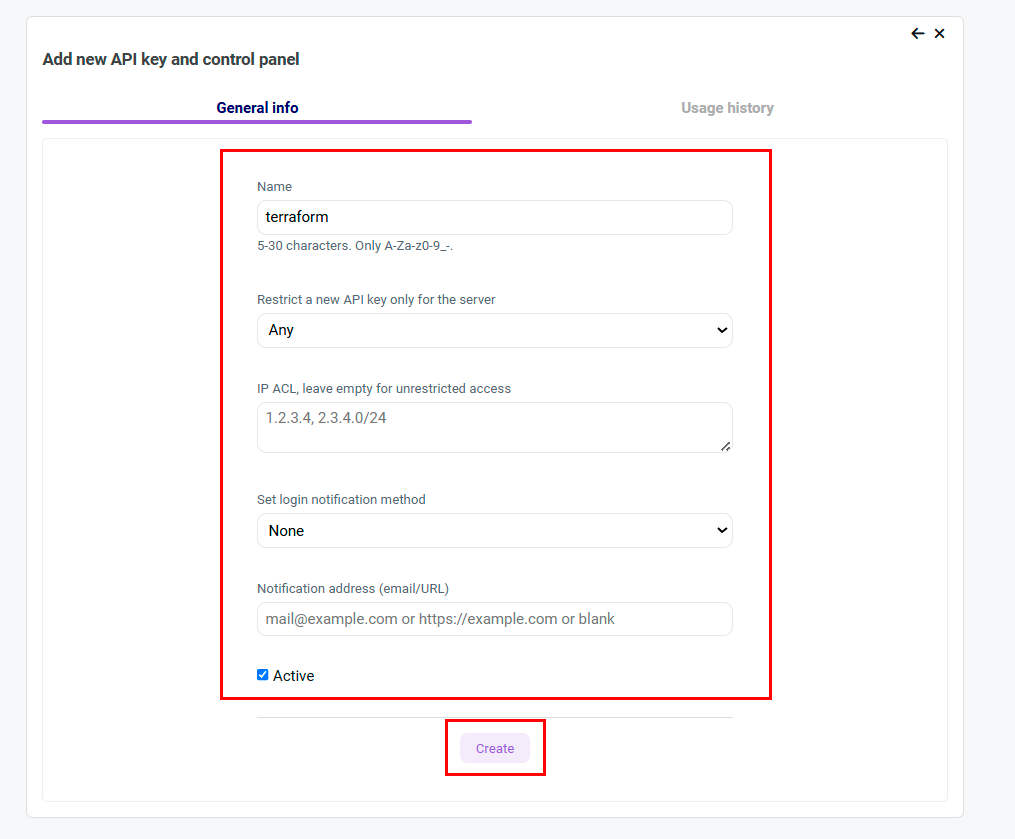
| Field | Value |
|---|---|
| Name | 5-30 characters, Latin letters, digits, _ and - only |
| Restrict a new API key only for the server | Any |
| IP ACL | Leave empty to allow access from any address |
| Set login notification method | None |
| Active | Selected |
The Restrict a new API key only for the server field binds the key to a single service, and the provider needs to order new servers, so the value must be Any.
The IP ACL field limits access to the listed addresses. It improves security, however with a dynamic IP address the key stops working as soon as the address changes, so leave the field empty when getting started, and for continuous integration list the addresses of your build servers.
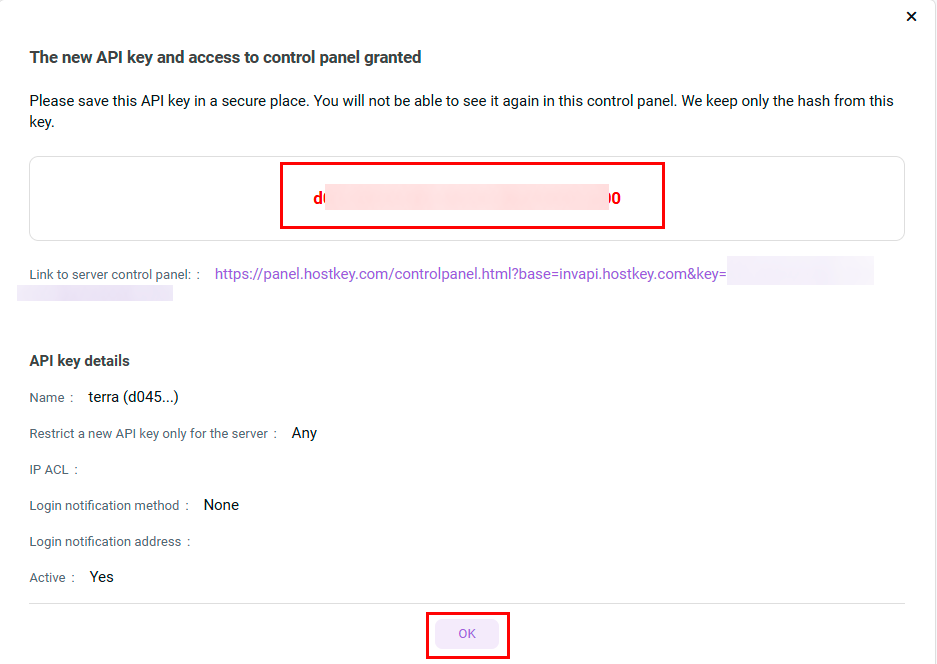
Click Create. The key is displayed only once.
Attention
Store the key immediately, since we keep only its hash and the value cannot be recovered. If you lose it, you will have to create a new one.
Step 3. Prepare the configuration
Configuration examples
Ready-to-use configuration examples are available in the provider repository. For a basic setup, see the examples/basic example.
Create a project directory, for example hostkey-terraform. Configuration files use the .tf extension and their names are arbitrary, since Terraform merges every .tf file in the directory into a single configuration. Our example uses three files.
main.tf
The first block pins the provider and the required Terraform version.
terraform {
  required_providers {
    hostkey = {
      source  = "hostkey-cloud/hostkey-com"
      version = "~> 0.2"
    }
  }
  required_version = ">= 1.0"
}

provider "hostkey" {}
Note
Starting with version 0.2 the provider is published separately for each billing system. The hostkey-com package works with invapi.hostkey.com, so there is no API endpoint to choose and the provider block stays empty.
Next comes the catalog check. These blocks create no resources and are not billed, they only ask the API for the lists of presets and traffic plans available to order:
data "hostkey_presets" "selected" {
  location = var.location
  name     = var.preset_name
}

data "hostkey_traffic_plans" "for_preset" {
  location    = var.location
  instance_id = data.hostkey_presets.selected.presets[0].id
}

output "catalog_preset" {
  value = data.hostkey_presets.selected.presets
}

output "catalog_traffic_plans" {
  value = data.hostkey_traffic_plans.for_preset.traffic_plans
}
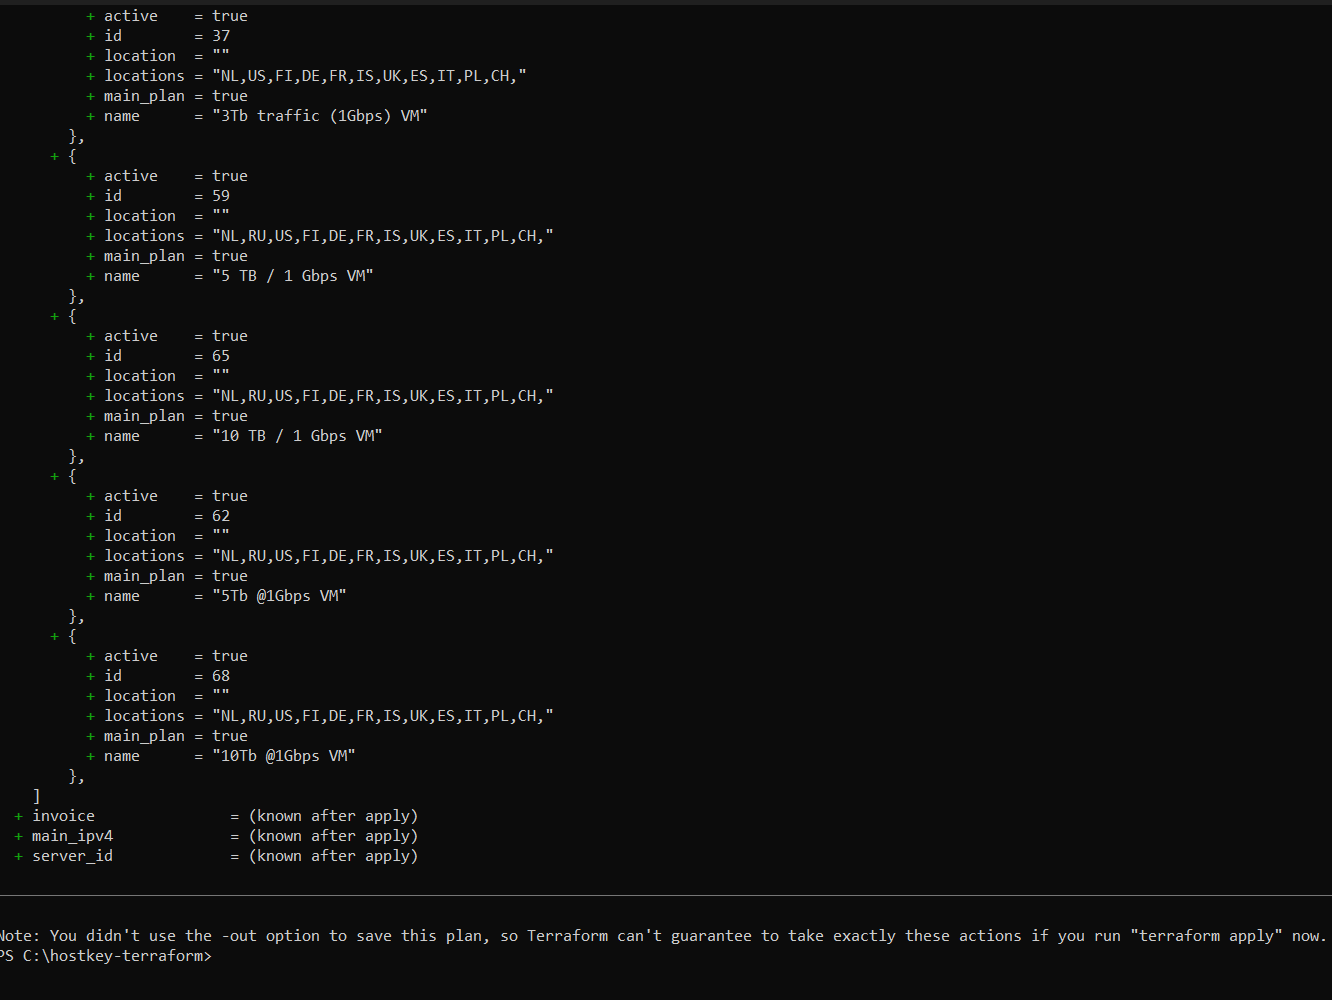
The check is worth having for two reasons. The provider requires an exact name match, and the catalog holds similar traffic plan names, for instance 3 TB / 1 Gbps VM and 3Tb traffic (1Gbps) VM. On top of that, the contents of the catalog depend on the location and change over time, so a preset available today may be unavailable tomorrow.
The server itself is described next:
resource "hostkey_server" "web" {
  preset_name       = var.preset_name
  location_name     = var.location
  traffic_plan_name = var.traffic_plan_name
  deploy_period     = "monthly"

  os_name   = "Ubuntu 22.04"
  root_pass = var.root_pass
  ssh_key   = file(pathexpand(var.ssh_public_key_path))

  power_state = "on"

  cancellation_type   = 1
  cancellation_reason = "terraform"

  tags = {
    env = "demo"
  }

  timeouts {
    create = "90m"
    update = "90m"
    delete = "30m"
  }
}
The timeouts block sets how long Terraform waits for an operation to finish. Deployment usually takes a couple of minutes, but if the wait is cut short by a timeout the order stays paid for while Terraform loses track of it.
The cancellation_type argument set to 1 cancels the service right away, while 0 leaves it running until the end of the paid period.
Note
The hostname argument is deliberately omitted from the example. When it is left out, the provider generates a unique name such as tf-44067425, and the service appears under that name in the control panel. The name inside the operating system may differ, since Invapi does not pass it to the guest, so the only way to check it is running hostname on the server itself.
The SSH key in the account storage is created separately:
resource "hostkey_ssh_key" "deploy" {
  name = "tf-deploy"
  key  = file(pathexpand(var.ssh_public_key_path))
}
This is not the same as the ssh_key attribute of hostkey_server. The server attribute writes the key to the machine during the operating system installation, while the hostkey_ssh_key resource stores the key in the account for later use.
The file ends with output blocks. After the order Terraform prints the server address, its identifier and the invoice number, and terraform output main_ipv4 returns the address at any point later, which is handy when something else runs next:
output "server_id" {
  value = hostkey_server.web.id
}

output "main_ipv4" {
  value = hostkey_server.web.main_ipv4
}

output "invoice" {
  value = hostkey_server.web.invoice
}
variables.tf
variable "location" {
  type    = string
  default = "FI"
}

variable "preset_name" {
  type    = string
  default = "vm.v2-pico"
}

variable "traffic_plan_name" {
  type    = string
  default = "3 TB / 1 Gbps VM"
}

variable "root_pass" {
  type      = string
  sensitive = true
}

variable "ssh_public_key_path" {
  type    = string
  default = "~/.ssh/id_ed25519.pub"
}
terraform.tfvars
This file holds the password, so it is not committed to version control:
root_pass = "StrongPass1%"

# The defaults can be overridden here
# location          = "NL"
# preset_name       = "vm.v3-pico"
# traffic_plan_name = "5 TB / 1 Gbps VM"
Attention
The root password must be 8 to 30 characters long and contain an uppercase letter, a lowercase letter, a digit and one of %, -, _, +. The characters @ and # are not allowed. The password is stored in the Terraform state file and is sent in plain text in the server readiness email, so change it once the server is deployed.
Step 4. Initialize the provider
The key is passed through an environment variable so that it stays out of the project files:
On the Windows command prompt use set HOSTKEY_API_KEY=your-key, and on Linux and macOS export HOSTKEY_API_KEY="your-key". The variable only applies to the current terminal session.
Note
The key is already needed at the planning stage, since the provider matches the names from the configuration against the catalog and fails without API access.
Next the provider has to be downloaded:
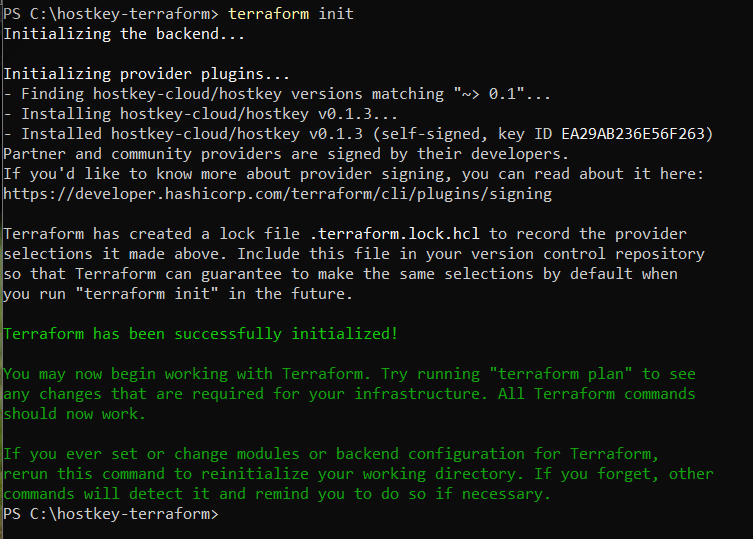
Terraform downloads the provider and creates a .terraform.lock.hcl file with the exact version. This file is committed to the repository, since it guarantees that everyone on the project ends up with the same version installed.
Step 5. Validate the configuration
The syntax is checked without calling the API:
A successful check prints Success! The configuration is valid.
Then comes the plan, which shows the upcoming changes without performing any of them:
The summary line. Expect Plan: 2 to add, 0 to change, 0 to destroy, that is the server and the SSH key.
The resolved identifiers. The provider fills in preset_id, os_id and traffic_plan_id next to the names, and if a name is not found in the catalog, the plan fails before anything is billed.
The catalog. The Changes to Outputs section lists the presets and traffic plans, and the values in the configuration have to be written exactly the same way.
Step 6. Order the server
Terraform shows the plan once more and asks for confirmation, type yes and press Enter.
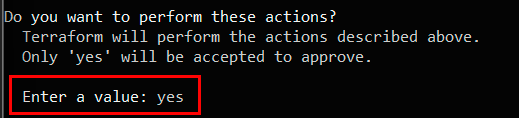
Attention
The order is paid for from this point on. Do not close the terminal window and do not interrupt the command, otherwise the order stays in the control panel while Terraform loses track of it.
The SSH key is created first, then the server order begins, and Terraform worked out that order by itself from the dependencies.
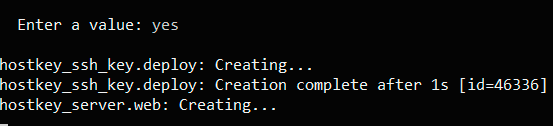
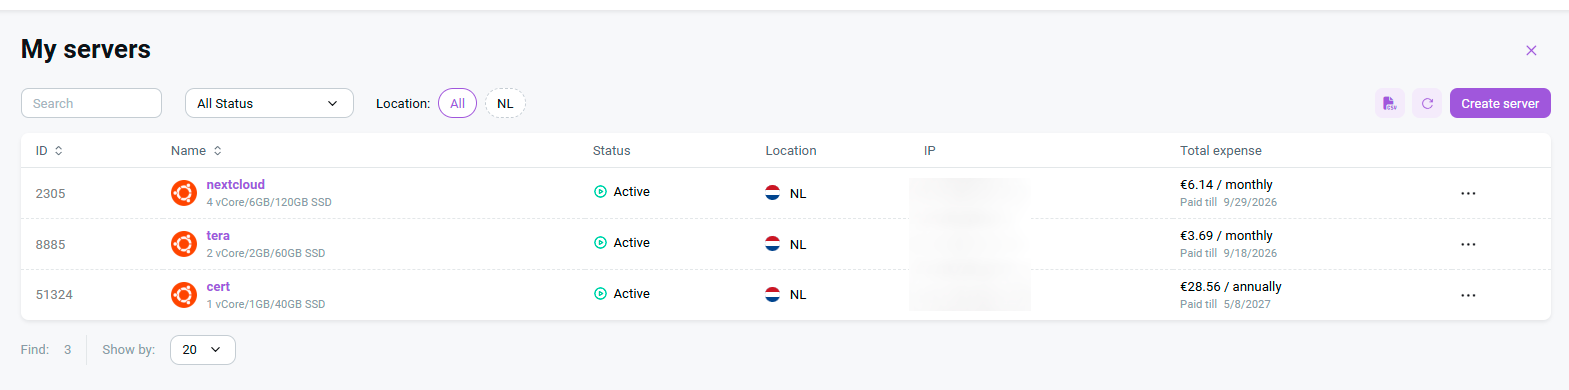
After that come the Still creating... lines, refreshed every ten seconds, while the provider polls the API and waits for the installation to finish. Meanwhile the server is visible in the control panel:
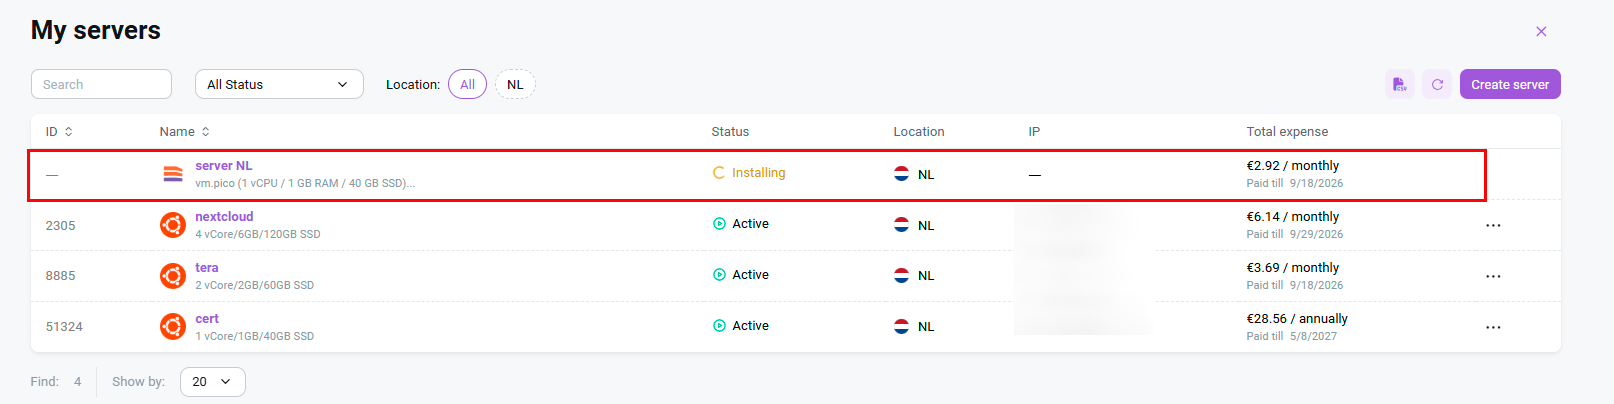
Once it is done, the values are printed. It is worth checking SSH access using the address you received:
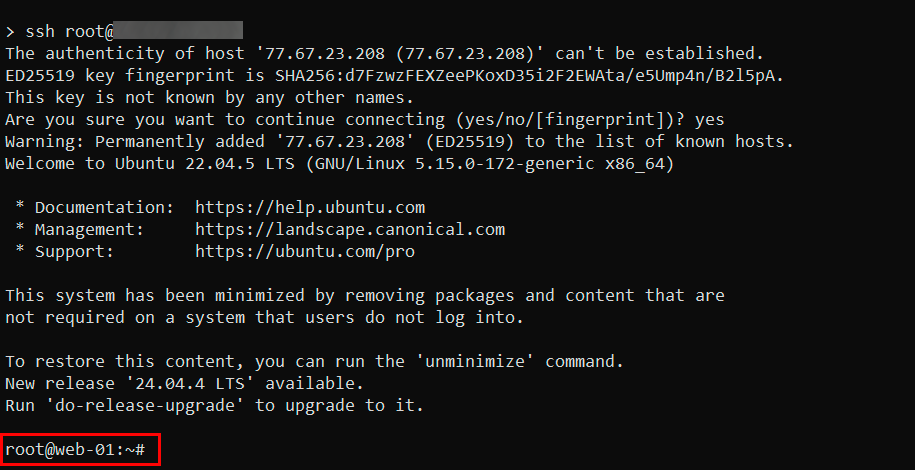
The key specified in the ssh_key attribute is already present on the server, so no password is requested. The new server appears in the control panel next to the ones ordered by hand:
Step 7. Change the configuration
Changes fall into three categories:
-
Safe changes. Tags and power state are applied to a running server, and the plan shows them as
update in-place. -
Operating system reinstall. Changing
os_name,soft_name,root_passorssh_keyreinstalls the operating system on the same server, which means all data on the disk is lost. -
A new order. Changing
preset_name,location_name,traffic_plan_nameordeploy_periodmeans the previous server is cancelled and a new one is ordered, so you are billed again. The plan marks such changes asforces replacement.
Attention
Changes that lead to a reinstall appear in the plan as update in-place, exactly the same way a harmless tag change does. The provider prints a separate warning about data loss, so before confirming it is worth reading not only the plan but the warnings as well.
Step 8. Destroy the resources
terraform destroy removes all resources that are in the current Terraform state for this configuration. Terraform will display the list of resources to be removed and ask for confirmation. Enter yes and press Enter.
If you need to remove only one resource, you can specify it with -target. For example:
Here, web is the resource name from the resource "hostkey_server" "web" block, not the server ID from the control panel.
Another option is to remove the resource from the .tf files and run:
Terraform will see that the resource is no longer present in the configuration and will remove it from the infrastructure.
The service cancellation is performed through Invapi, and the cancellation method is determined by the cancellation_type parameter: 1 cancels the service immediately, while 0 cancels it at the end of the paid period.
Information
With immediate cancellation (cancellation_type = 1), the unused portion of the paid period is credited back to the account balance proportionally to the actual time the service was running.
Importing existing servers
Servers ordered through the control panel can be brought under Terraform management. The identifier is taken from the ID column in the server list:
After the import the state holds the live data, that is the identifier, the address, the status and the power state. Order-time arguments are not carried over from the control panel, so they are described in the configuration by hand. The first terraform apply after an import does not lead to a reinstall.
Troubleshooting
Note
No appropriate servers found when running plan. Check that the account holds at least one service, since Invapi does not issue a session for an account with no services.
Note
Catalog name resolve failed. The specified preset, operating system or traffic plan name is not present in the catalog for the selected location. List the available values through the hostkey_presets and hostkey_traffic_plans data sources and bring the configuration in line with them.
Note
State pending:<invoice>. The order is paid for but the deployment has not finished, as a rule because the connection dropped. Running terraform apply again resumes the wait and does not place a new order. If the invoice is unpaid, pay it and run terraform apply again. The live status of the service is shown in the control panel.
Information
More on Terraform itself can be found in the official HashiCorp documentation, and the specific arguments of the resources and data sources are documented in the Terraform Registry.