Install and configure WHMCS to work with the HOSTKEY billing system
In this article
Required Software
- reseller module for WHMCS: download;
- WHMCS version 8.8 or higher.
Module installation
Extract the contents of the archive to the root of the accounting system.
Activate module in WHMCS
After copying the module to the WHMCS directory and configuring file system permissions, you need to activate the module. To do this:
- Go to the section
>> System Settings >> Apps & Integrations >> Addon Modules; -
Find the
HOSTKEY VPS/Dedicatedmodule in the list and activate it by clicking the buttonActivate;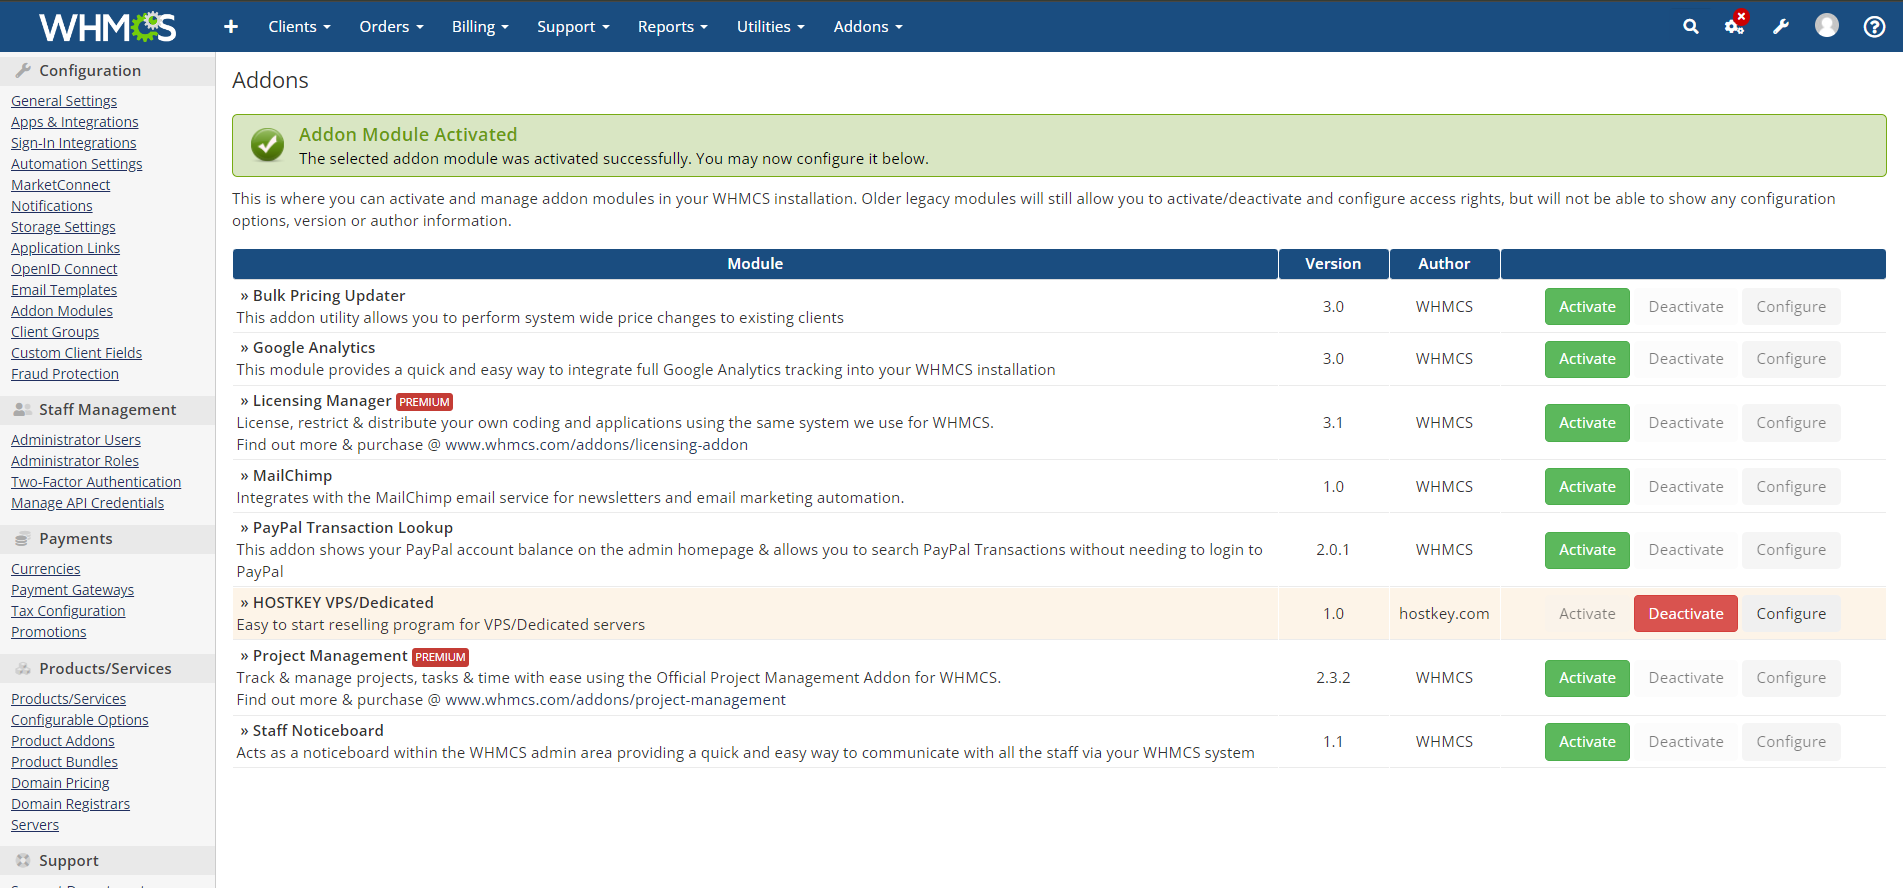
-
Customize the module by clicking the
Configure- API Url - path to the HOSTKEY billing system. Default value
https://invapi.hostkey.com/; - API key - key to access the billing system. Obtain it by following instructions;
- Preset name prefix - prefix for naming VPS/VDSs so that they can be distinguished in the WHMCS list. By default
HKP-; - Default product group - name of the product group. Default value
Hostkey servers; - Access Control - list of user groups that have access to this module.
Attention
If a group is not checked under Access Control, the module will not be available for that group and will not be displayed in the menu, even for the administrator.
If everything is done correctly (including setting permissions), the HOSTKEY VPS/Dedicated section will appear in the Addons menu.
- API Url - path to the HOSTKEY billing system. Default value
-
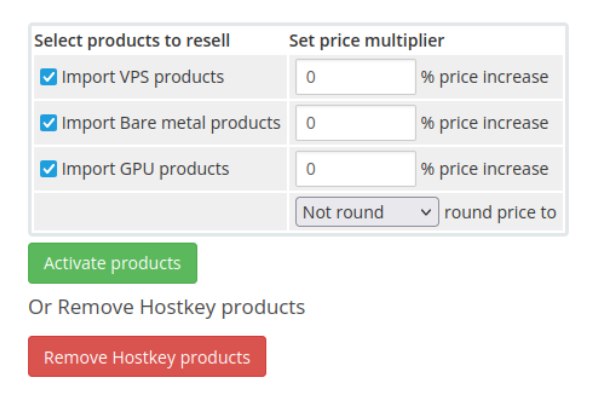
Go to Add-ons >> HOSTKEY VPS/Dedicated and select the products you wish to resell:
- Import VPS products - VPS server resale;
- Import bare metal products - resale of dedicated servers;
- Import GPU products - GPU server resale;
For each marked group in the Set price multiplier column, you can specify a markup as a percentage or in the selected currency. You can round the calculated price by choosing the rounding mode in
round price to:- Not round – no rounding;
- 0.1, 0.2, etc – rounding to the nearest tenth of the currency unit (e.g., 123.56 RUB will be rounded to 123.6);
- 0.25, 0.5, 0.75 - rounding to the nearest quarter (123.56 – to 123.5, 123.76 – to 123.75);
- 0.5, 1.0 – rounding to the nearest half (123.56 – to 123.5, 123.76 – to 124);
- 1.0 – rounding to the nearest whole number.
Then click the
ImportProduct/AdjustPricebutton.Note
For the first run, we recommend using another method, as when loading a large amount of information, the page may end with a 504 code.
-
If the module is correctly connected and activated, a message about successful download of HOSTKEY products will appear.

and a suggestion to go to the product specific settings in the System Settings >> Product/Services menu.
Note
In case of large amount of information, the page may terminate with code
504 Gateway Timeout. For the first loading of the product list we recommend to execute the command in the billing root.
Loading and Deleting Information from HOSTKEY Using Console Commands
cron.php Execution
Used to load information from Hostkey. Execute the command from the root of your website:
During operation, the command uses the modules/addons/presetsload/import.ini file (if it exists). Example format of the file:
[general]
# Use 0 not to round,
# 10 to 0.1, 0.2, etc,
# 4 to 0.25, 0.5, 0.75
# 2 to 0.5, 1.0
# 1 to 1.0
round = 0
[markup]
# Put the markup as a percentage
vps = 0
bm = 0
gpu = 0
The file has two sections:
-
The general section contains the
roundparameter, which controls rounding. Possible values for the parameter:- 0 – no rounding;
- 10 – rounding to the nearest tenth;
- 4 – rounding to the nearest quarter;
- 2 – rounding to the nearest half;
- 1 – rounding to the nearest whole number.
-
The markup section contains the percentage markup for each group.
If the import.ini file does not exist or the "default" option is used, no markup or rounding is applied.
clear.php Execution
Deletes information previously received from HOSTKEY. Execute the command from the root of your website:
Note
Calling this command deletes all groups and presets received from HOSTKEY, as well as their prices.
Currency Configuration for Price Exporting
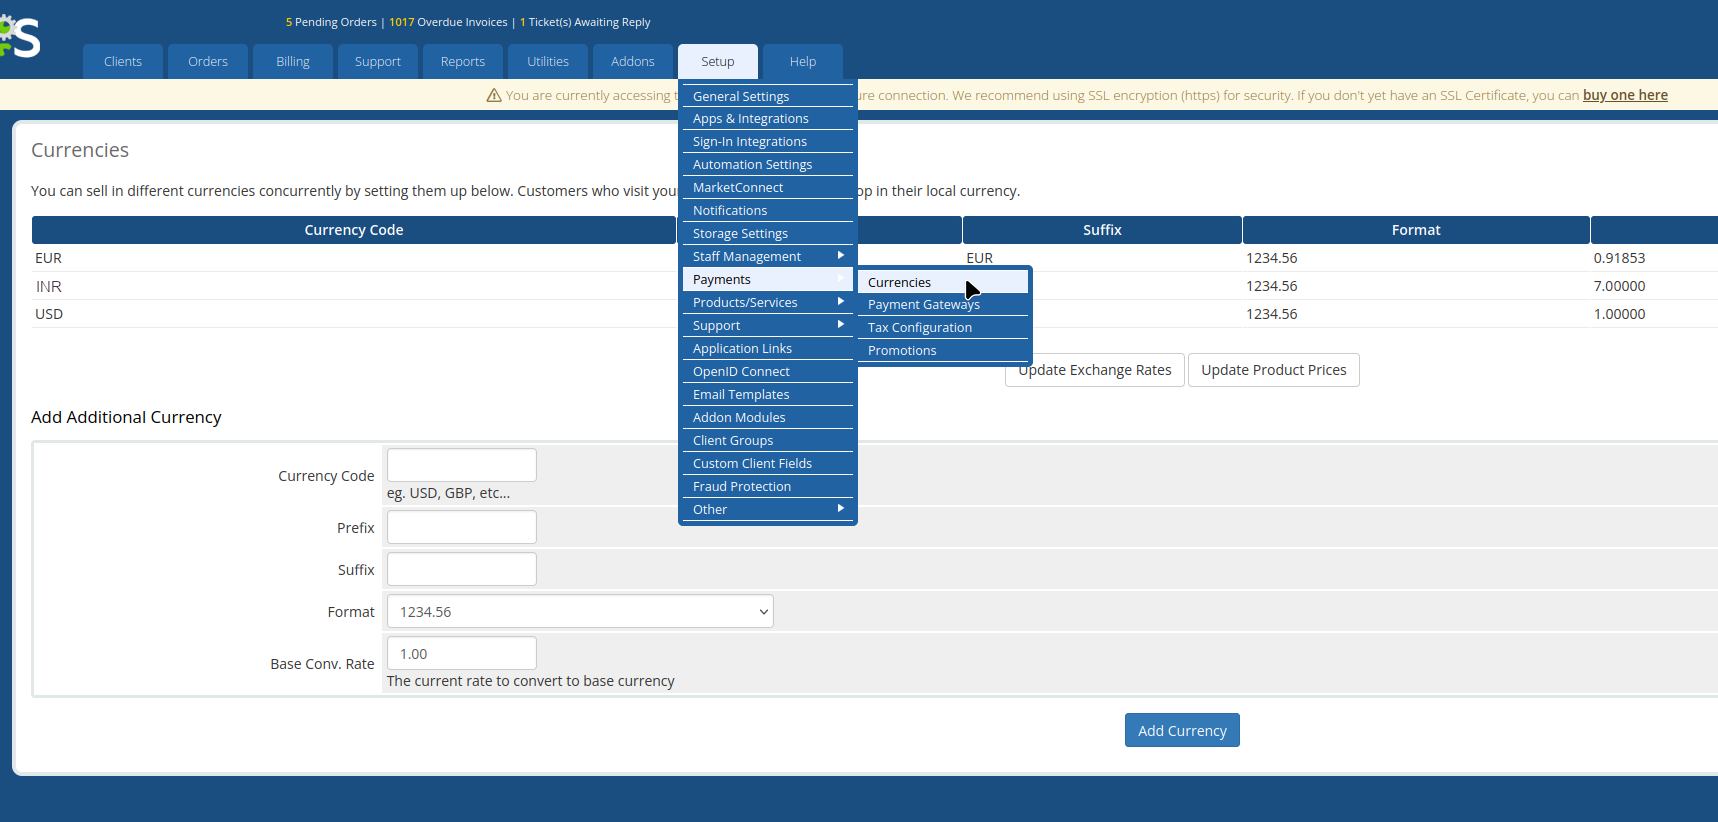
To accurately export product prices, you need to configure currency rates relative to EUR or USD and between them. This can be done in the Payments >> Currencies section.
Customize specific products for resale
By going to System Settings >> Product/Services you will see a table of all the products available to you for resale.
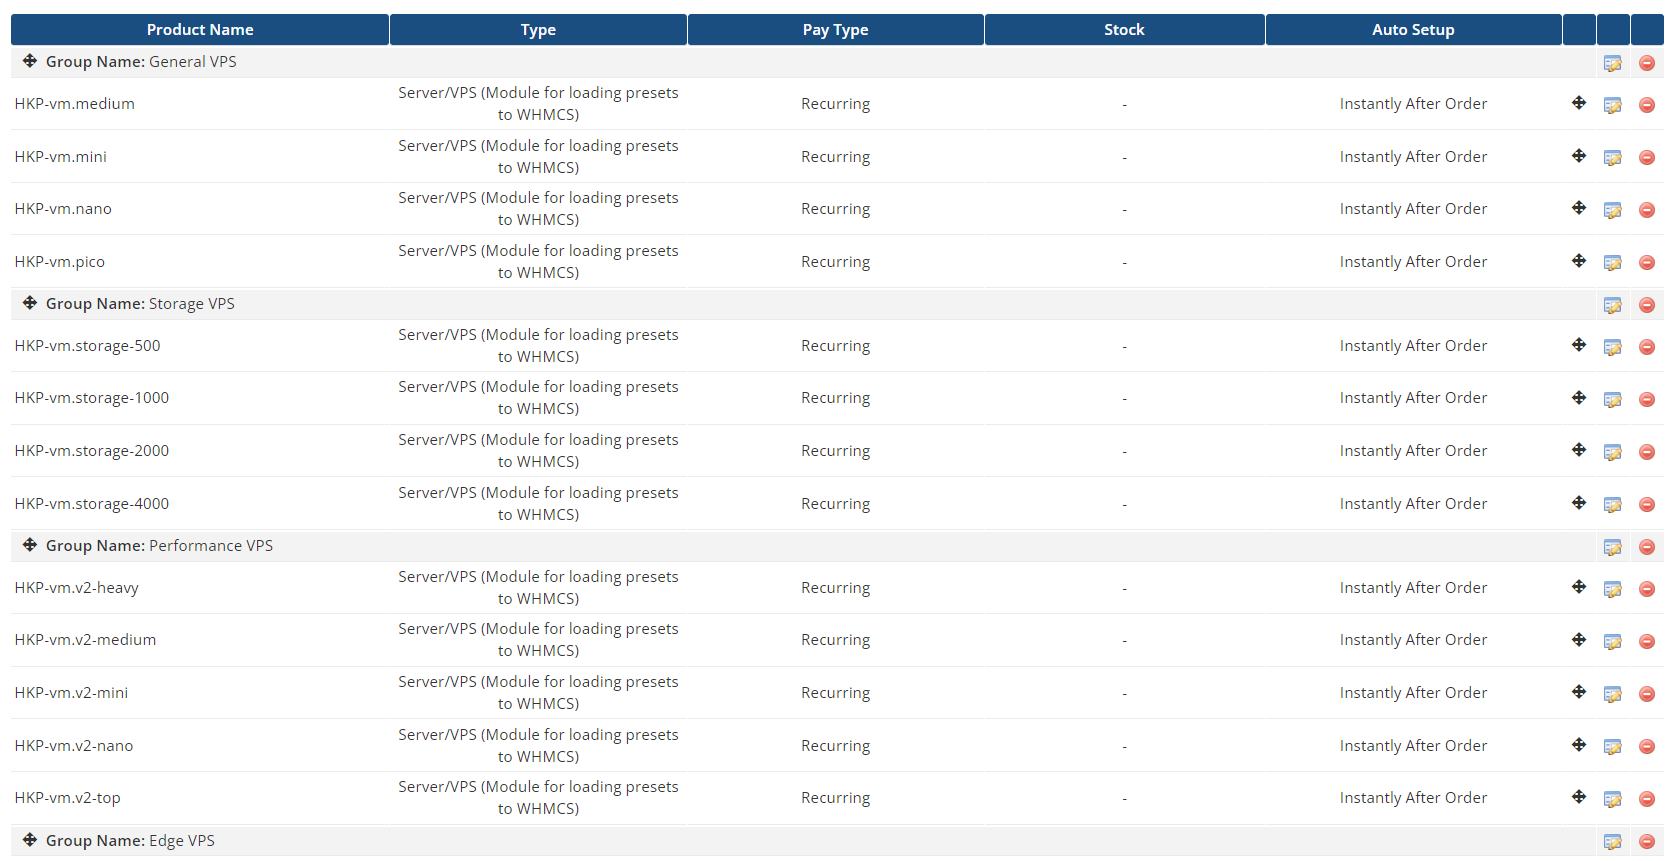
By clicking on the icons in the rightmost columns, you can change the product settings or remove it from the list. Most of the settings are determined by the WHMCS settings and we will only focus on those that are critical for resale.
Edit a specific product
Clicking on the Edit icon will take you to the Edit Product parameter modification section.
Detail tab
This tab allows you to change the product name that will be displayed on your storefront.
Also, by checking the Hidden to hide the product from the order form without removing it.
Price tab
Use this tab to set the price of your product in the currencies available to you.
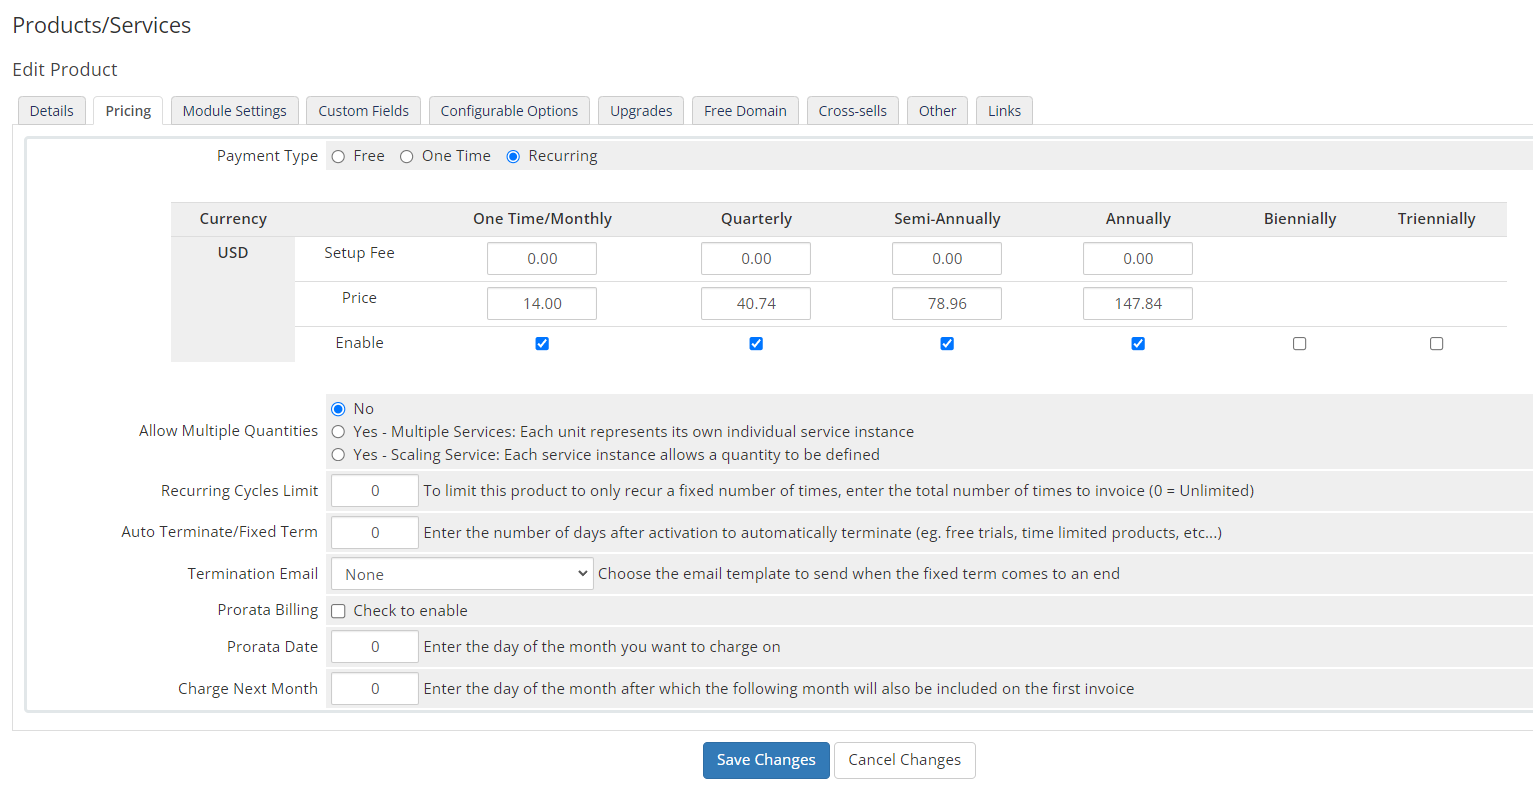
You can set three types of payment (Payment Type):
- Free - the product is distributed free of charge;
- One Time - one-time payment for one month of use;
- Recurring - recurring payment for a period of time.
You set the price for each period and currency separately, giving you the flexibility to adjust your pricing policy:
- One Time/Monthly - One time payment or recurring monthly payment.
- Quarterly - payment every quarter (3 months)
- Semi-annual - payment every six months (6 months)
- Annual - Payment for one year (12 months)
There are two separate prices available to you:
- Setup Fee - the price for installing the product;
- Price - the selling price of the product.
Attention
Your price must be higher than that shown in the Price boxes, otherwise you will end up selling "underpriced".
After changing the parameters and price, click Save Changes and save the settings for this product.
After confirming the successful saving of the settings, click and the button in the upper right corner Back to product list to return to the product table.
Once configured, products appear in the client dashboard.
Payment activation for ordered products
To pay for any ordered products, your HOSTKEY account balance will be used. Please ensure that the automatic payment from balance mode is enabled.
![](../billing/images/autopay_bill_4_2.png