Control panel for the server via the API key
In this article
The Server Control Panel can be used as a separate module to be integrated into your billing system to manage HOSTKEY servers.
Key benefits:
- Security. ACL - access restriction by IP; access type - protection against destructive actions (TBA);
- Automation. Enables users to perform basic server operations, reducing the burden of user support;
- Simplicity. To manage the server, select it and create an API token. Use the token to perform the necessary actions with confidence.
Panel usage
-
Login to Invapi;
-
To access the external server control panel, please select the server by clicking on My Servers >> Any of your Server from the list;
-
Generate an API key:
- Navigate to the Configuration tab and choose the API keys & control panel section.
- Click the
Add newbutton;
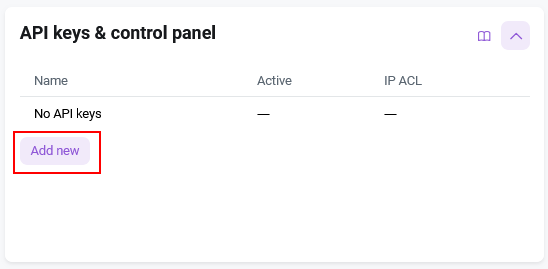
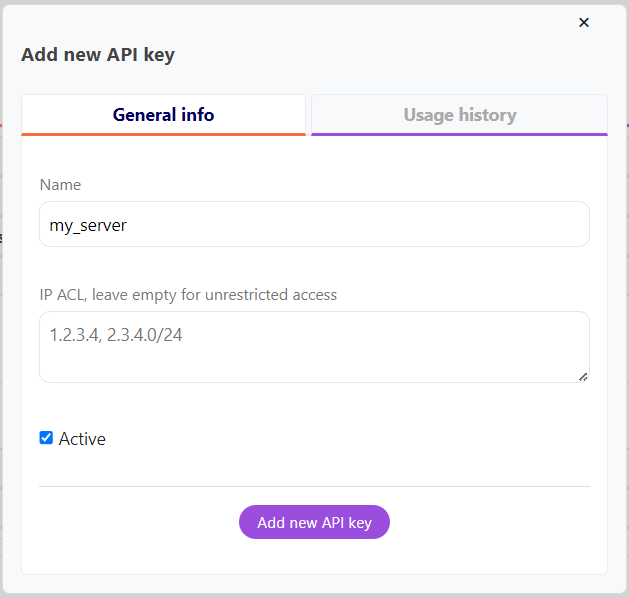
- In the Name field, enter the name of the key to identify it;
- Specify IP addresses only from which this key will be allowed access in the IP ACL field, or leave it blank for unrestricted access;
- Check the Active box to activate the key;
- Click
Add new API keybutton.
The API key will be displayed to you.
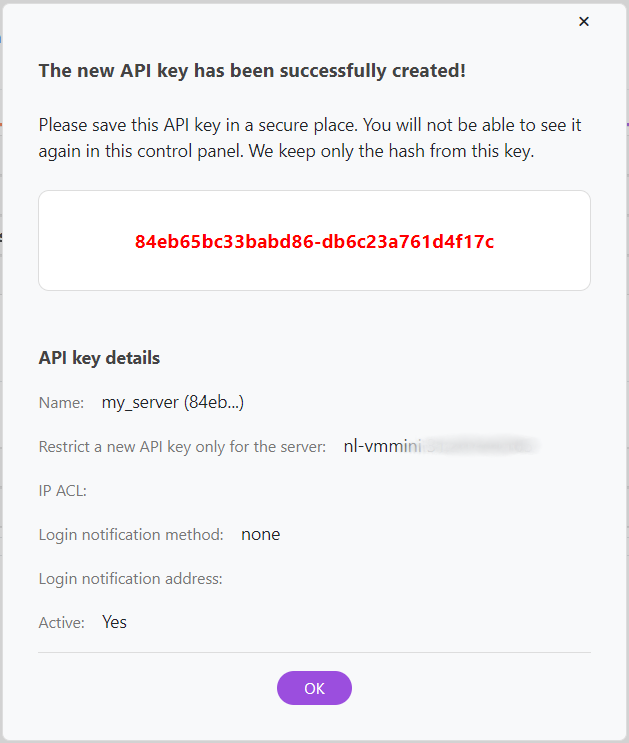
Attention
Be sure to copy and save the API key value as it will only be displayed once. Invapi stores only the hash value of the key, so if the original key is lost, it will need to be recreated.
Information
For more information on working with API keys in Invapi, please refer to the provided documentation.
-
To manage the server associated with your API key, use this link
https://panel.hostkey.com/controlpanel.html?base=invapi.hostkey.com&key=api-key. Replaceapi-keywith the key you generated earlier.Note
To host the dashboard on your domain, follow these instructions.
Description of Server Control Panel
Upon accessing the control panel through the API key link, the user will have access to the following units and features:
Information and Power Supply Unit
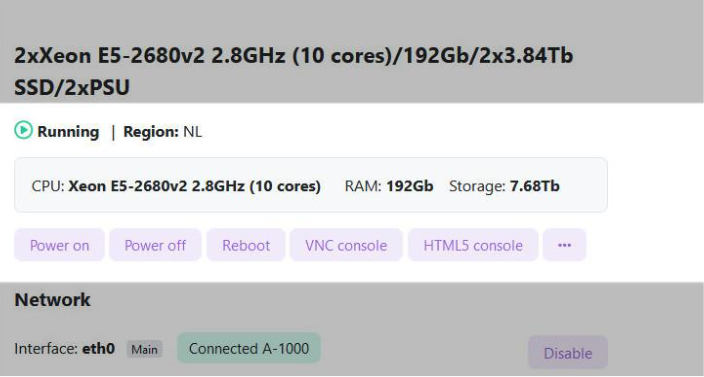
This unit presents an overview of the server, including its current status (either Running or Stopped), the server region, and the preset. Additionally, it provides information on the hardware configuration, such as the CPU, RAM, and server storage.
The server can be controlled using the 6 buttons on the unit:
Power On— server power on button;Power off— server power off button;Reboot— button to restart the server;Native Console— launches the Native browser console;Power status— returns the current power status of the server.
Attention
The server type determines the available features.
ISO Image unit
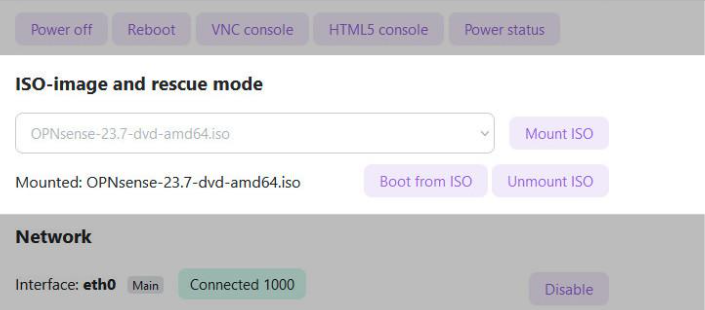
This unit's functions enable you to work with ISO images.
Note
Upon initial loading of the site, the ISO images available to this server will populate in the Select element.
The unit features three buttons for controlling ISO images:
Mount ISO— the user can mount their selected image to this server, enabling access to the Boot from ISO and Unmount ISO functions;Boot from ISO— enables you to initiate a server reboot using a mounted ISO image;Unmount ISO— Unmount the ISO image that is currently mounted on the server.
Network unit
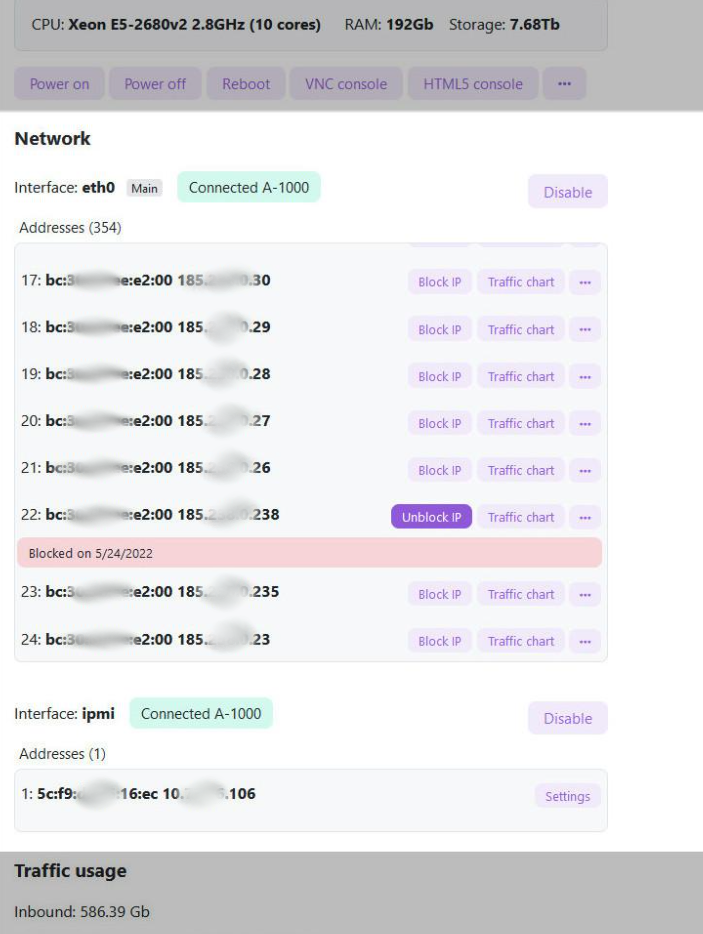
This unit contains all information and functions related to the server network. It displays:
- Interface — interfaces, also known as ports, will always display the primary interface first and mark it specially;
- The interface's connection status.
- Enable or disable the interface using buttons.
-
Addresses — all IP addresses belonging to a particular interface. Their MAC addresses, buttons, and control menus are also displayed:
Block IP— enables you to prevent access from a specific IP address and displays the date and reason for the block in a red box below;Unblock IP— enables you to unblock an IP address and make it available for use;-
Traffic chart— displays a diagram of IP address traffic: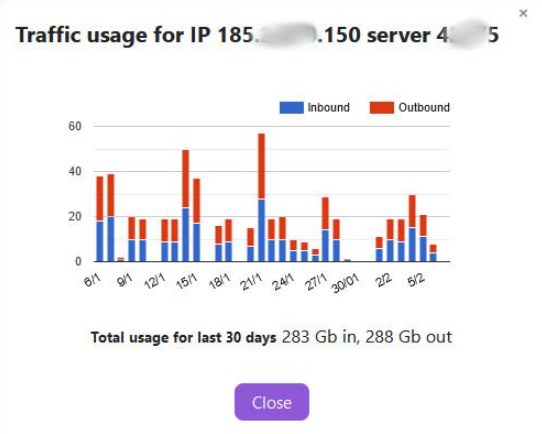
-
Scan IP (accessible by clicking on the
(3 Horisontal Dots) icon) — to scan for IP addresses and view the results: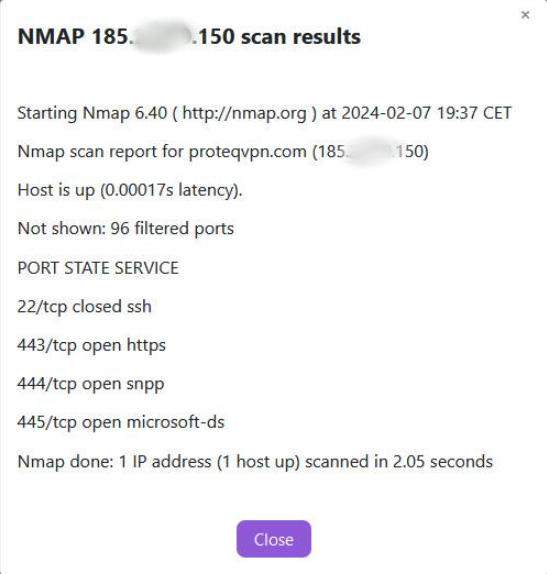
-
Settings (accessible by clicking on the
(3 Horisontal Dots) icon) — displays detailed information about the IP address, allows you to configure a PTR record for it, set it as the main interface (Main Interface Address checkbox), and set its description:
Attention
To update the PTR record information, simply press the
Update PTRbutton.
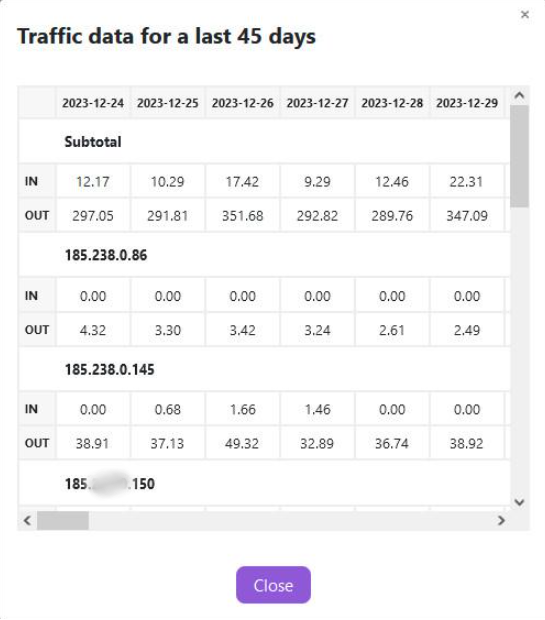
Traffic unit
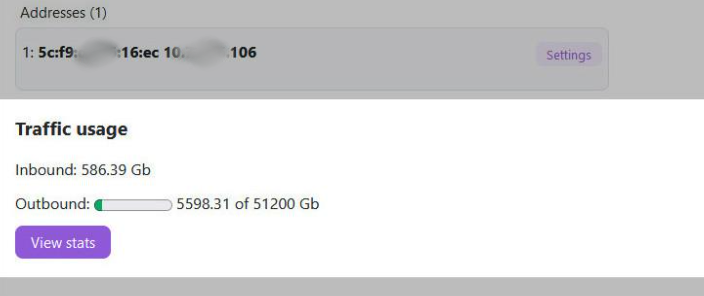
This section presents statistical information on incoming and outgoing traffic of the server.
Clicking the View stats button will display detailed statistics for each IP address for the last 30 days: