search: exclude: true
Client Management Panel
The Client Management Panel is located at the main domain of WHMCS installation. After installing and configuring the sales module, it displays: - client account details - all products and services available for resale to your clients, with which the buyer will interact. - issued invoices - client tickets - news
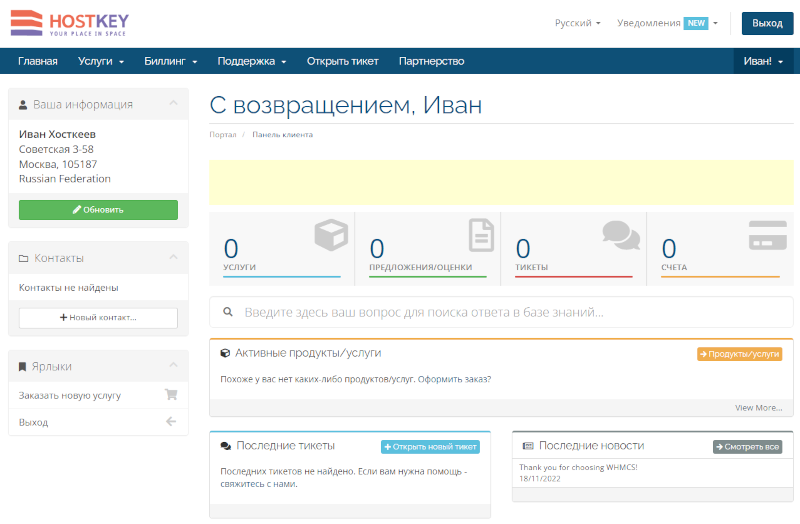
Purchasing a Product/Service
Selecting a Product
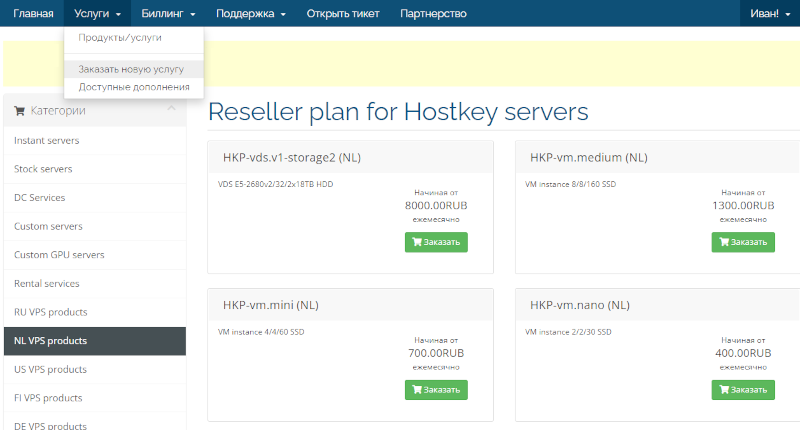
To purchase a product, you need to select the Services >> Order New Service menu option (or click on the corresponding shortcut on the homepage).
After this, a section will appear where the left-hand menu will display all available types of servers for ordering, and on the right, their available presets, starting price, payment type, and a button to order the product.
Clicking on the Order button will open the server order form:
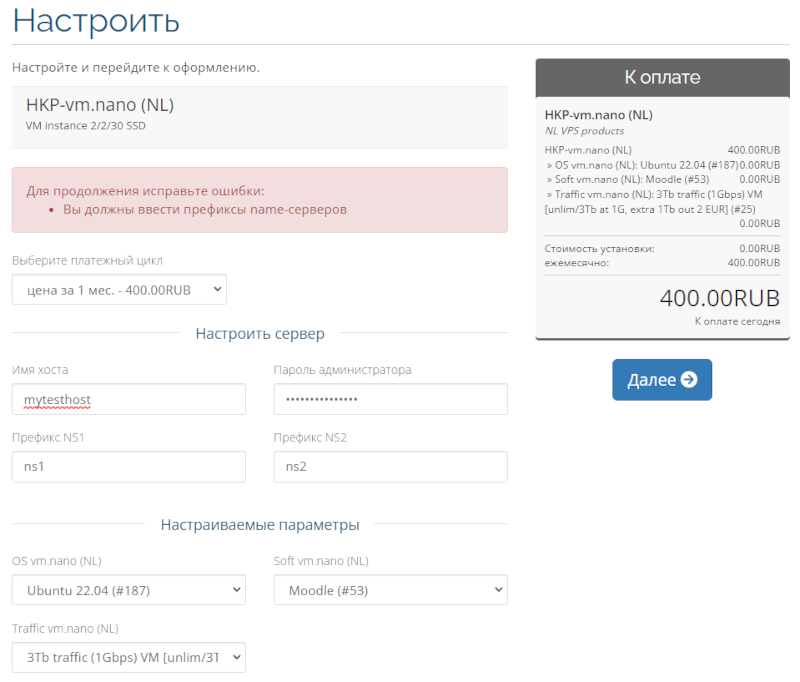
In this window, you can select:
- Payment Cycle - 1, 3, 6, or 12 months;
- Configure the server - set the host name and administrator (root) password;
- Custom parameters:
- OS - the operating system that should be installed when deploying the server;
- Soft - pre-installed software from HOSTKEY Marketplace;
- Traffic - additional network traffic. By default, it is included in the tariff and there is no need to change it.
In the right section under To Pay, the final configuration and price are shown.
Note
If any fields are filled out incorrectly, you will receive a warning message.
Clicking on the button Next allows you to proceed with server payment.
Payment of the Product
After this, the View and Pay window will open:
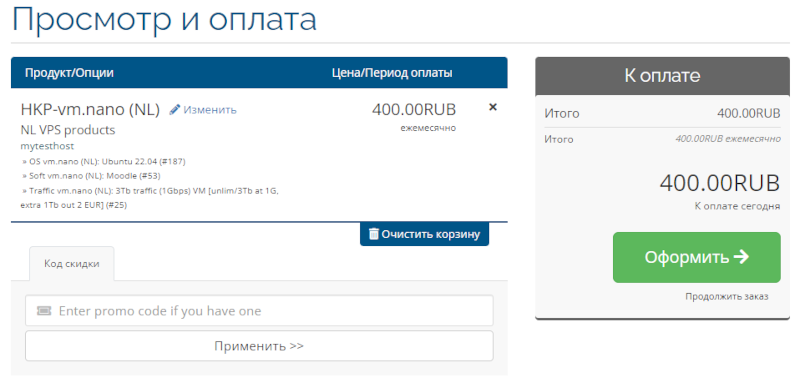
At this stage, you can:
- Cancel the order by clicking on the button
Clear Cart; - Enter a discount code in the Discount Code field and click on the button
Apply; - Confirm the order by clicking on the button
Confirm Order.
In the next window, you will need to select the payment options:
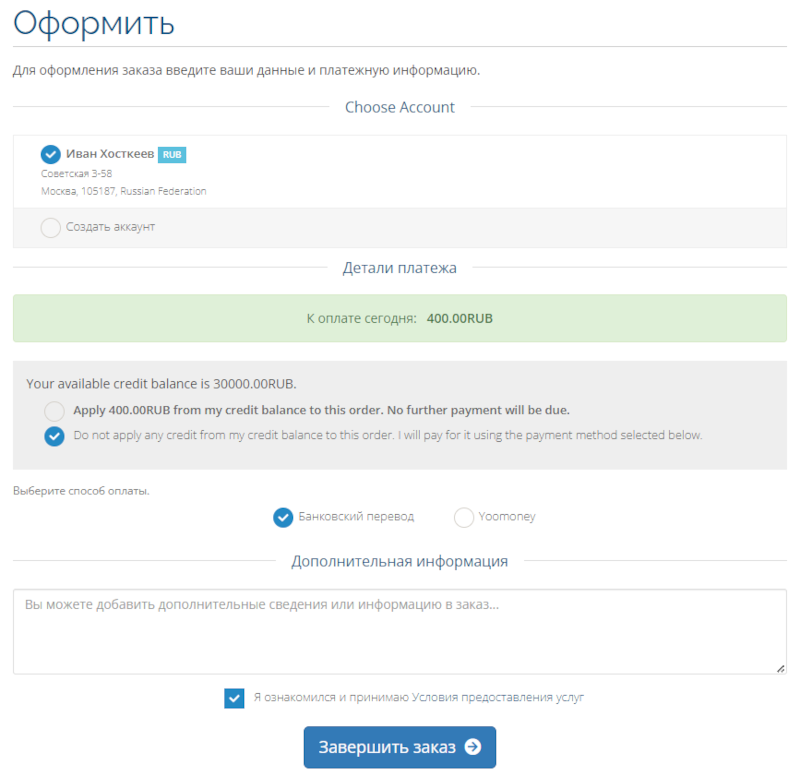
At this stage, the following options are presented for selection:
- The account for which the payment will be made and to which the server will be attached. You can choose an existing one or create a new one;
- The amount to be paid;
- The credit balance of the selected account;
- The method of payment:
- From the credit balance;
- By another method: Bank transfer or Yoomoney.
- Additional information to consider when deploying the server.
After this, it is necessary to familiarize yourself with and agree to the terms of service by checking the corresponding checkbox and clicking the Finish Order button.
When paying from a credit account, the order number is provided for contacting technical support, and the information will be duplicated on your email.

If you choose a payment method other than Yoomoney online payment, a new window will open with a payment account where you can switch between payment types.
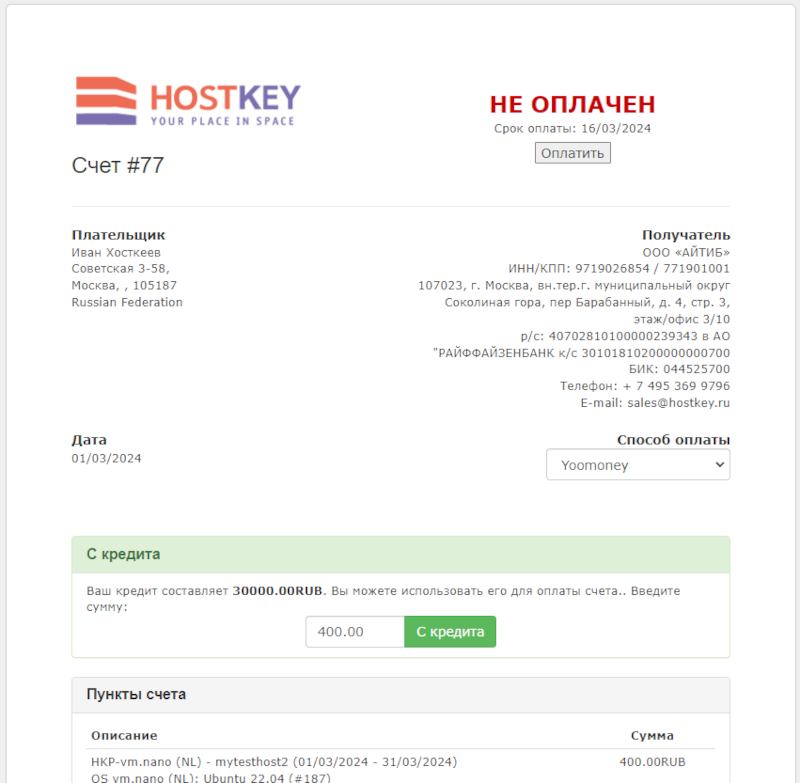
- If the Yoomoney online payment method is selected, you can pay the invoice immediately by clicking the corresponding button;
- If the bank transfer payment method is selected, the payment details will be displayed, and you can print or download the invoice using the
PrintandDownloadbuttons. - Pay from a credit balance.
Note
On the account page, you can switch between payment methods.
After receiving money to the hosting account balance, the status of the account will change to Paid in the Billing section.
Managing Ordered Products/Services
Ordered servers are displayed in the Services > Products/Services section.
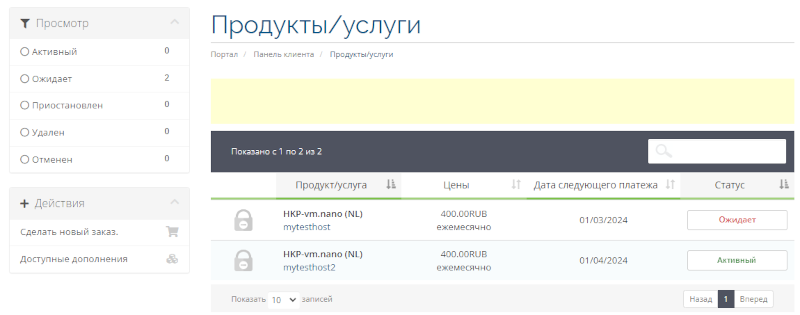
Servers ready for operation have a status of Active. Selecting such a server allows you to access the Manage Product page.
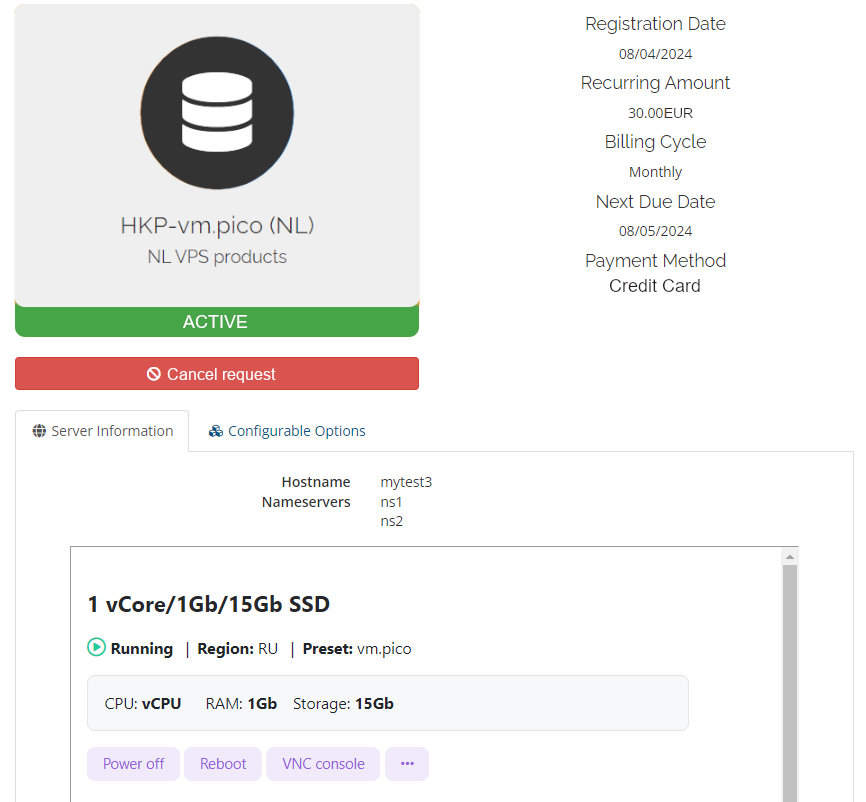
On this page, you can:
- Access the Server Control Panel;
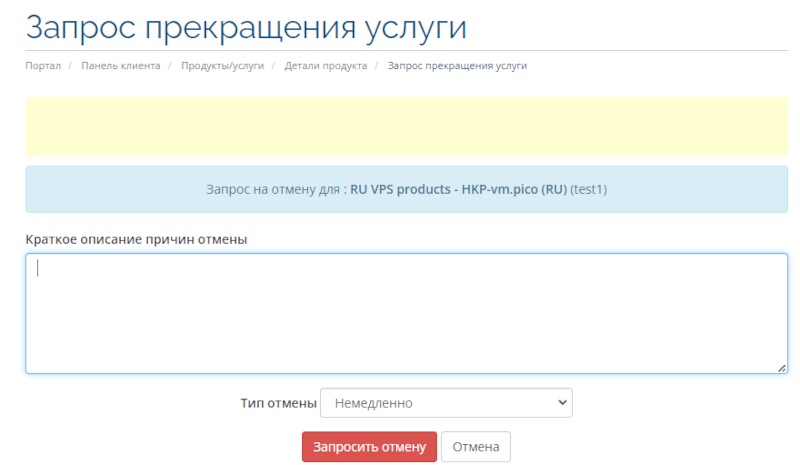
- Request a cancellation for your ordered server.
Canceling a Product
You can request a product cancellation with a refund minus the actual deployment and usage time or at the end of the payment period.
Billing
In this section, you can view your billing history and payments, as well as see and pay for unpaid invoices for services.
Viewing and Paying Invoices
To view and pay invoices, go to the Billing > My Invoices section.
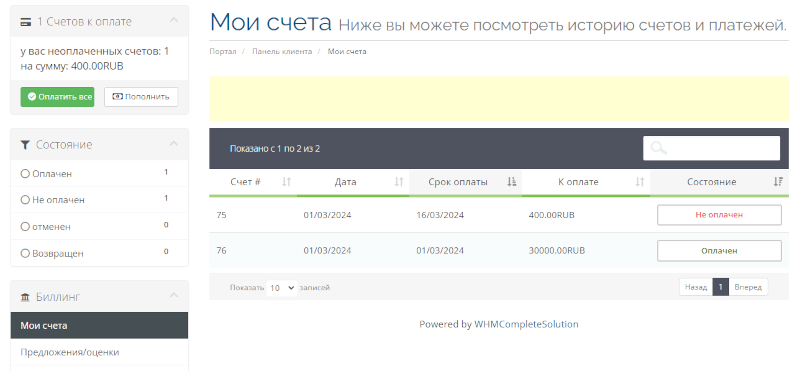
Unpaid invoices with the status Not Paid can be paid by clicking the status button. The invoice will open, allowing you to perform the following actions:
- If the online payment method through Yoomoney is selected, you can immediately pay the invoice by clicking the corresponding button;
- If the bank transfer payment method is selected, the payment details and invoice will be displayed, and can be printed or downloaded using the
PrintandDownloadbuttons. - Pay the invoice from your credit balance.
Note
You can switch between payment methods on the invoice screen.
You can pay all invoices at once by clicking the Pay All button.
Topping Up Your Credit Balance
You can also top up your credit balance by going to the Billing > Top Up section. In this section, enter the amount to top up and select the payment method, then click the Top Up button.
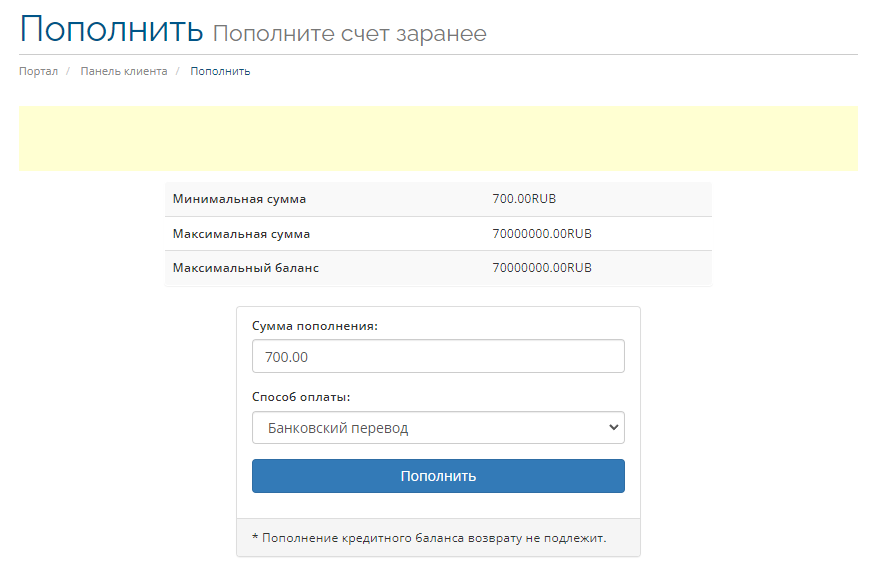
Further actions depend on the chosen payment method:
- If the online payment method through Yoomoney is selected, you can immediately pay by clicking the corresponding button;
- If the payment method is Bank Transfer, the payment details will be displayed, and the invoice can be printed or downloaded using the
PrintandDownloadbuttons.
Note
You can switch between payment methods on the invoice screen.
Once the funds are credited to your hosting account, the invoice status will change to Paid.
Note
Unpaid invoices are automatically deleted after the due date.
User Setup
User Data Setup
Edit user details by clicking the top-right name and selecting Personal Data.
 Change the displayed name on the homepage under Username > Profile.

Enable Two-Factor Authentication
Boost account security with 2FA. Go to My Name > Security Settings and click on Enable 2FA button.
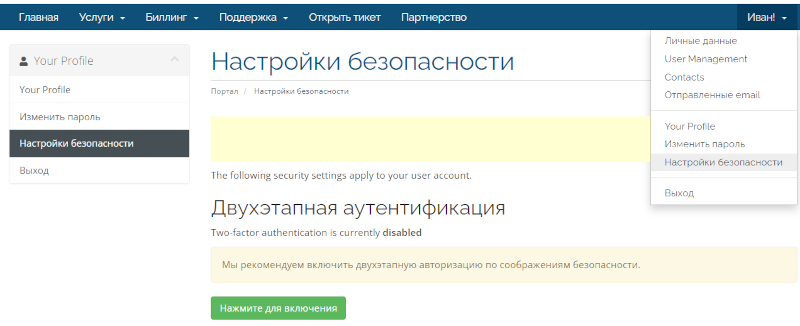
The authentication setup wizard will appear.
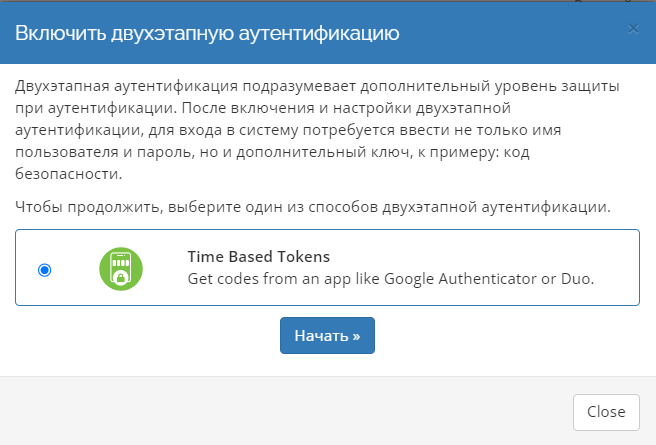
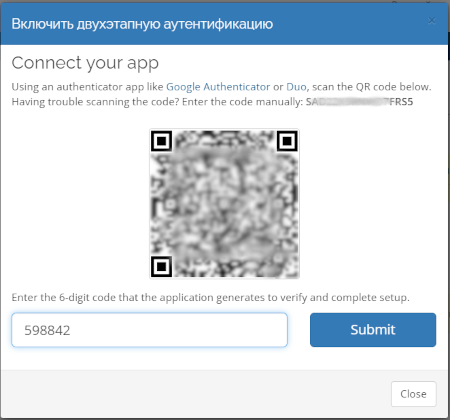
Before clicking Start you need to install the Google Authenticator app (or a similar program, such as Microsoft Authenticator) on your smartphone.
Open the app, select Add new account (for Google Authenticator, click the plus sign in the lower right corner and choose either Scan QR Code or Enter Setup Key), and scan the QR code from the screen or enter the key.
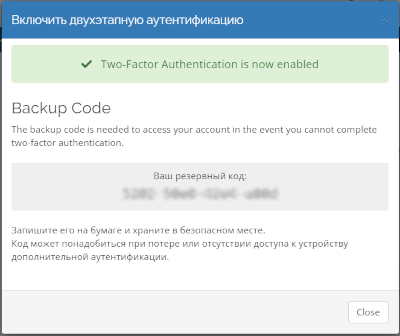
In the next window, a backup code will appear. This code may be needed if you lose access to your device or experience issues with additional authentication.
Attention
Write down the backup code on paper and store it in a safe place.
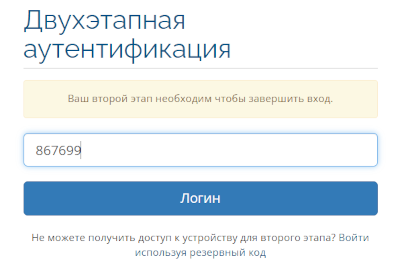
After this, when entering the client panel, a second step of inputting the code from the two-factor authentication application will be added.
To disable two-factor authentication, you need to log in again to the section My Name >> Security Settings and click on the button Click to Disable, enter the password in the opened window and click on the button Disable Two-Factor Authentication.
Changing a User's Password
To change a password, go to the section Username >> Change Password. Then enter the current password, the new password (or click on the button Generate Password for generating a password that meets security requirements), confirm the new password (it will be inserted automatically if generated) in the corresponding field, and then click on the button Save Changes. The new password must be entered upon next login to the control panel.
Attention
Write down the generated password from the Generated Password field appearing window, as when clicking on the button Copy to clipboard and insert it will be inserted in a hidden starred mode.
Mail Archive
All information sent to the user's email is stored in this section