Nextcloud
In this article
- Nextcloud. Key Features
- Deployment Features
- Getting Started After Deploying Nextcloud as a Managed App
- Getting Started After Deploying Nextcloud from the Marketplace: Configuring Installation Parameters via Cloud-init
- Getting started after deploying Nextcloud
- Changing the Domain name
- Ordering Nextcloud using the API
Information
Nextcloud is an open source server software. It allows you to create your own cloud service for data storage and collaboration. It is based on the PHP programming language and provides the ability to use various databases such as MySQL, PostgreSQL and SQLite. Nextcloud supports client-level data encryption, which ensures security while transferring data over the Internet. With the help of Nextcloud, you can synchronize data between different devices and work online and offline. Nextcloud offers an extensive set of collaboration tools such as document exchange, task management, calendars, and contacts. Nextcloud can also be integrated with other services such as Google Drive, Dropbox and Microsoft OneDrive.
Nextcloud. Key Features
Nextcloud has many features that make it an effective tool for storing and processing data:
- File storage. Nextcloud allows you to store files on a server and access them through a web interface or through applications for desktop computers and mobile devices.
- File synchronization. Ability to synchronize files between different devices makes the service a convenient tool for working in various conditions.
- Version control. Nextcloud allows you to save multiple versions of the same file. It will also let you restore previous versions if needed.
- Access to files through the web interface. Nextcloud has a web interface that allows you to access files through a browser, making it a convenient tool to work on any device.
- Management of calendars and tasks. Nextcloud lets you create and manage calendars and tasks, making it a useful tool for organization.
- Contact management. Nextcloud allows you to create and manage contacts, making it a handy tool for managing communications.
- Access to files through applications. Nextcloud has applications for desktop computers and mobile devices which let you access files through them.
- Expandability. Nextcloud has many additional applications that can be installed and used to expand the functionality. They are applications for online collaboration, document editing, project management, etc.
Note
You can deploy Nextcloud as a Managed App. To do this, select Services > Managed Apps in the Invapi server control panel.
Deployment Features
| ID | Name of Software | Compatible OS | VM | BM | VGPU | GPU | Min CPU (Cores) | Min RAM (GB) | Min HDD/SDD (GB) | Custom Domain | Active |
|---|---|---|---|---|---|---|---|---|---|---|---|
| 16 | Nextcloud | Ubuntu 22.04 | + | + | + | + | 2 | 4 | 40 | Yes | ORDER |
For this software, you can set a custom domain during installation. See instructions
- Nextcloud is included in the kernel and no additional installation is required. We provide a web interface through which the service is installed and configured.
- The configuration files are located in:
/opt/nextcloud- Nextcloud installation and configuration;/opt/nginx- installation and configuration of Nginx service;/opt/nextcloud/compose.yml- run docker compose, which starts a bunch of Nextcloud + Onlyoffice containers.
- SSL certificate generation is based on jonasal/nginx-certbot assembly.
-
These commands may be necessary to update containers' versions and edit the configuration file.
- To stop containers, run the command
Then
- To enable containers, run the command
Then
-
Docker compose up -drunscompose.ymlfile, which downloads and launches the following containers:- db - container, PostgreSQL is downloaded, and the following settings are made:
- The Nextcloud database (or base) is created;
- The Nextcloud user is generated;
- the password for SSH (it is sent in an email to your email address once the server is ready to work after deploying the software);
- The standard port is 5432.
- redis - container, storing calls to Nextcloud in memory and only after records in the PostgreSQL database. PotgreSQL
- app - container, Nextcloud service has the following parameters:
- Access to an application is carried out from a web browser or mobile app using the link
https://nextcloud(server_id).hostkey.in(for example,https://nextcloud16094.hostkey.in); - login:
admin; - password: from ssh;
- Access to an application is carried out from a web browser or mobile app using the link
- onlyoffice-document-server - container, OnlyOffice service runs on port 80.
Attention
This container starts within 6 minutes. At this time, you can go to the Nextcloud web interface, upload and download files, but the ability to edit documents will appear only 6 minutes after running
docker compose up -d(it takes some time to start some components).- nginx - container, Nginx service that accepts requests on ports 80 and 443 and redirects requests to the Nextcloud container.
- db - container, PostgreSQL is downloaded, and the following settings are made:
Note
Unless otherwise specified, by default we install the latest release version of software from the developer's website or operating system repositories.
Getting Started After Deploying Nextcloud as a Managed App
After deploying Nextcloud as a managed app, you can find the following in the My Apps tab of the server control panel:
- an application link;
- login and password for access;
- information regarding service usage and management.
For more details on working with managed apps, see the instructions.
Getting Started After Deploying Nextcloud from the Marketplace: Configuring Installation Parameters via Cloud-init
When ordering a server with Nextcloud, you can pre-configure the main installation parameters using cloud-init configuration during the ordering process at the Automatization stage. This allows you to automatically set administrator credentials, email, and data storage path:
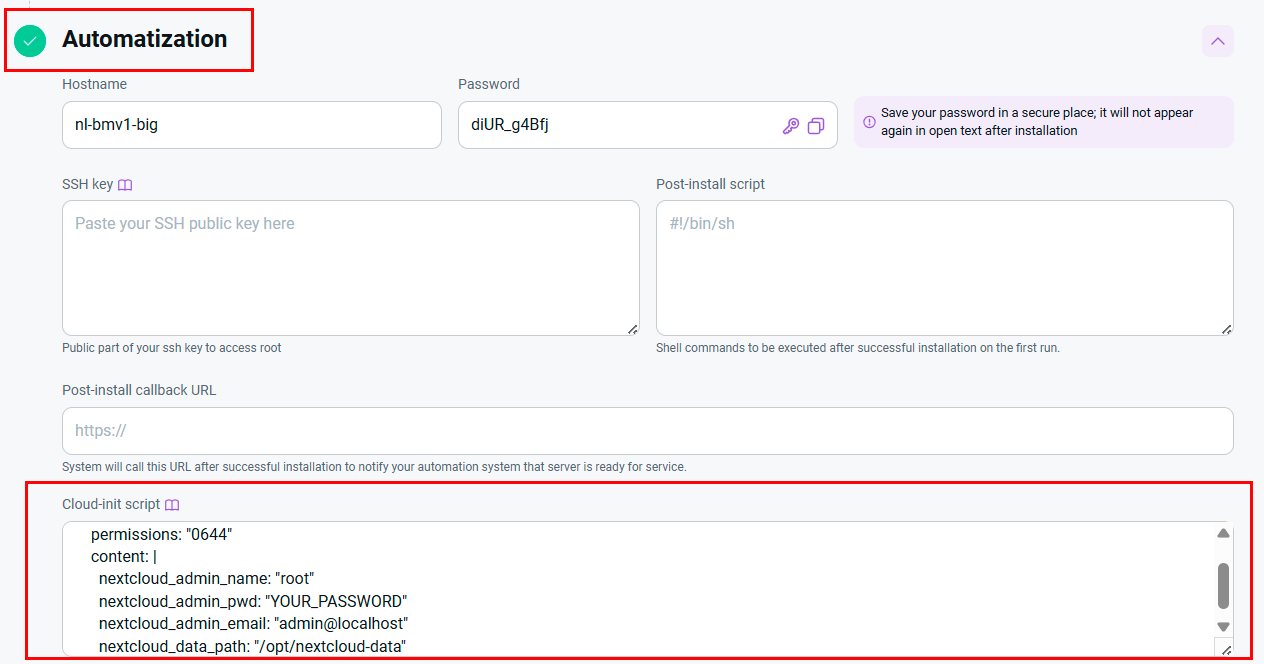
Configuration Parameters
To configure Nextcloud via cloud-init, use the following format:
write_files:
  - path: "/opt/main.yml"
    permissions: "0644"
    content: |
      nextcloud_admin_name: "root"
      nextcloud_admin_pwd: "YOUR_PASSWORD"
      nextcloud_admin_email: "admin@localhost"
      nextcloud_data_path: "/opt/nextcloud-data"
Parameter Description
- nextcloud_admin_name - administrator account name (default:
admin); - nextcloud_admin_pwd - administrator password (specify your strong password);
- nextcloud_admin_email - administrator email for notifications;
- nextcloud_data_path - path for storing Nextcloud data (default:
/opt/nextcloud-data).
Recommendation
Use a strong password for nextcloud_admin_pwd and a real email for nextcloud_admin_email to receive important system notifications.
Important
After applying cloud-init configuration, the specified parameters will be used instead of the default ones. Save this data in a secure place.
Getting started after deploying Nextcloud
A notification will be sent to the e-mail specified during registration that the server is ready for work after paying for the order. It will contain the IP address of the VPS, as well as the login and password for the connection. Clients of our company manage the hardware in the server`s and API control panel — Invapi.
You can find the authorization data either in the Configuration* >> **Tags tab of the server control panel or in the email that was sent.
- Link to access the Nextcloud dashboard with a web interface: in the webpanel tag;
- Login:
admin; - Password: Sent to your email address after the server is ready for use following software deployment.
After moving to the Nextcloud control panel, you must enter your login and password:
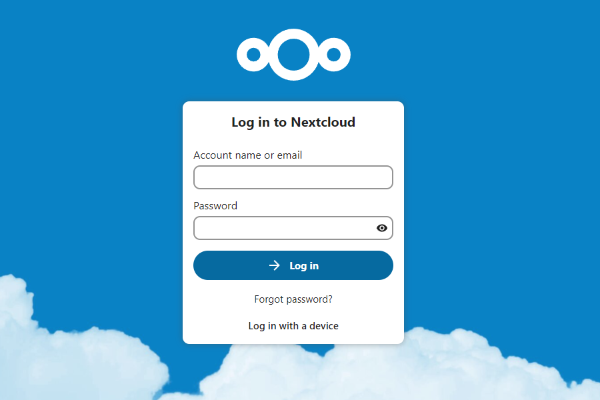
After logging in successfully, you can start using the service.
Note
For more information on the basic settings of Nextcloud, see documentation of the developers.
Attention
To order the Nextcloud server, you should choose a server in accordance with the recommendations of the developers.
Changing the Domain name
Before starting work on changing the domain name, it is recommended to create a backup of all files specified in the instructions. To create backups of the main files, execute the following commands:
-
Create a directory for backups
-
Copy the Nginx configuration file
-
Copy the Docker Compose file
-
Copy the configuration script
-
Copy the Nextcloud configuration file
These commands will create backups of all key files that will be changed during the domain name change process. In case of problems, you can restore the original configuration from these backups.
Restoring from Backups and Deleting After Successful Migration
If the domain name change process fails and you need to restore the original configuration, execute the following commands:
-
Restore the Nginx configuration file
-
Restore the Docker Compose file
-
Restore the configuration script
-
Restore the Nextcloud configuration file
-
Restart containers
-
Restart nginx
These commands will restore all configuration files to their original state and restart the necessary services.
Once you are sure that the domain name change was successful and everything is working correctly (it is recommended to wait at least 24-48 hours for full testing), you can safely delete the backups:
-
Check the contents of the backup directory
-
Delete the entire backup directory
Before deletion, it is recommended to check the directory's content to ensure you are deleting only the necessary files.
Configuring Files
-
Connect to the server via SSH:
-
Change the hostname (optional):
-
Edit
/etc/hosts:Add a line linking the new domain to the server's IP address:
(replace the IP address and domain name with your values)
Configuring Nginx
-
Find and edit the Nginx configuration file:
Replace all instances of the old domain name (
nextcloud<server ID>.hostkey.in) with the new one (YOUR_DOMAIN_NAME):- Line 4:
server_name nextcloud<server ID>.hostkey.in;>server_name YOUR_DOMAIN_NAME; - Line 15:
server_name nextcloud<server ID>.hostkey.in;>server_name YOUR_DOMAIN_NAME; - Line 17:
ssl_certificate /etc/letsencrypt/live/nextcloud<server ID>.hostkey.in/fullchain.pem;>ssl_certificate /etc/letsencrypt/live/YOUR_DOMAIN_NAME/fullchain.pem; - Line 18:
ssl_certificate_key /etc/letsencrypt/live/nextcloud<server ID>.hostkey.in/privkey.pem;>ssl_certificate_key /etc/letsencrypt/live/YOUR_DOMAIN_NAME/privkey.pem; - Line 19:
ssl_trusted_certificate /etc/letsencrypt/live/nextcloud<server ID>.hostkey.in/chain.pem;>ssl_trusted_certificate /etc/letsencrypt/live/YOUR_DOMAIN_NAME/chain.pem;
- Line 4:
-
Rename the configuration file:
-
Restart the Nginx container:
Configuring Nextcloud
-
Edit the Docker Compose file:
Replace all instances of the old domain name with the new one (YOUR_DOMAIN_NAME). Pay attention to lines containing:
- Line 40:
- OVERWRITECLIURL=https://nextcloud<server ID>.hostkey.in/ - Line 41:
- OVERWRITEHOST=nextcloud<server ID>.hostkey.in
- Line 40:
-
Edit the Nextcloud configuration script:
Replace all instances of the old domain name with the new one. Pay particular attention to lines:
- Line 11:
if ! grep -q "nextcloud<server ID>.hostkey.in" trusted_domain.tmp; then - Line 13:
docker exec -u www-data app-server php occ --no-warnings config:system:set trusted_domains $TRUSTED_INDEX --value="nextcloud<server ID>.hostkey.in" - Line 23:
docker exec -u www-data app-server php occ --no-warnings config:system:set onlyoffice StorageUrl --value="https://nextcloud<server ID>.hostkey.in/
- Line 11:
Applying Changes
-
Navigate to the Nextcloud directory:
-
Stop and remove existing containers:
This command will stop and remove all containers defined in the
compose.ymlfile but will retain all data in volumes. -
Start Nextcloud containers:
-
Run the configuration script:
If the script reports an error that the command "maintenance:install" is not defined, this is normal—Nextcloud has already been installed.
Checking and Debugging
-
Verify that Nextcloud is accessible via the new domain name:
Open your browser to
https://YOUR_DOMAIN_NAME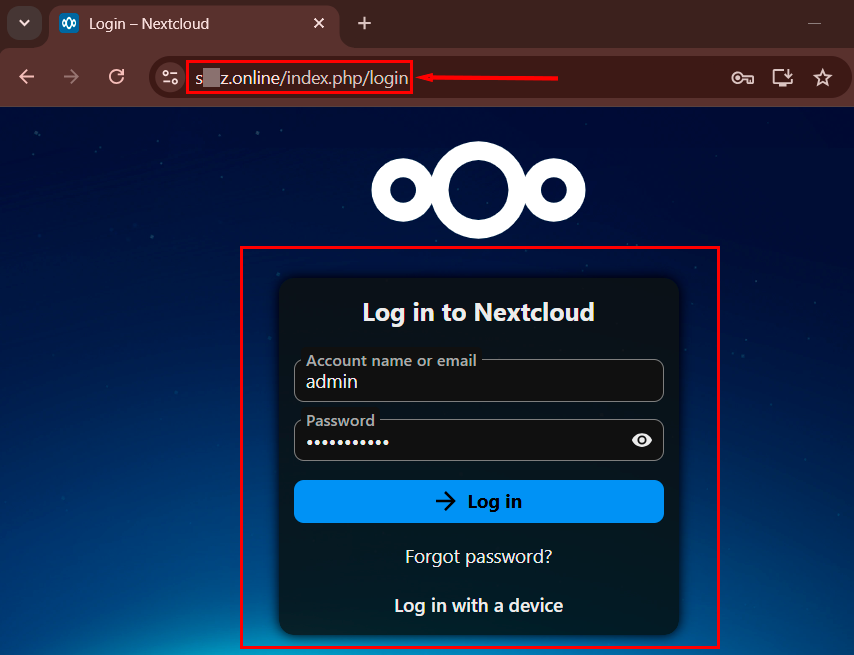
-
If there are issues, check the logs:
-
Manually configure trusted_domains if necessary:
-
If OnlyOffice is used, verify its settings:
Important Notes
- After making changes, it is essential to clear your browser cache;
- All user credentials remain the same as before changing the domain name;
- If your DNS provider requires time for record updates, some delay may occur before the new domain name starts working;
- Ensure that the A-record in DNS points to the correct IP address of your server;
- The PTR record (reverse DNS) is not critical for Nextcloud's operation but can be updated through the control panel for full consistency.
Ordering Nextcloud using the API
To install this software using the API, follow these instructions.