PyTorch
In this article
Information
PyTorch is an open-source machine learning library developed by Meta AI (formerly Facebook AI Research). It provides a flexible and efficient toolkit for creating and training deep learning models, as well as conducting research in the field of artificial intelligence. The PyTorch server offers a secure and isolated computational environment supporting modern NVIDIA GPU graphics processing units. A private PyTorch server can be beneficial for researchers, developers, and companies that require a secure and high-performance computing environment for developing and training machine learning models using PyTorch. It ensures full control over resources and data confidentiality, while accelerating the model training process by leveraging modern NVIDIA GPUs.
PyTorch: Key Features
- Pre-configured PyTorch environment: pre-installed latest stable version of PyTorch. Optimized NVIDIA drivers and CUDA settings. Support for creating and managing multiple virtual Python environments.
- High-performance tensor computations: rich set of optimized operations for efficient work with multi-dimensional tensors (data arrays). Acceleration of computations on graphics processing units (GPU) using CUDA.
- Dynamic computation graphs: flexible definition of computational graphs at runtime, rather than static compilation beforehand. Suitable for research tasks and rapid prototyping of models.
- Automatic differentiation: effective and high-performance mechanism for computing gradients of complex functions. Support for dynamic computation graphs and high-level interfaces.
- Deep learning library: comprehensive set of pre-trained architectures (CNNs, RNNs, Transformers, etc.). Complete toolkit for training, evaluating, and deploying deep learning models.
- Extensibility and compatibility: ability to define custom differentiable operations and layers. Seamless integration with other popular libraries (NumPy, SciPy, Pandas, etc.) for solving data processing tasks.
The private PyTorch server is designed for researchers, developers, and companies that require a secure and high-performance computing environment for developing and training machine learning models using PyTorch. It ensures full control over resources and data confidentiality, while accelerating the model training process by leveraging modern NVIDIA GPUs.
Deployment Features
| ID | Compatible OS | VM | BM | VGPU | GPU | Min CPU (Cores) | Min RAM (Gb) | Min HDD/SDD (Gb) | Active |
|---|---|---|---|---|---|---|---|---|---|
| 114 | Ubuntu 22.04 | - | - | + | + | 1 | 1 | - | Yes |
- Installation time: 15-30 minutes along with the OS;
- Installs Python, PyTorch, CUDA, and NVIDIA drivers;
- System requirements: professional graphics card (NVIDIA RTX A4000/A5000, NVIDIA H100), at least 16 GB of RAM.
Note
Unless otherwise specified, by default we install the latest release version of software from the developer's website or operating system repositories.
Getting Started after Deployment
After payment confirmation sent to your registered email address, you will receive a notification that the server is ready for use. This notification will include the VPS IP address and login credentials. You can manage the equipment through our Server Control Panel or API - Invapi.
The authentication data can be found in the Info >> Tags panel or in the email sent:
- Login:
rootfor administrator,userfor working with PyTorch; - Password: for administrator, received in an email upon server deployment; for user
user, located in the file/root/user_credentials.
Connecting and Initial Settings
After gaining access to the server, you need to establish a connection with it via SSH with superuser (root) privileges:
Then, execute the command:After executing the command, a text file containing the user user credentials will be opened. You must copy the password for the user user.
Next, complete the root session and reconnect to the server via SSH as the user user, using the copied password. Alternatively, you can also execute the following command from under root:
This will ensure a transition to the user account.
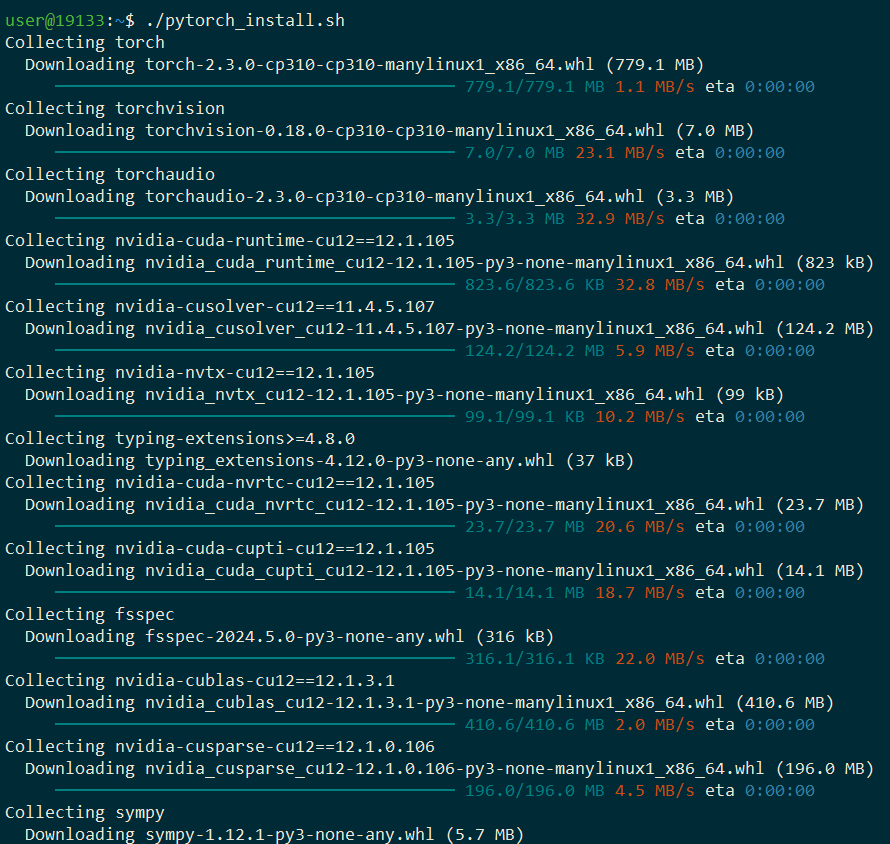
To verify that the necessary components are correctly installed, you can run the script:
The result of executing the command:

After successfully executing the script, you need to activate the virtual environment venv using the command:
Now you can start working in the Python interpreter by running it with the command:
The interpreter is ready for inputting commands and executing code.
Note
Detailed information on PyTorch's primary settings can be found in the developer documentation.
Ordering a Server with PyTorch using API
To install this software using the API, follow these instructions.