ComfyUI
In this article
Information
ComfyUI is a user interface designed for creating image generation workflows using machine learning models. It provides a visual programming environment based on nodes, allowing users to construct complex image processing pipelines without needing to write code.
ComfyUI: Key Features
- Visual Programming: An intuitive node-based interface for building intricate image generation workflows.
- Model Support: Compatibility with a wide range of image generation models, including various versions of Stable Diffusion.
- Extensibility: The ability to add custom nodes and integrate your own models or algorithms.
- Parameter Control: Precise control over generation parameters, including image size, number of steps, sampling methods, and more.
- img2img and Inpainting Support: Utilize existing images as a base or mask for image generation.
- CUDA Integration: Optimized GPU utilization for accelerated generation.
- Workflow Saving and Loading: Save complex configurations for reuse or sharing.
- Flux Integration: Automate workflow management and task orchestration through Flux.
- Active Community: Regular updates, a wide selection of community-created nodes, and extensions.
- Local Execution: All computations are performed locally, ensuring data privacy and control.
A private server with ComfyUI offers high performance, complete control over the generation process, and data confidentiality.
Deployment Features
| ID | Compatible OS | VM | BM | VGPU | GPU | Min CPU (Cores) | Min RAM (Gb) | Min HDD/SDD (Gb) | Active |
|---|---|---|---|---|---|---|---|---|---|
| 213 | Ubuntu 22.04 | - | - | + | + | 4 | 16 | 240 | Yes |
- Installation time: 20-40 minutes including OS setup;
- Installs Python, ComfyUI, CUDA, NVIDIA drivers, and Flux;
- System Requirements: A professional graphics card (NVIDIA RTX A4000/A5000, NVIDIA A100), at least 16 GB of RAM.
-
All models are stored in the
/root/ComfyUI/models/directory within specific subdirectories:checkpoints/: Main Stable Diffusion models;loras/: LoRA models;vae/: VAE models;controlnet/: ControlNet models;upscale_models/: Models for image upscaling;embeddings/: Textual Inversion embeddings;hypernetworks/: Hypernetworks.
-
To add a new model, copy the model files into the corresponding directory and restart ComfyUI.
Note
Unless otherwise specified, by default we install the latest release version of software from the developer's website or operating system repositories.
Getting Started After ComfyUI Deployment
After your order is paid, you will receive a notification to the email address you provided upon registration, informing you that your server is ready. This notification will include the VPS IP address, as well as login credentials for connection. Our company's clients manage their equipment through the server management panel and API — Invapi.
Authentication data, which can be found in the Info >> Tags tab of the server management panel or in the email you received, include:
- Link to access the ComfyUI web interface: in the webpanel tag;
- Login:
root- for the administrator; - Password: sent to your email address upon server delivery.
Connection and Initial Setup
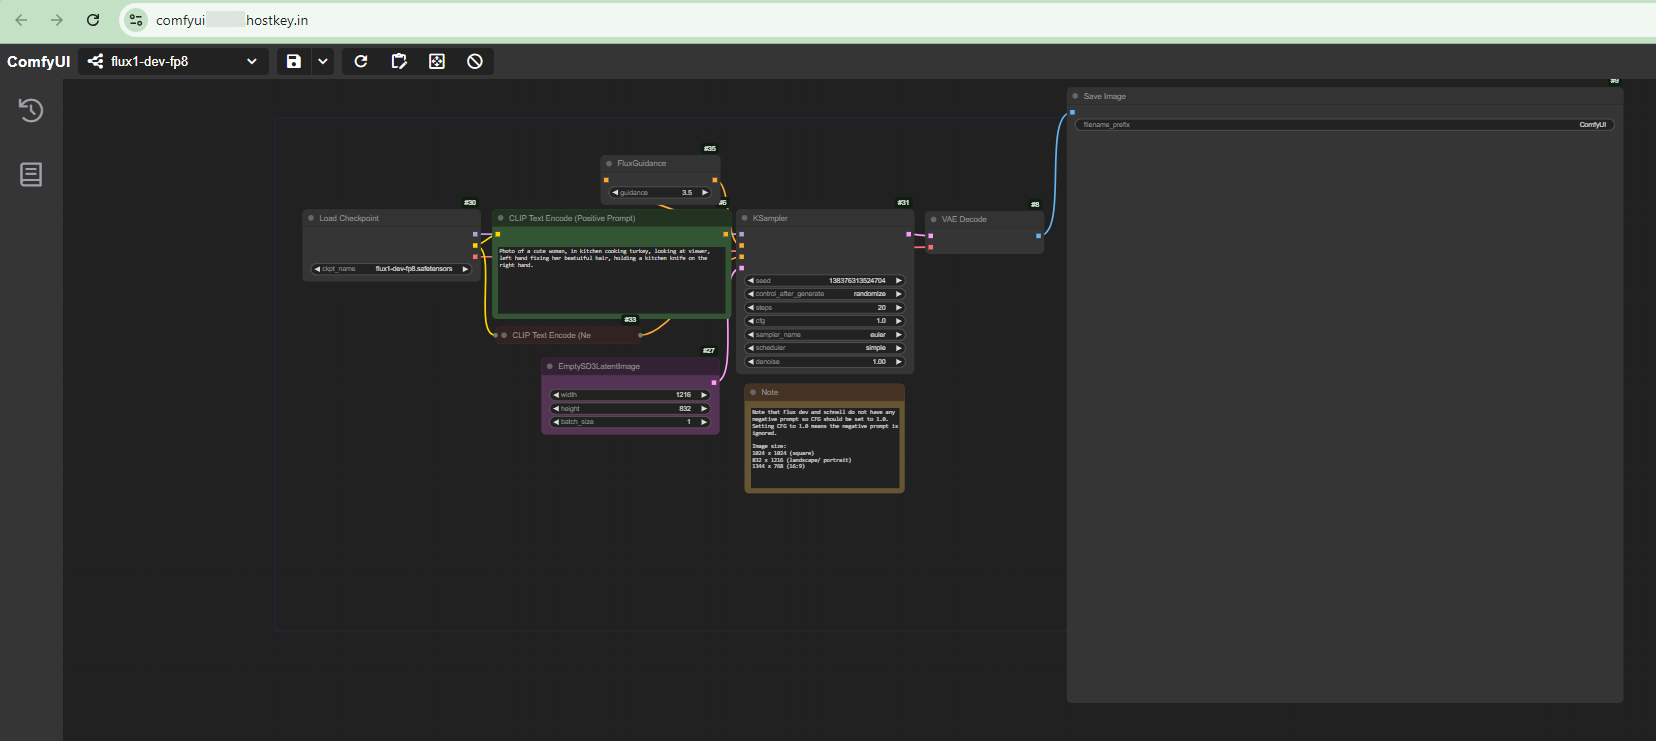
After clicking the link from the webpanel tag, you will be taken to the ComfyUI workspace:

The workspace is a graphical interface where the main control elements are displayed as interconnected nodes. The top section features the toolbar with the "Unsaved Workflow" dropdown menu and the "Queue" button on the right.
Key working elements include:
- Load Checkpoint node for loading the model's checkpoint;
- Two CLIP Text Encode nodes for entering text prompts, where you can specify the desired image description and unwanted elements;
- KSampler node with generation settings, including:
- seed (generation seed);
- number of steps (steps);
- prompt following strength (cfg);
- sampler type (euler);
- scheduler;
- noise level (denoise);
- Empty Latent Image node for setting the output image resolution (512x512 pixels);
- VAE Decode and Save Image nodes for final processing and saving the result.
All nodes are connected by colored lines, indicating the data flow path during image generation. Each node can be configured by modifying its interface parameters. This interface allows you to visually construct and configure the image generation process by connecting different functional blocks and setting parameters for each stage of processing.
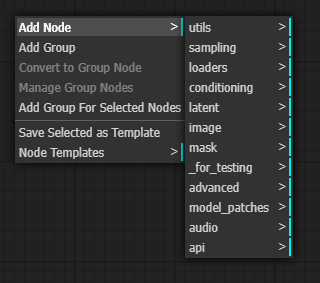
To add a new node to the workspace, right-click anywhere and select the desired node from the context menu. Nodes are organized into categories for easy searching:

The button in the bottom left corner of the ComfyUI interface opens the Settings window, containing all the main application settings.
Generating Images
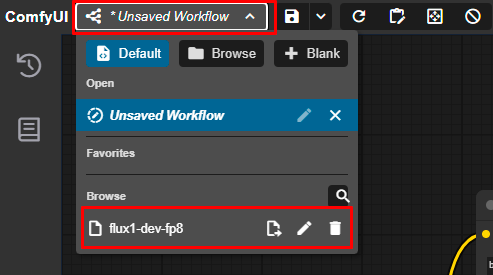
Selecting a Workflow
After accessing the ComfyUI web interface, in the top left corner of the menu Workflow, select the configuration for the Flux model (flux1-dev-fp8) from the dropdown list:

The loaded workflow will automatically configure all necessary nodes and parameters.
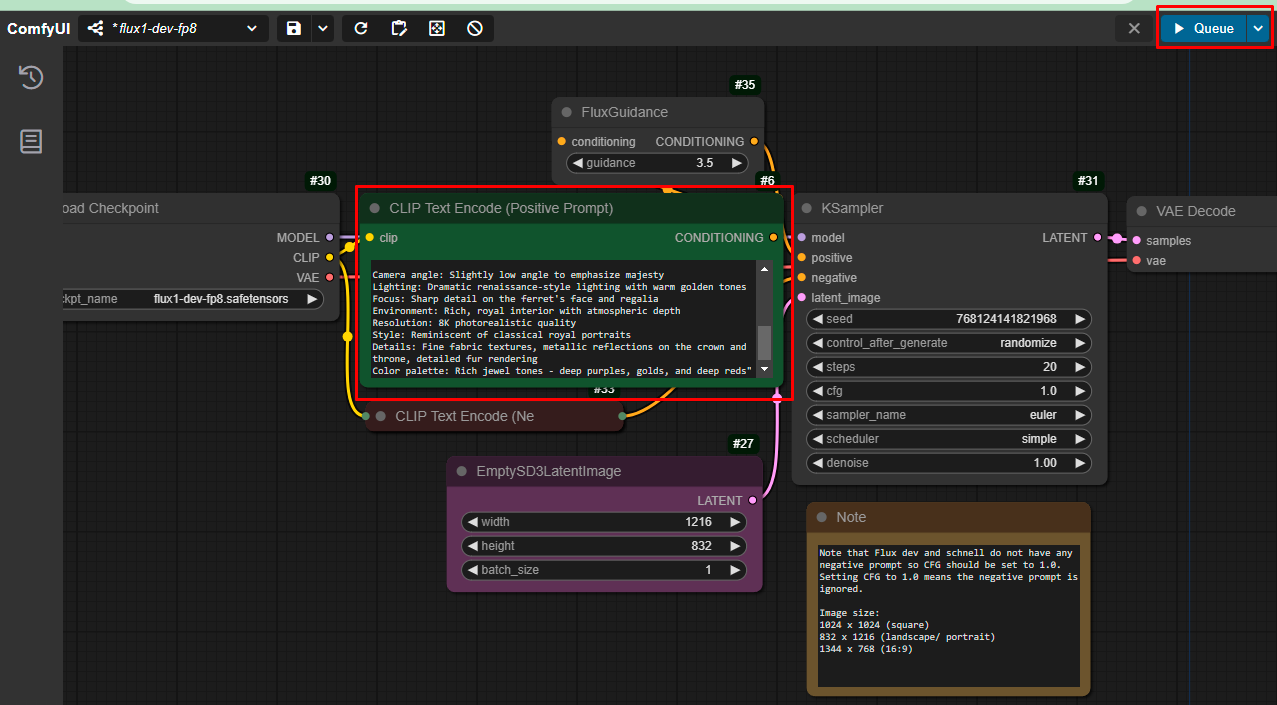
To generate an image, enter a prompt in the CLIP Text Encode (Positive Promt) field and click the Queue button:

If everything is configured correctly, you will see the generated image in the ComfyUI interface:

Note
Detailed information on using ComfyUI can be found in the official project documentation.
Installing the Stable Diffusion 3.5 Medium Model
The SD 3.5 Medium model can be run on any Nvidia vGPU with RTX and 16+ GB of video memory (A4000, A5000, A6000, A100, H100, 4090).
Here's how to do it:
-
Log in as root via SSH to your server with ComfyUI and navigate to the
/root/ComfyUI/models/checkpointsdirectory using the command: -
Download the SD 3.5 Medium model with integrated encoders:
-
Log into the ComfyUI web interface and use the same workflow as offered by default for the Flux model, selecting the sd3.5_medium_incl_clips_t5xxlfp8scaled.safetensors model in the Load Checkpoint block and changing the values in the KSampler block to:
- cfg = 4.5
- scheduler = sgm_uniform
- denoise = 0.95
Note
You can download the workflow yourself link and "drag and drop" its JSON file into ComfyUI open in your browser.
After this, you can generate images using the new model.

Ordering a Server with ComfyUI using API
To install this software using the API, follow these instructions.