Chatwoot
In this article
Information
Chatwoot is an open-source customer engagement platform that integrates various communication channels—email, website live chat, social media, and messengers—into a single workspace for support teams.
Chatwoot Key Features
- Omnichannel: receive and process inquiries from email, website live chat, WhatsApp, Facebook, Instagram, Telegram, as well as via API/SMS channels—all in one interface.
- Teamwork: distribute dialogues between agents and teams, internal (private) notes, colleague mentions, and assigning responsible parties.
- Automation: canned responses (quick reply templates), automation rules, chatbots, and macros for standard actions.
- Analytics and Reporting: built-in reports on agent workload, response time, number of dialogues, and customer satisfaction.
- Open Source: possibility of self-hosted deployment without the limitations on the number of agents found in cloud SaaS versions.
Deployment Features
| ID | Name of Software | Compatible OS | VM | BM | VGPU | GPU | Min CPU (Cores) | Min RAM (GB) | Min HDD/SDD (GB) | Custom Domain | Active |
|---|---|---|---|---|---|---|---|---|---|---|---|
| 627 | Chatwoot | Ubuntu 22.04 | + | + | + | + | 4 | 4 | 20 | No | ORDER |
Information
You can find information regarding the deployment features of this software at this link.
Note
Unless otherwise specified, we install the latest release version of the software from the developer's website or the operating system repositories by default.
Connection Data
After paying for your order, a notification will be sent to the email address provided during registration once the server is ready for operation. It will contain the VPS IP address, as well as the login and password for connection.
Service management is performed in the Chatwoot web interface control panel; the link is located in Invapi.
You can find authorization data either in the Info >> Tags section of the server management panel or in the sent email:
- Link: in the webpanel tag;
- Login and Password for server management: sent via email to your address once the server is ready after software deployment. Application administrator credentials (email and password) are created separately during registration upon your first visit to the web interface.
The web interface will be available at: https://chatwoot{Server_ID_from_Invapi}.hostkey.in
Note
To connect the Chatwoot panel itself to the PostgreSQL and Redis databases, a default technical password set during automatic installation is used by default. You can view the current value in the configuration file on the server:
For security purposes, it is recommended to change the password to your own — check official Chatwoot documentation for details.Getting Started After Chatwoot Deployment
-
For the initial setup, go to a link like -
https://chatwoot<Server_ID>.hostkey.com/installation/onboarding.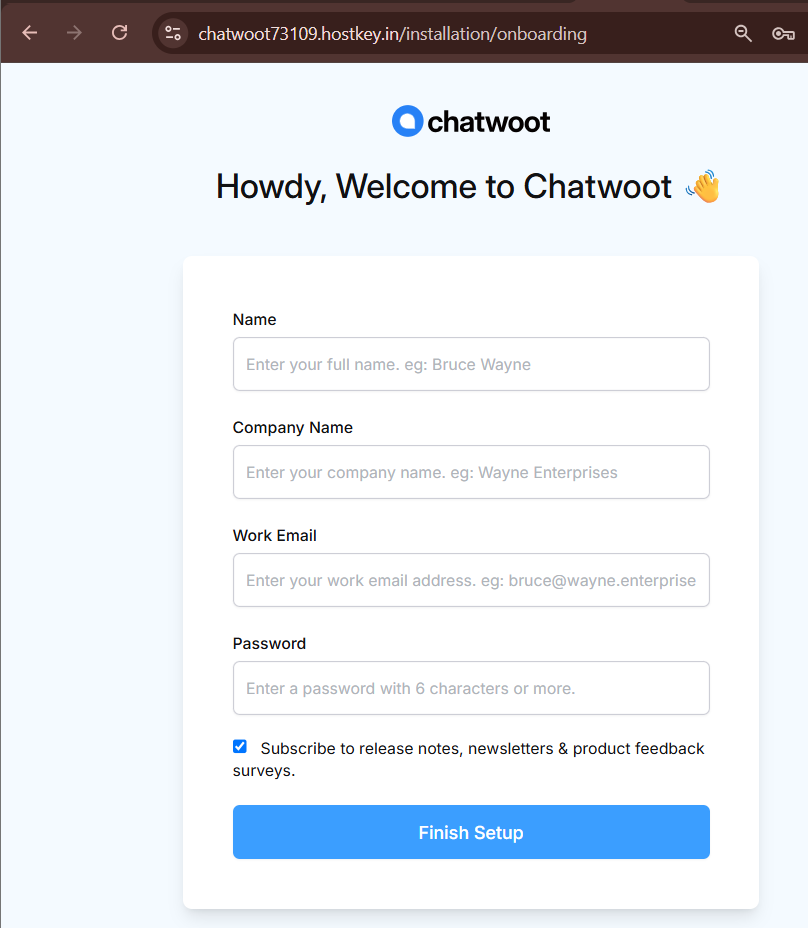
Fill in the administrator registration fields:
- Name - your full name;
- Company Name - your company name;
- Work Email - your work email address (this will also be used as your login);
- Password - password (at least 6 characters).
If necessary, uncheck the Subscribe to release notes, newsletters & product feedback surveys checkbox if you do not wish to receive newsletters from the developer, and click
Finish Setup. -
After completing registration, the login page will open. Enter the Email and Password specified during registration and click
Login.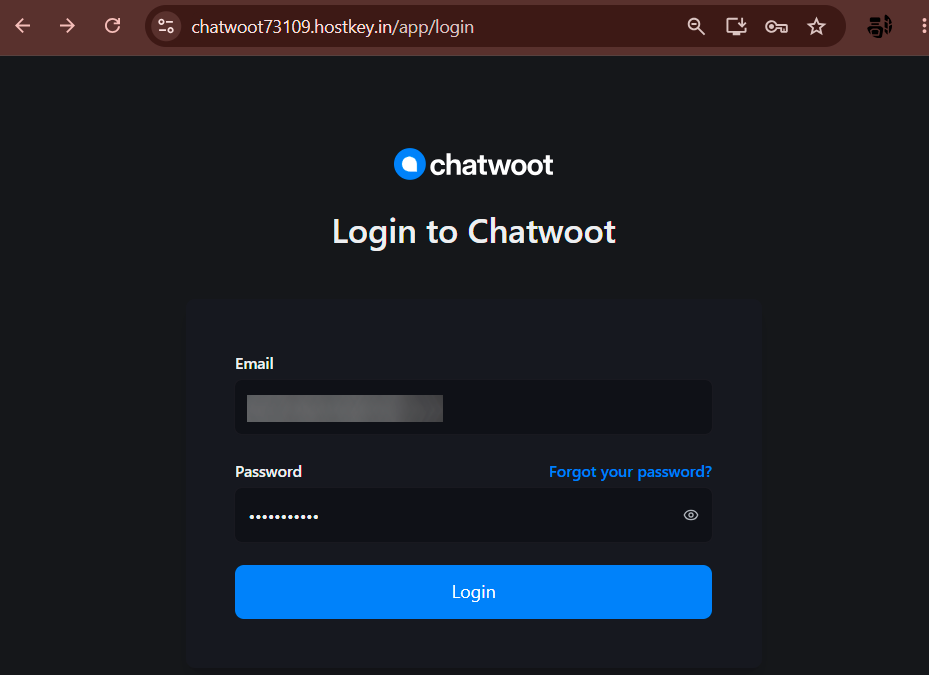
Note
If you have forgotten your password, use the Forgot your password? link next to the password field.
-
Upon first login, the system will offer a brief onboarding - verify your account and company details (Your details, Company details): name, email, time zone, and interface language. If desired, fill in additional fields (Industry, Company Size, Where did you find us?) and click
Continue.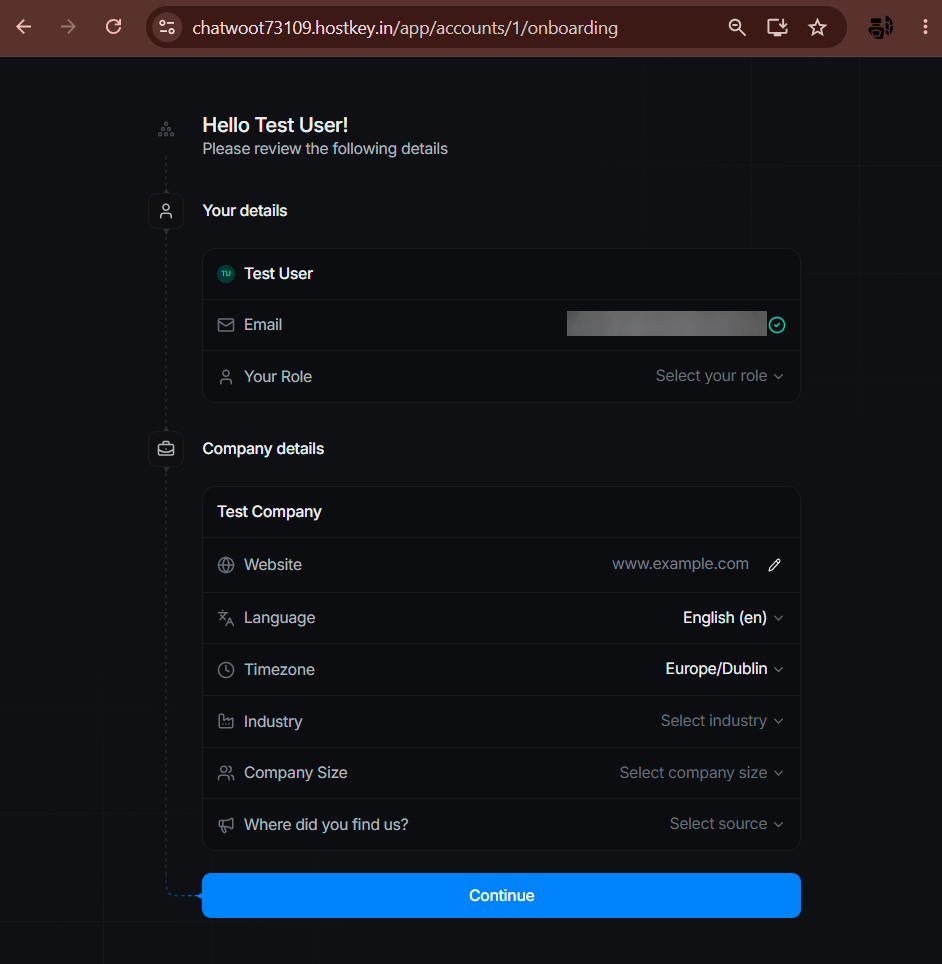
Note
The Your Role and Industry fields can be left blank—they are not required to continue.
-
After completing onboarding, the main Chatwoot workspace will open with a welcome message and tips for getting started.
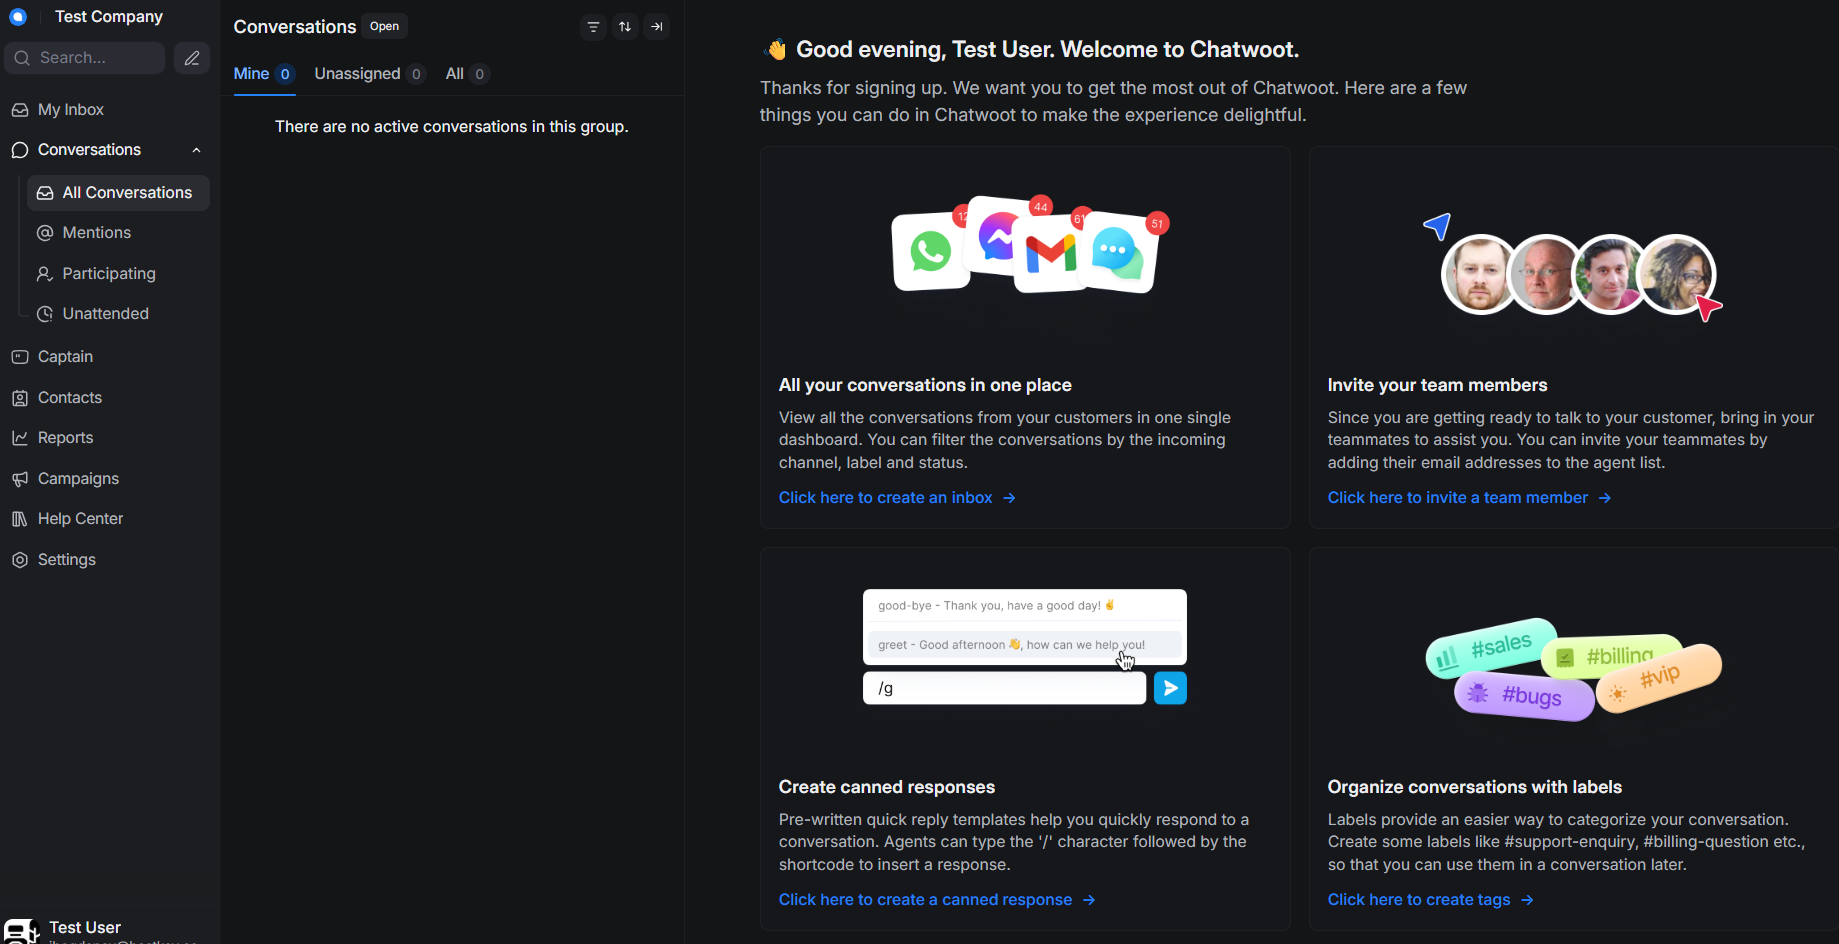
The following main sections are available in the left menu:
- My Inbox - dialogues assigned specifically to you;
- Conversations - all inquiries with filters Mine / Unassigned / All;
- Captain - AI assistant for automating responses;
- Contacts - customer contact database;
- Reports - reports and analytics;
- Campaigns - newsletters and proactive messages;
- Help Center - knowledge base / support center;
- Settings - account, inboxes, agents, and integrations settings.
From the home screen, you can proceed directly to basic setup using these links:
Click here to create an inbox- connect a channel (email, website chat, social media, messengers);Click here to invite a team member- invite agents via email;Click here to create a canned response- create quick reply templates (triggered by the/command);Click here to create tags- create labels for categorizing dialogues.
Note
Detailed information regarding Chatwoot core settings can be found in the developer documentation.
Ordering Chatwoot via API
To install this software using the API, follow these instructions.