Authorization and Invapi Start Screen
In this article
Information
To make using our services more convenient, we have developed an API as well as the Invapi Control Panel graphical interface. HOSTKEY customers can manage their leased equipment via command line and a personal account.
Authorization
To authorize a user in the personal account, go to https://invapi.hostkey.com and enter your HOSTKEY account login and password.

Note
If you have forgotten your password, please use the password recovery instructions.
Two-Factor Authentication
If two-factor authentication is enabled in the user account settings (2FA), a window will appear prompting you to enter an authentication code, which will be sent via SMS to the mobile phone number provided during registration.
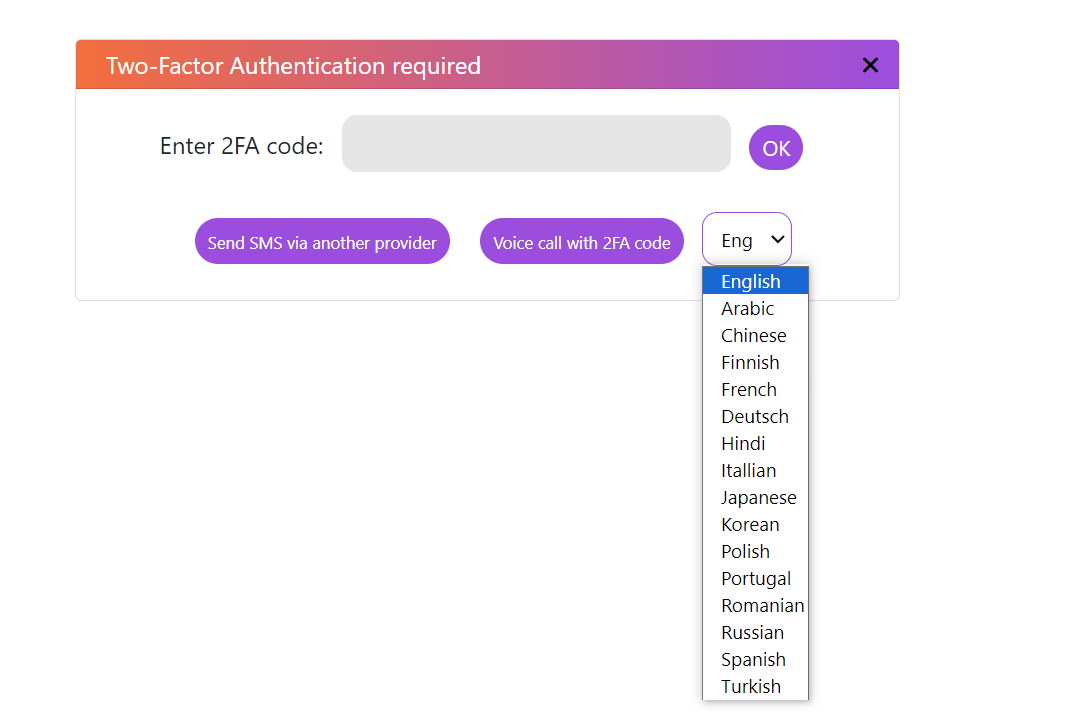
If the code does not arrive within 5 minutes, the user can:
- request a resend through another provider by clicking the
Send SMS via another providerbutton; - click the
Voice call with 2FA codebutton (after selecting the dictation language from the dropdown menu to its right) to request an incoming voice call. Upon answering the call, the user will hear a repeating dictation of the authentication code.
Attention
If you do not select a call language, it will default to English!
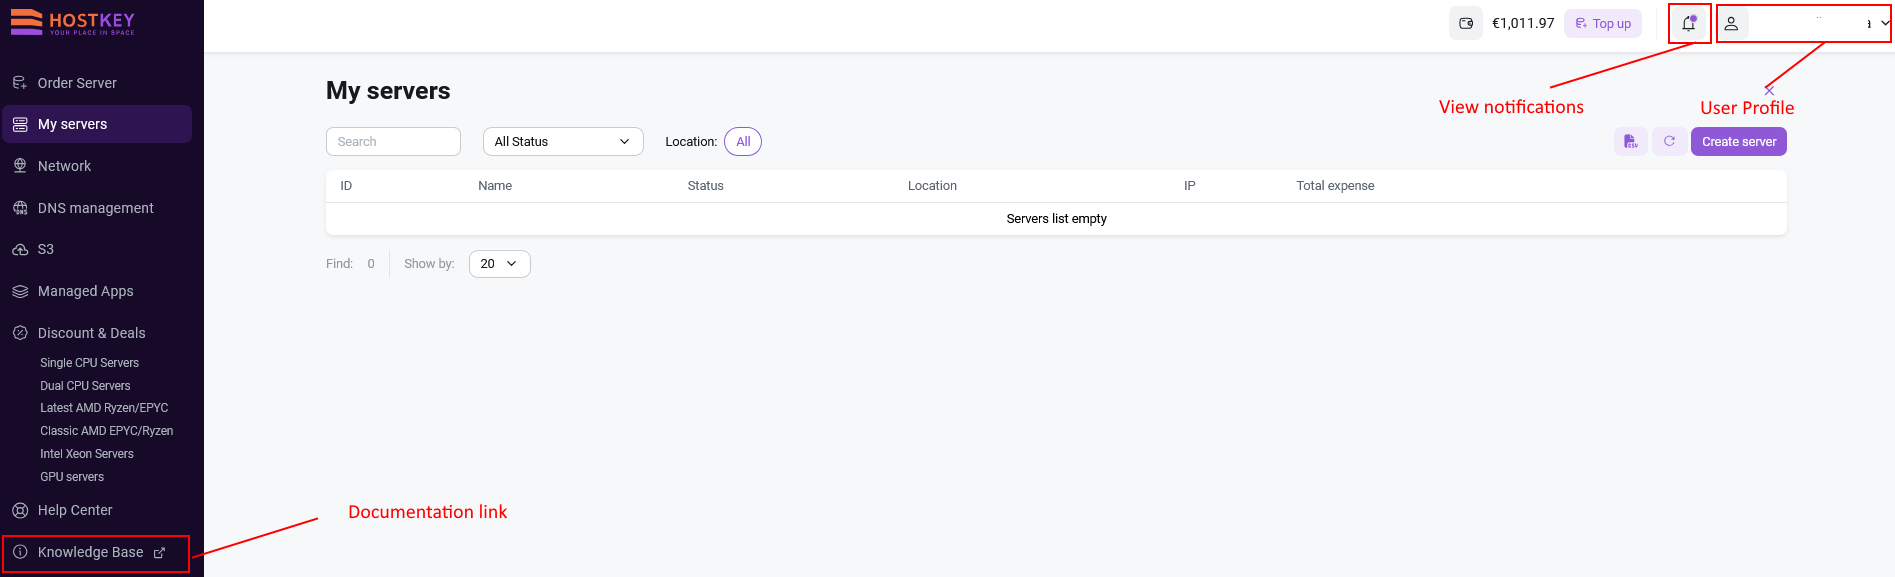
After successful authorization, the user enters the personal account, where the following are available:
- Equipment and service management;
- Server ordering;
- Account top-up;
- Activity log viewing.
Note
Some server operations may take longer than the standard execution time for a script. To manage this, we have created asynchronous operations—the user sends a request for an action and can proceed with other operations in the personal account; once the initiated action is complete, the system will send a notification.
Information
New Server
This menu item is intended for online server ordering. By choosing ready-made solutions, users can quickly obtain the exact equipment they need. To select equipment, you can use the Region and Type filters:

Information
My Servers
The panel displays a list of servers with the ability to filter by location (EU - Europe, NL - Netherlands, US - USA, FI - Finland, DE - Germany, IS - Iceland, TR - Turkey, UK - United Kingdom, ES - Spain, IT - Italy, PL - Poland, CH - Switzerland) and status—users can select overdue servers with the Pending Payment status, as well as use the button to export a list of all servers. The search window allows you to find a server by entering its ID, assigned tag, or IP address. Clicking the New Server button will redirect you to the new server ordering section.
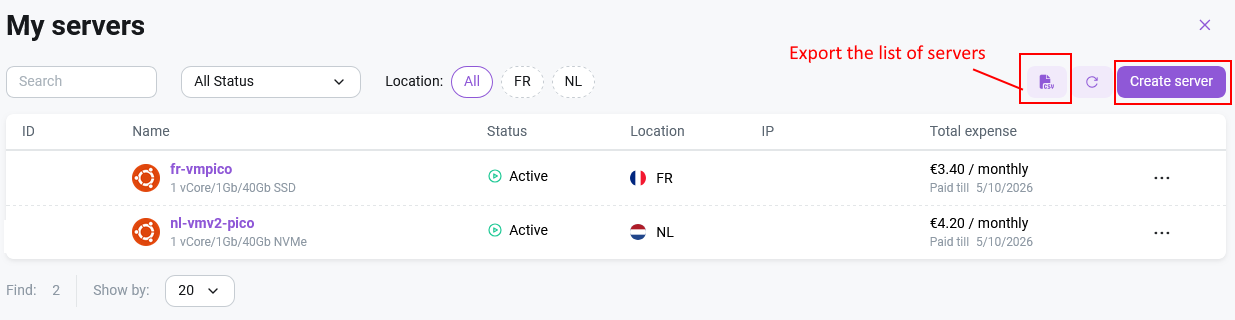
Clicking the ... icon activates the quick server power management mode.

The specific server control panel is activated by clicking on a server card from the list.
Information
Network
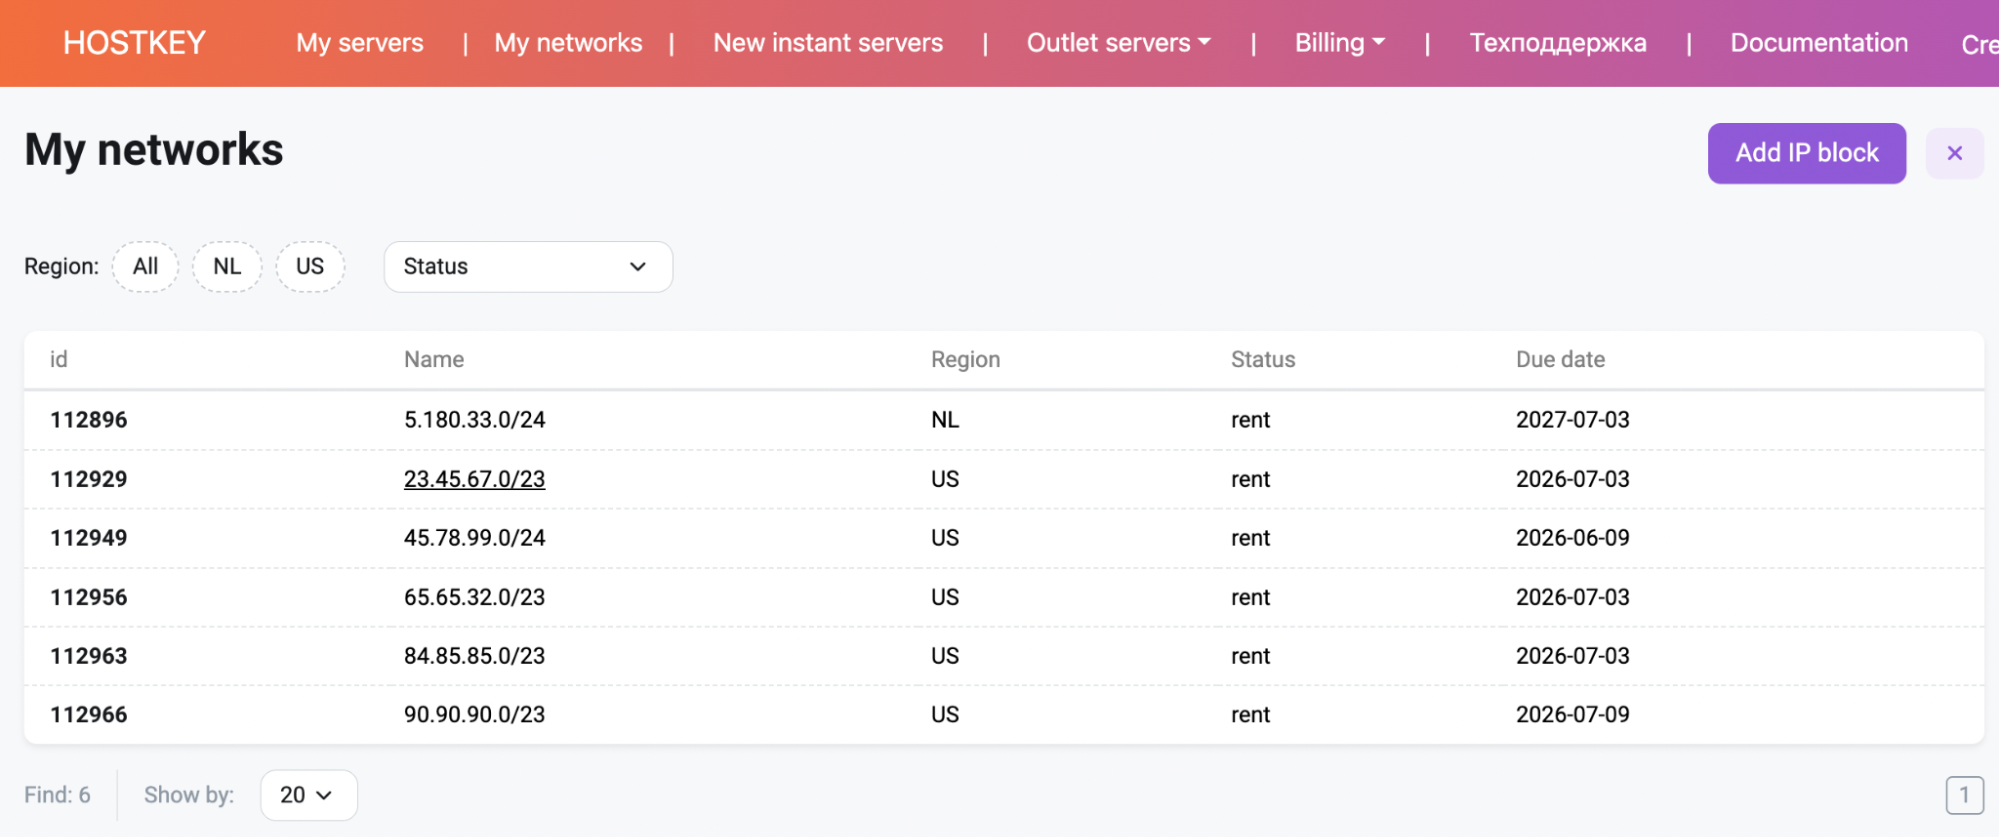
The following actions are available in the Network interface:
- subnet filter by region;
- status filter;
- option to change the number of subnets displayed on the page (via the Show by dropdown list);
- navigation to other pages in the list (if they exist) using the page switcher in the bottom-right corner;
- adding a new block by clicking the
Announce my IP-subnetbutton.
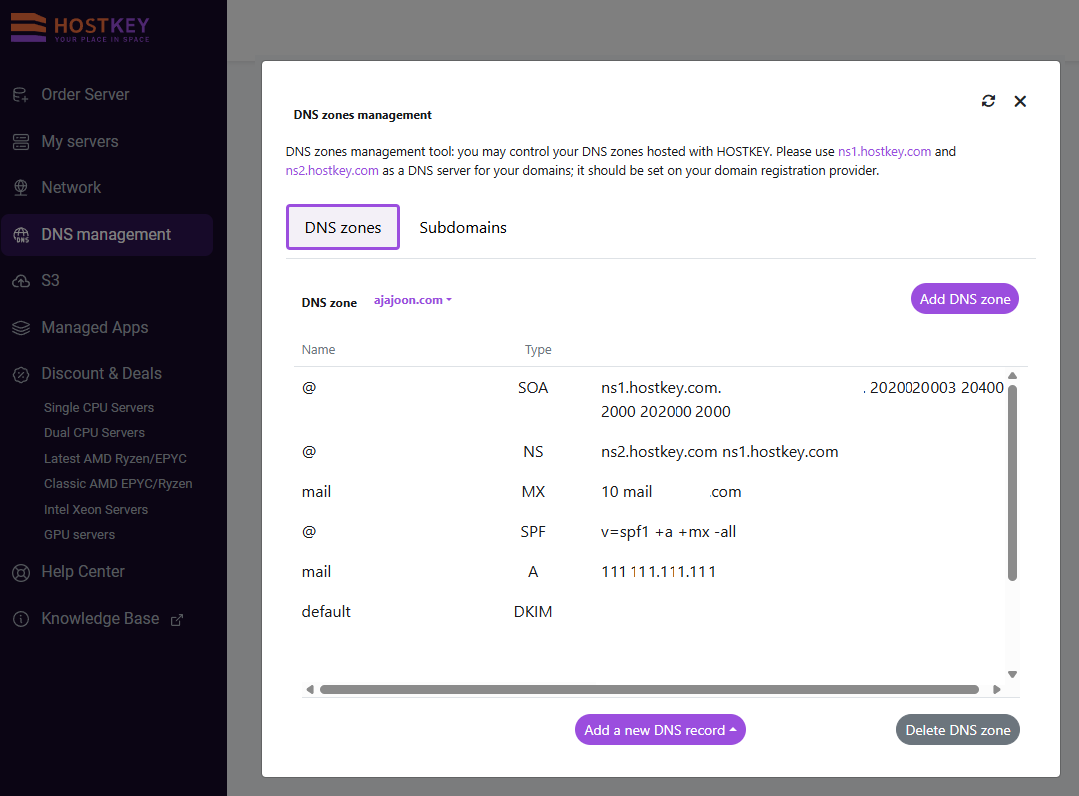
DNS Hosting
This menu is used to manage DNS in Invapi
Information
S3 Storage
This menu item is intended for managing S3 object storage. In this section, users can create independent S3 storages, manage existing ones, create and delete buckets, and track current resource consumption.
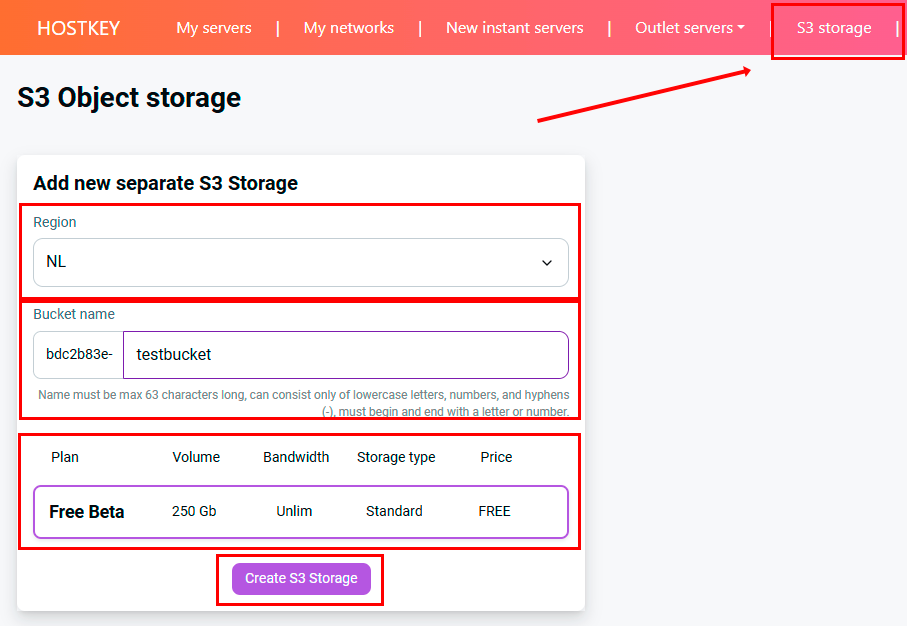
The top of the page displays a list of already created independent storages, indicating:
- plan;
- storage limit;
- deployment region;
- unique storage identifier.
After creating a storage, users can add new buckets. To do this, simply specify a bucket name and click the Create new bucket button.
Charts are presented on the right side of the page:
- used storage capacity;
- consumed traffic.
These charts allow you to track resource usage dynamics over a selected period.
The Credentials tab contains the information required to connect to S3-compatible clients and services (access keys, endpoints, etc.).
Information
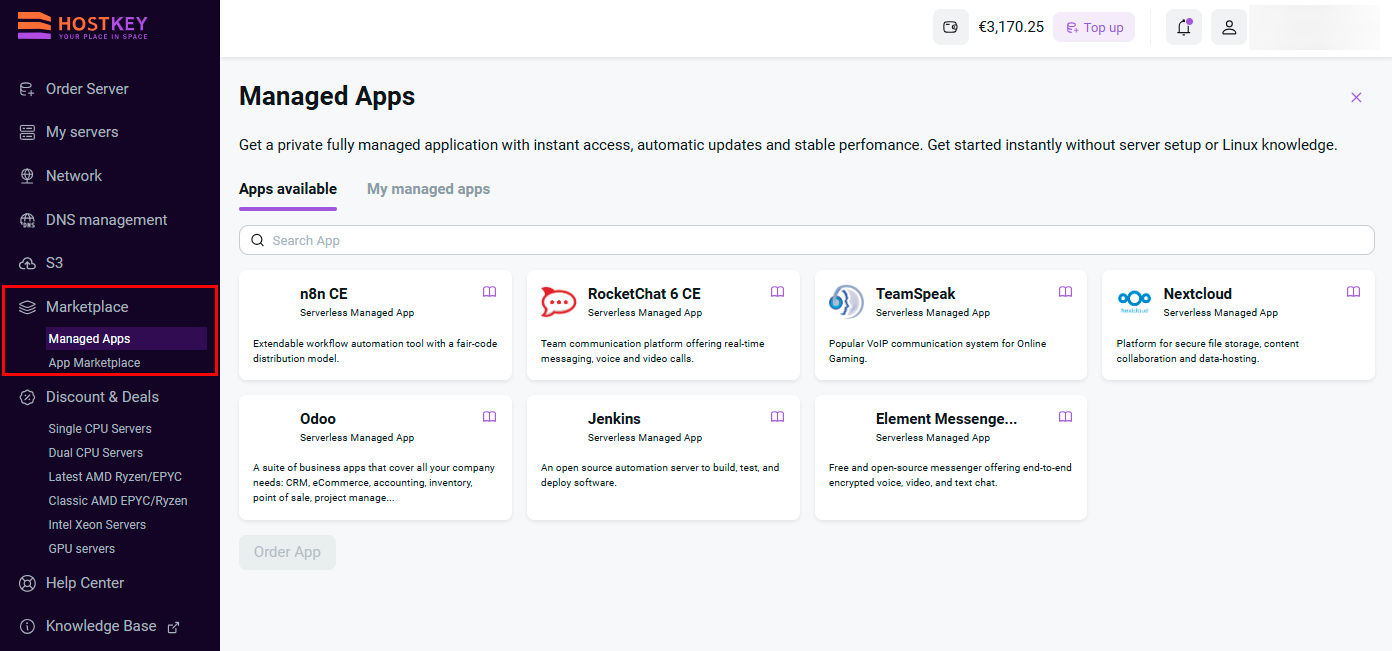
Marketplace
HOSTKEY provides its customers with a wide selection of applications to solve a broad range of tasks. You can purchase the required server and install an application on it at the time of purchase, or you can use only the application at a fixed rate without purchasing a server.
Log in to your Invapi client area, choose the most convenient method, and enjoy applications with guaranteed uptime, 24/7 support, and version tracking.
Information
Discount & Deals
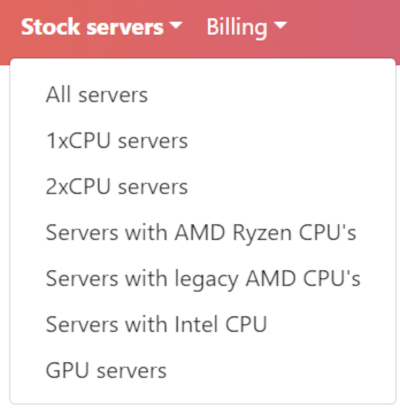
This menu item is intended for online ordering of physical stock servers with standard configurations. All standard servers are deployed within the next business day unless otherwise specified. The entire process is fully automated. Available stock servers are divided into several categories:
- All servers;
- Single-processor servers;
- Dual-processor servers;
- Servers with new EPIC/Ryzen;
- Servers with older generation EPIC/Ryzen;
- Servers with Intel Xeon;
- GPU servers.
GPU servers are excluded from the CPU server groups.
Information
Help Center
This section is intended for user interaction with technical support. Here, you can create new tickets, view ticket history, and track their current status.

Information
Balance and Top Up
At the top of the screen, you can view your account balance status.

To quickly top up your balance, click the Top Up button:
After which, a payment window will open:
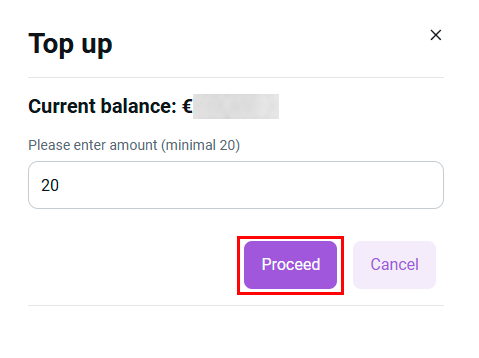
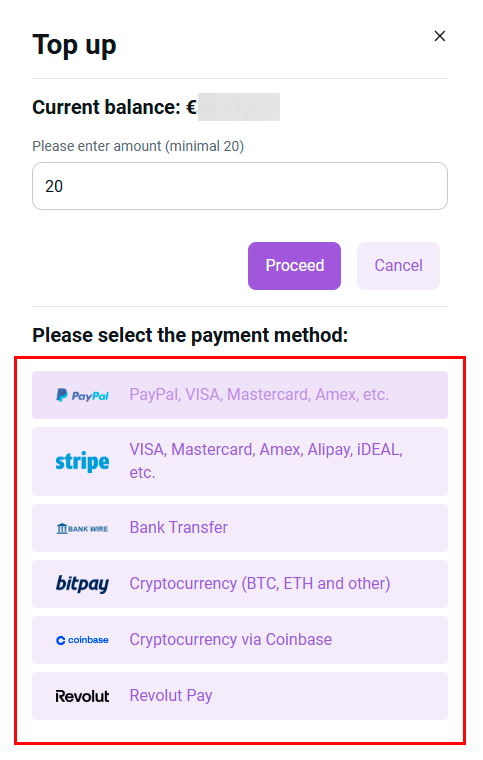
In this menu, the user must specify the amount and payment method:
- Set up automatic payments for services using a credit card.
- One-time payment via credit card, SEPA, IOMoney, SberPay, T-Pay (Tinkoff Pay).
- Pay via bank transfer to a settlement account.
Information
View Activity Log
To view the activity log, click on (Bell) in the upper right corner of the screen. In this log, a user can track all actions performed during their session. Every action taken in the personal account (for example, changing a PIN or server management operations) is accompanied by pop-up notifications. These specify the operation being performed and its result (in a separate notification). Notifications appear in the upper right corner of the personal account screen.
Notifications can be hidden or shown by clicking on the bell icon.
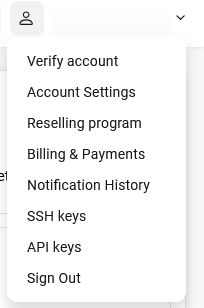
User Profile Settings
In this section, you can manage various settings and security parameters for your account. It contains the following sub-sections:
- Account Settings;
- Affiliate Program;
- Balance and Payments;
- Notification History;
- SSH Keys;
- API Access Keys;
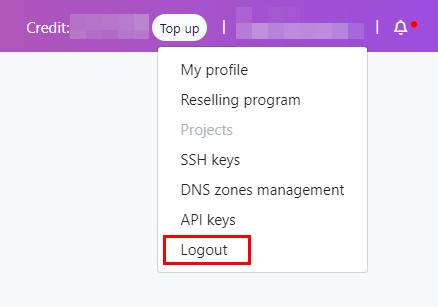
- Logout.
Information
Logout
After finishing work in the system, you must end your session to delete the authentication token and secure user data. To log out of the personal account, click the dropdown menu next to your username and select Logout.