Setting and changing the PIN
In this article
Information
The PIN is an important part of account management: after the first authorization in the personal account, the user can set a PIN code – a short password designed to keep the security of the user's servers in case of data leak or account hacking. The system requires a PIN code for all crucial operations with the server. If a PIN code is not required, check the Don't use PIN for an extra security checkbox in the PIN code management menu.
PIN hashes are stored separately from our billing and technical databases. Our employees do not know your PIN codes. The system asks for the PIN code once at the beginning of the session and then uses it during all sessions. The PIN is not recorded to the cookie or session key.
Attention
If the user forgot the PIN code or entered it incorrectly 3 times, then need to contact our support service to reset the PIN code via support or send a request to [email protected].
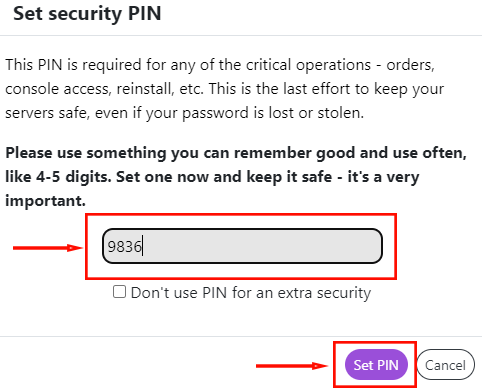
Setting a new PIN
The system will automatically prompt you to enter your PIN code when you perform critical account management actions. If you do not have a PIN, you will be prompted to create one. In the window that opens, fill in the New PIN field and click Set PIN:
Example set/change PIN cURL:
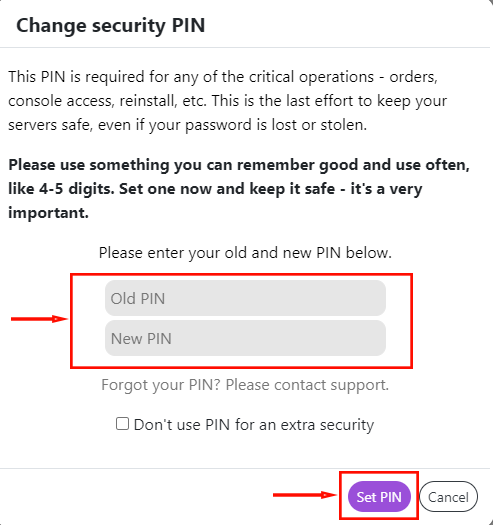
Changing your current PIN
Select Change PIN from the PIN code entry menu. Then enter the current (if set) and new PIN codes and press Set PIN:
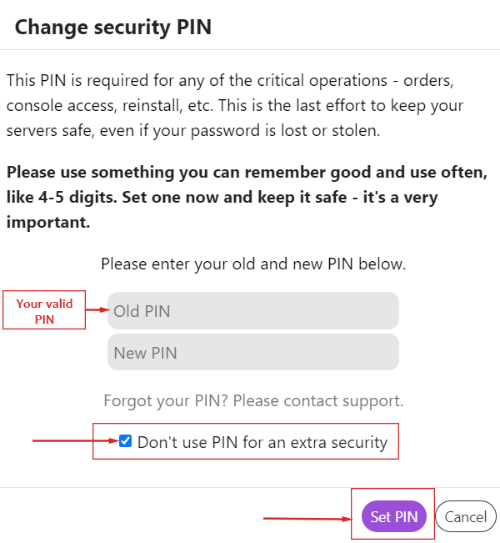
If the PIN code is not required, then it is necessary to check the box Don't use PIN for an extra security and enter the previously set PIN code (if it was set):
Example validate pin cURL:
Information